This article was co-authored by wikiHow Staff. Our trained team of editors and researchers validate articles for accuracy and comprehensiveness. wikiHow's Content Management Team carefully monitors the work from our editorial staff to ensure that each article is backed by trusted research and meets our high quality standards.
This article has been viewed 146,438 times.
Learn more...
Flickr is an online image and video hosting service and community. By default, all images on Flickr are public. When an image is public, anyone may view and download it. If this makes you uncomfortable, you may alter your default privacy settings—this change will only apply to future content. To make existing content private, batch-edit or individually edit your content's privacy settings. In addition to protecting your privacy, you can grant your friends and/or family members exclusive access to your images through Flickr's privacy settings.
Steps
Flickr Mobile App - Altering Your Default Privacy Settings
-
1Tap the Settings icon in the upper right corner. On Android click the three dots in a vertical line. On iPhone, click the gear.
-
2Select “Privacy and safety”.Advertisement
-
3Tap “Default post privacy”.
-
4Choose who may view your content. When you change your default privacy setting, it will only affect new content. It will not change the privacy settings for existing content. You may choose one of the following options:
- Public: Anyone can access your content.
- Friends & Family: The contacts you've designated as friends and family may access your content.
- Friends: Only the contacts you've identified as friends may view your content.
- Family: Only the contacts you've identified as family may view your content.
- Private: Only you may view your content.[1]


Flickr Mobile App - Batch-Editing Photos in Camera Roll
-
1Click “Camera Roll”.
-
2Tap and hold down on an image. This will allow you to select multiple images.
-
3Select the images you want to make private.
-
4Tap on the lock icon. This will open the privacy settings.
-
5Select who may view your content. You may choose one of the following options:
- Public: Anyone can access your content.
- Friends & Family: The contacts you've designated as friends and family may access your content.
- Friends: Only the contacts you've identified as friends may view your content.
- Family: Only the contacts you've identified as family may view your content.
- Private: Only you may view your content.[2]


Flickr Mobile App - Editing One Image in Camera Roll
-
1Select “Camera Roll”.
- If you've organized your images into albums, you can press “Albums” instead of “Camera Roll”. After you select the album you wish to edit, press the icon (three dots in a horizontal line) in the very top, right corner of the screen. Tap “Edit” from the drop-down menu and then proceed with the remaining steps.
-
2Tap the image you want to make private.
-
3Tap the info icon. This icon is a lowercase “i” surrounded by a circle.
- If you are in “Albums”, press the lock icon located at the very bottom, left corner of the screen.
-
4Locate the “Privacy” section and click the pencil icon.
- If you are in “Albums”, skip this step.
-
5Decide who may view your content. You may choose one of the following options:
- Public: Anyone can access your content.
- Friends & Family: The contacts you've designated as friends and family may access your content.
- Friends: Only the contacts you've identified as friends may view your content.
- Family: Only the contacts you've identified as family may view your content.
- Private: Only you may view your content.[3]


Flickr Desktop - Altering Your Default Privacy Settings
-
1Click on your profile picture in the upper right corner.
-
2Select “Settings”.
-
3Select “Privacy & Permissions”.
-
4Scroll down to the “Defaults for new uploads” section.
-
5Edit “Who will be able to see, comment on, add notes, or add people”.
-
6Change the default setting from “Anyone (public)” to “Only you (private)”.
-
7Allow your friends and/or family to see your images. When you select “Only you (private),” Flickr presents you with the option to allow the contacts designated as “Your friends” and/or “Your family” to also view these private images. Checking the box next to one or both options will allow contacts you've designated as friends and/or family members to access your private photos.
-
8Click “Save Settings”. Your new privacy settings will only apply to content you upload in the future. It will not alter the privacy settings for existing content.[4]


Flickr Desktop - Editing Images in Camera Roll
-
1Click “You”, followed by “Camera Roll”.
-
2Select one or multiple images. You can select images individually or click “Select all”.
-
3Click on the privacy "lock" icon.
-
4Choose who may view your content. You may choose one of the following options:
- Public: Anyone can access your content.
- Friends & Family: The contacts you've designated as friends and family may access your content.
- Friends: Only the contacts you've identified as friends may view your content.
- Family: Only the contacts you've identified as family may view your content.
- Private: Only you may view your content.[5]


Flickr Desktop - Editing One Image in Photostream
-
1Click “You” then press “Photostream”.
-
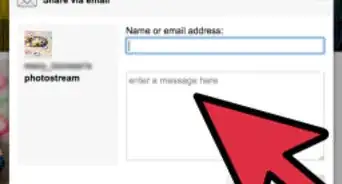
2Choose an image to edit.
-
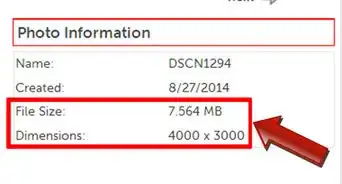
3Scroll down to the “Additional Information” section.
-
4Change the Viewing privacy settings. You may choose one of the following options:
- Public: Anyone can access your content.
- Friends & Family: The contacts you've designated as friends and family may access your content.
- Friends: Only the contacts you've identified as friends may view your content.
- Family: Only the contacts you've identified as family may view your content.
- Private: Only you may view your content.[6]


Flickr Desktop - Batch-editing Photos in an Album
-
1Select “You”.
-
2Click “Albums”.
-
3Click on the album you want to edit.
-
4Select “Edit in Organizer”. This is located above the album's banner.
-
5Select “Batch Edit” the “Change Permissions”.
-
6Choose “Only you (private)”.
-
7Allow your friends and/or family to see your images. Once you've selected “Only you (private),” Flickr presents you with the option to allow the contacts designated as “Your friends” and/or “Your family” to also view these private images. Checking the box next to one or both options will allow contacts you've designated as friends and/or family members to access your private photos.[7]
-
8Click “Change Permissions”. Clicking “Change Permissions” saves the changes you made to the album's privacy settings. Only those you granted permission to (“Only You (Private)”, “Your friends”, and/or “Your family”) will be able to view the images in this album.


Warnings
- When you make a public image private, any favorites associated with that image will be removed.⧼thumbs_response⧽


References
About This Article