This article was co-authored by wikiHow Staff. Our trained team of editors and researchers validate articles for accuracy and comprehensiveness. wikiHow's Content Management Team carefully monitors the work from our editorial staff to ensure that each article is backed by trusted research and meets our high quality standards.
This article has been viewed 152,655 times.
Learn more...
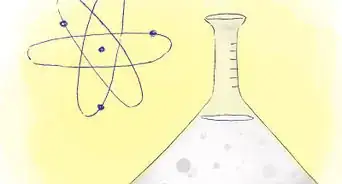
Sodium hydroxide, lye, and caustic soda all refer to the same compound, NaOH, which is comprised of 3 single atoms: sodium, oxygen, and hydrogen. NaOH is often used to teach about pH in high schools and it can neutralize HCl. Using some simple supplies, you can make homemade NaOH for use in the lab, or just to impress your colleagues and students. Although NaOH can be made with or without electricity, this article shows how to make a small amount of it with electricity.
Steps
Creating an NaOH Solution
-
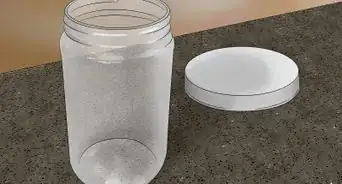
1Place all your materials on a clean, flat surface. This is a potentially dangerous experiment, so be sure to clean and dry your work area before starting. Make sure you only use batteries in this kind of experiment rather than plugging anything into a wall socket. The reaction you are going to demonstrate is called electrolysis. When a current passes through salty water it dissociates and creates bonds with both the water (H2O) and the salt (NaCl).
- 4V9Ah lead acid batteries are rechargeable, but never charge them while conducting this experiment.
-
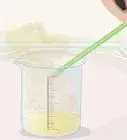
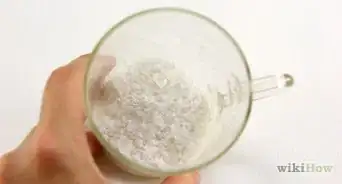
2Dissolve 1 tablespoon (17 grams) of salt in 1.24 cups (290 mL) of water. Add the water to a glass and gently pour the salt into the water. Stir it in well with a spoon until the salt is completely dissolved.[1]
- If your cup has a lid, attach it after adding the salt and shake it up and down to mix the salt it in. Make sure all the salt is completely dissolved for best results.
Advertisement -
3Expose the top and bottom 0.59 inches (1.5 cm) of lead in 2 graphite pencils. Take 2 black graphite pencils and carefully remove the top 0.59 inches (1.5 cm) of wood using a knife. Hold each pencil firmly from the bottom and cut away from you to avoid harming yourself. This will expose the led at their tips, which will be placed in the salt-water solution. Afterward, remove the bottom 0.59 inches (1.5 cm) of wood on the eraser ends—these will connect to the battery terminals via copper wire.
- Never cut the pencils in the direction of a body part or another person.
-
4Insert the exposed pencil lead through a piece of cardboard or stiff paper. Poke 2 holes through a piece of cardboard or stiff paper with a toothpick—this will make it easier to insert your pencils. Afterward, press each piece of lead through the cardboard or paper.[2]
- Be sure the pencils' body is covered with wood—there should be wood underneath the exposed lead after pushing the ends through the cardboard or paper.
-
5Place the cardboard over the glass with 0.6 in (1.5 cm) the lead in the water. Balance the cardboard over the opening in the cup and ensure that the exposed lead tips are submerged. The paper should cover as little of the glass as possible to allow ventilation.[3]
- Use scissors to snip off a piece of the paper or cardboard if it covers all of the glass.
-
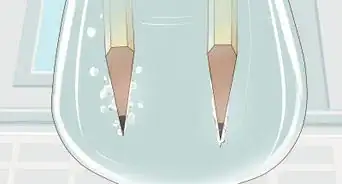
6Attach the free end of each pencil lead to the battery terminals. Wrap wire around the remaining exposed lead of each pencil. Connect one to the positive terminal and the other to the negative terminal. Be sure that each wire is tightly bound. Each pencil should now have one end of exposed lead inserted through cardboard or paper and the other attached to the battery via copper wire.[4]
- Be sure not to cross uncovered sections of the lead.
- Make sure you are in a well-ventilated area or set up a fan because the hydrogen and the oxygen can burn and explode with any little spark and chlorine can be toxic.[5]
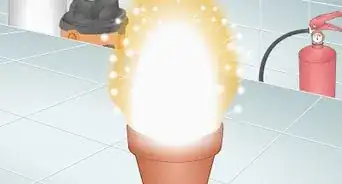
- If you accidentally start an electrical fire, smother it with a dry blanket or fire extinguisher. Never pour water on it because water conducts electricity which can shock you.
-
7Wait until no more bubbles form at the nodes. You'll see that in the 2 wires there will be bubbles. In the positive one, there'll be oxygen (O2) and chlorine (Cl) while there'll be Hydrogen (H) in the negative one. As the bubbles grow and leave, more and more NaOH is formed.[6]
- Never touch the wires while the battery is on.
-
8Remove the wires from the battery nodes and disassemble the apparatus. After disconnecting the copper wires from the battery, remove the piece of cardboard or paper from the cup and pull out the pencils. Place everything onto a dry towel and clean up any water.
- Be careful not to touch the tips of the pencils that were submerged in the NaOH—they can severely burn your skin.


Extracting NaOH
-
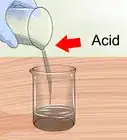
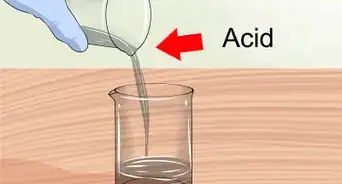
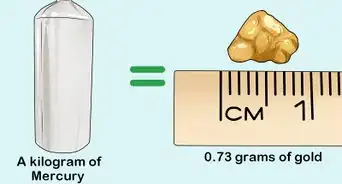
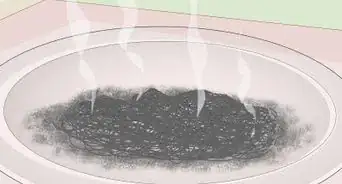
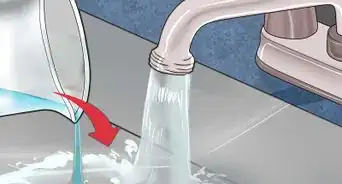
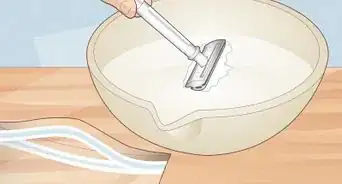
1Boil the solution you made in a stainless steel, platinum, or titanium evaporating dish. Always conduct this step in a professional laboratory at a college, university, or workplace. If you don't have access to one, skip this step—do not attempt it. Gently pour the solution into the dish and place it on a boiler. Water boils at 212 °F (100 °C), while NaOH boils at 2,530 °F (1,390 °C), so boiling will separate the water from the NaOH. Be sure to boil it underneath a fume hood.[7]
- Don't use aluminum to boil your solution or the dish will melt.
- Never boil your solution in a kitchen, outdoors, or in a non-chemically designed ventilation area.
- Use chemical gloves (not regular kitchen gloves) while handling the solution. NaOH is extremely basic and can cause severe chemical burns if it contacts your skin.
-
2Pour your NaOH solution into an appropriate container. Purchase a new chemical container rated for NaOH (rating systems vary per country) along with a chemically-approved funnel. Slowly pour the cold NaOH into the container underneath the fume hood. Be sure to wear chemical gloves and discard any extra to a lab-provided waste container.[8]
- Always use caution and remember that you can severely burn yourself. This is extremely dangerous since you now have a solution that is upwards of 65% NaOH.
-
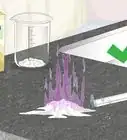
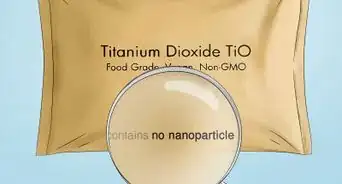
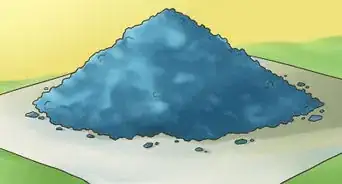
3Transport and store your NaOH with care. This is the riskiest step as it puts others in danger as you transport the NaOH. Use a trolley for more stability. Walk slowly, especially when moving around corners. Once you reach the designated storage site, place the NaOH container into a larger, waterproof, and chemically rated container. Make sure that it is visibly marked with at least:[9]
- "HIGHLY BASIC"
- "HIGHLY CORROSIVE"
- '"NaOH"
- "LYE"
- "CAUSTIC"


Expert Q&A
Did you know you can get expert answers for this article?
Unlock expert answers by supporting wikiHow
-
QuestionWould ocean water work for this?
 Meredith Juncker, PhDMeredith Juncker is a PhD candidate in Biochemistry and Molecular Biology at Louisiana State University Health Sciences Center. Her studies are focused on proteins and neurodegenerative diseases.
Scientific ResearcherTheoretically, any salt water should work in this situation. However, it is recommended that you use table salt dissolved in distilled water to make the solution as pure as possible.
Support wikiHow by unlocking this expert answer.
-
QuestionCan I use an aluminium can for electrolysis?Meredith Juncker, PhDMeredith Juncker is a PhD candidate in Biochemistry and Molecular Biology at Louisiana State University Health Sciences Center. Her studies are focused on proteins and neurodegenerative diseases.
Scientific ResearcherAlthough aluminum is not as good of an electrical conductor as other elements, it is recommended that you use a glass container for the electrolysis step.Support wikiHow by unlocking this expert answer.
-
QuestionWhat happens to the chlorine?
 Raz'ziCommunity AnswerThe chlorine appears as tiny bubbles of gas on a node until a proper apparatus is used.
Things You'll Need
- 4V9Ah lead acid battery
- Glass cup with 1.24 cups (290 mL) of water
- 1 tbsp (17 g) of salt
- 2 black graphite pencils
- Piece of cardboard or stiff paper
- Toothpicks
- 20 inches (0.51 m) of rubber coated copper wire
- Tape
- Stainless steel, platinum, or titanium evaporating dish
- NaOH-rated chemical container
- Dry towel
- Gloves
- Type C fire extinguisher.
Warnings
- This can be a very dangerous experiment. Always follow safety precautions and if you're unsure of anything, take a break.⧼thumbs_response⧽
- If you do not have advanced laboratory equipment and facilities, stop after the reaction, as you do not have the equipment to extract the NaOH.⧼thumbs_response⧽
- If you spill any concentration of NaOH on yourself, seek medical attention immediately. As a preventative measure only, treat the burn yourself to minimize damage.⧼thumbs_response⧽

References
- ↑ https://youtu.be/S4VEZk9ccWg?t=13s
- ↑ https://youtu.be/S4VEZk9ccWg?t=29s
- ↑ https://youtu.be/S4VEZk9ccWg?t=29s
- ↑ https://youtu.be/S4VEZk9ccWg?t=35s
- ↑ https://youtu.be/RjlfG1n2N2U?t=2s
- ↑ https://youtu.be/S4VEZk9ccWg?t=35s
- ↑ http://www.chem.ucla.edu/~bacher/Specialtopics/extraction.html
- ↑ https://nj.gov/health/eoh/rtkweb/documents/fs/1706.pdf
- ↑ https://nj.gov/health/eoh/rtkweb/documents/fs/1706.pdf
About This Article