X
wikiHow is a “wiki,” similar to Wikipedia, which means that many of our articles are co-written by multiple authors. To create this article, 11 people, some anonymous, worked to edit and improve it over time.
This article has been viewed 20,554 times.
Learn more...
Celebrate your affinity for wine by creating these ultra absorbent wine cork coasters. These two projects are easy and allow you to display your love of wine and creativity. Making coasters is also a great way to recycle old wine corks.
Steps
Method 1
Method 1 of 2:
Building a Criss-Crossed Coaster
-
1Use a sharp knife to slice a wine cork in half.[1] Stand the cork up on one of its sides so that it is taller than it is wide, and use a sharp knife to slice it into two equal halves. Each halve should now have a flat and a rounded side.
-
2Slice three more corks in half. Just as you did in step one, continue to slice three more corks in half so that each has a rounded and flat side.[2] You should have a total of eight cork pieces.Advertisement
-
3Lay the cork out on a piece of felt or cork board.[3] Line up a piece of cork so that it sits perfectly flush with the corner of the felt.
-
4Lay down another piece of cork. Place the piece of cork directly in contact with the previous piece, lining up the edge of the cork with the edge of the felt or cork board. The two pieces should be directly in contact, parallel, and aligned with the edge of the felt.
- The pieces of cork should now be arranged in a square.
-
5Place two more pieces of cork down on the felt. These two pieces of cork should lay perpendicular to the pieces that you already arranged on the felt or cork board.[4]
- Be sure that the edge of the cork piece is lined up to the edge of the felt or cork board, inline with the previous pieces.
-
6Continue the criss cross pattern. Place two additional pieces of cork on the felt, just above the the very first "cork square" that you made. Be sure to line up the edge of the cork with the felt or cork board, and that you lay them perpendicularly to the original cork square.
-
7Place the final two pieces of cork down onto the felt or cork board. Just as you did with the previous three cork squares, lay these final pieces of cork down so that they are perpendicular to the adjacent cork squares.
- Once you are happy with the arrangement, you can go ahead and begin adhering the corks together to form a coaster.
- Try experimenting with different sizes, shapes and patterns.
-
8Apply hot glue to the bottom of a piece of cork. Being careful not to disturb the other pieces, lift one of the pieces of cork from the felt or cork board and apply glue to its flat bottom.[5]
- Begin with one of the pieces of cork that is along the edge of the felt or cork board. This will help you maintain a straight edge.
-
9Glue the cork into place. Now that you have applied hot glue to the bottom of the cork, all you need to do is place it back down on the felt in its original position.
-
10Continue this process for each of the remaining seven pieces of cork.[6] Allow 10-15 minutes for the hot glue to dry after you have adhered the final piece of cork to the felt or cork board.
-
11Trim the felt or cork board. Once the hot glue has dried you can trim the excess. Using a pair of sharp scissors, cut along the edge of the corks and remove any excess felt or cork board.


Advertisement
Method 2
Method 2 of 2:
Building a Fractal-Shaped Coaster
-
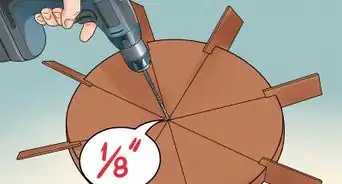
1Cut a wine cork into five equal slices. Using a sharp knife, divide your cork into five equally sized slices. Slice the cork horizontally as you would a cucumber or piece of salami. You should have five cork discs.
-
2Continue to slice two more wine corks. Just as you did with the previous cork, use a sharp knife to divide each cork into five equal slices. Once you are done, you should have a total of 15 cork discs.
-
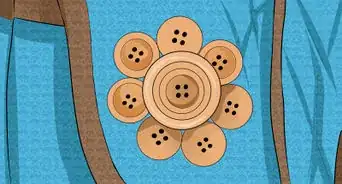
3Arrange five discs into a pentagon. This will create the fractal design of your coaster.
-
4Glue the discs together. Once you are happy with the shape, place a bit of hot glue on the sides of the cork discs to glue them together. Set this pentagon aside and allow it to dry.
-
5Make another pentagon. Use five more cork discs to create another pentagon shape.
-
6Glue the discs together. Apply glue to each piece of cork and reform your pentagon. Try to be sure that your pentagons are matched as close to possible, the way a real fractal would appear in nature.
-
7Assemble your final fractal. Using the last pieces of cork, glue together the final fractal just as you did the previous two. Again, try to get each of the fractals to match in shape as close to possible.
-
8Glue one side of a cork fractal to the side of another. Once all the cork fractals have dried, begin assembling them together to form the final coaster. Place glue on one of the sides of the cork fractal and adhere it directly to the side of another.
-
9Glue the cork fractal into place. This last piece will come into contact with both of the other cork fractals, so you need to be sure to apply glue to two adjacent sides. Once you have applied the glue, slide the final fractal into the other two so that it roughly forms a triangular shape.
-
10Look at each side of the cork coaster to determine which side you would like to be displayed. Both sides may look identical, or not. The side you want to be displayed once the coaster is complete is up to you.
-
11Lay the coaster display side down. After you have decided which side of the coaster you would like to be displayed (or up), go ahead and lay it down on a flat surface display side down.
-
12Apply a bit of hot glue to each of the cork discs. Not just each cork fractal, but each individual disc. You will need to work rather quickly so that the glue does not begin to dry before you are finished applying it to each disc.
-
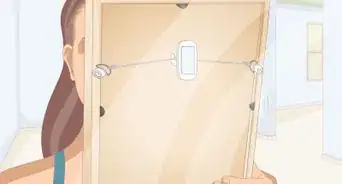
13Lay a piece of felt over the cork coaster. You should do this before the glue dries to make sure that the cork pieces properly adhere. Once you have the felt in position, use your palms to apply a gently amount of pressure to the felt. This will make sure the glue fills any gaps between the felt and the uneven surfaces of cork.
- The felt will help maintain the form of the coaster.[7]
-
14Trim the felt. Once the hot glue has dried you can trim the excess felt. Using a pair of sharp scissors, cut along the edge of the corks to remove any excess felt.


Advertisement
Things You'll Need
- Wine corks
- A sharp knife
- Hot glue gun
- Felt or cork board

References
- ↑ http://www.mom4real.com/make-wine-cork-coasters-tutorial/
- ↑ http://www.mom4real.com/make-wine-cork-coasters-tutorial/
- ↑ http://www.mom4real.com/make-wine-cork-coasters-tutorial/
- ↑ http://www.mom4real.com/make-wine-cork-coasters-tutorial/
- ↑ http://www.mom4real.com/make-wine-cork-coasters-tutorial/
- ↑ http://www.mom4real.com/make-wine-cork-coasters-tutorial/
- ↑ http://crafts.creativebug.com/make-wine-cork-coasters-1188.html
About This Article
Advertisement