wikiHow is a “wiki,” similar to Wikipedia, which means that many of our articles are co-written by multiple authors. To create this article, volunteer authors worked to edit and improve it over time.
This article has been viewed 59,647 times.
Learn more...
Burlap ribbon bows are a great way to add rustic charm to your home décor and gift wrappings. Even though burlap can be a messy material to work with, it holds its form well and can be easily manipulated into several bow shapes. It’s easy to create a DIY burlap bow. With just a few basic supplies, you can make a perfect bow to add to wreaths, stick on gift boxes, top a Christmas tree, or hang on the mantlepiece!
Steps
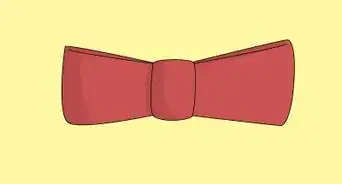
Basic Bow
-
1Cut a length of burlap ribbon. Use scissors to cut 2 to 3 feet (61 to 91 cm) of wired or free-form burlap ribbon.[1]
- This can be done with nearly any width, but 2–4 in (5.1–10.2 cm) wide ribbon will work well for many decorative applications. If you use a much thicker ribbon, you may need to cut a longer piece.
- It's better to start with too much length than too little since you can trim off any excess toward the end of the project.
-
2Crisscross the ends over the center. Lay the burlap ribbon flat an identify the center. Fold the ends so that they crisscross over this center point.
- The top edge of each folded end should intersect at the exact center point of the ribbon, but the rest of the end will angle downward below this point.
- Fold the ribbon so that the folds are about as large as you want the final ribbon loops to be. Make sure that both sides are even.
Advertisement -
3Pinch and tie the center. Pinch the ribbon at the center point of intersection, then tie it in place with a small wire tie or piece of twine.[2]
- Pinch from top to bottom and adjust the inner pleats that form as needed. You should also make any necessary adjustments to the size and shape of the loops before tying off the center.
- Trim the wire tie or ribbon after tying it on. Keep it as short as possible so it will be easier to cover.
-
4Cut a smaller length of burlap ribbon. Use scissors to cut 4–6 inches (10–15 cm) of wired or free-form burlap ribbon.
- This piece of ribbon should be 1/2 to 2/3 the width of the main ribbon. Make sure that it is wide enough to hide the center, but not wide enough to distort the shape of the bow.
-
5Cover the center using the second piece. Wrap the new length of burlap around the center of the bow and tack it into place using hot glue.[3]
- Make sure that this piece of burlap completely hides the wire or ribbon holding the bow's shape.
- Also note that the end of this center piece should be positioned to the back of the bow.
-
6Snip the ribbon ends. Trim the ends of the burlap as desired, and try to keep both ends the same approximate length.
- You can trim the ends at a simple slant, but cutting a "v" shape into both ends can give the bow a decorative appearance. Doing so also makes the burlap less likely to unravel.
-
7Use the bow as desired. Now you should have a simple, beautiful bow. You can use it to decorate frames, wreaths, and more.


Multi-Loop Bow
-
1Cut a length of burlap ribbon. Cut 4 to 5 feet (1.2 to 1.5 m) of wired or free-form burlap ribbon. With this technique, you can create a big bow with several smaller bows stacked on top, giving it a fancier look.
- For this length range, burlap ribbon measuring 2 to 4 inches (5.1 to 10.2 cm) wide should work well.
- You can, however, use larger widths. Wider ribbon can actually create a fluffier bow. Just make sure to increase the length of the ribbon when selecting a wider type.
-
2Fold the burlap. Determine how wide you want the final bow to be, then fold one end over to create a loop half that long.
- Note that this should not be half the length of your ribbon. At most, this first loop should only take up no more than 1/4 the total ribbon length.
- This loop should also lie flat and parallel to the rest of the ribbon.
-
3Make a mirror fold. Fold the opposite end back over the front of the bow and over the first loop. The resulting loop should be just as large as the first.
- Keep the ribbon parallel and flat as you make this second loop.
- After completing this step, the maximum bow width should be set to your desired final width.
-
4Stack progressively smaller loop sets on top. Continue folding the loose end of burlap back and forth on top of the initial loop set. Work in equal pairs, and make each pair a little smaller than the one beneath it.
- Each set of folds should lie flat and parallel on top of the rest of the bow, and each individual loop in a set should match the other loop with which it's paired.
- The exact number of pairs will vary based on the width of the ribbon and on your personal aesthetic taste. Larger widths may only need 2 to 3 loop sets total, but smaller widths may need twice that amount to achieve a similarly fluffy bow.
-
5Tie off the center. Carefully wrap a wire tie or piece of florist wire around the exact center of the bow to secure it.
- Tie the wire as tightly as possible to maintain a fixed shape, then trim any excess wire using wire cutters.
- You should also trim any excess burlap after tying off the center of the bow.
-
6Hide the wire tie with additional burlap. Cut another length of burlap, then wrap it around the center to hide the wire.
- The burlap used during this step will need to be narrower than the burlap used for the main body of the bow. You can use a different ribbon, or use the same type of ribbon and simply fold it before wrapping it.
- Make sure that the center ribbon overlaps and ties at the back of the bow instead of the front.
- Leave enough ribbon hanging down from the center to create "tails" beneath the bow.
-
7Fan out the loops. Twist and fluff the separate loops as needed to create the precise look you want.
- Since burlap is such a thick material, it will usually retain its shape regardless of whether you use wired or free-form ribbon.
-
8Cut the ribbon tails. Trim the ribbon tails to the desired length, keeping both tails equally long.
- If desired, you can also cut "v" shaped notches into the ends to help prevent the burlap from unraveling over time.
-
9Use as the bow as desired. The burlap bow should now be finished. You can use it as its own decoration or use it to accent wreaths, vases, pillows, and more.


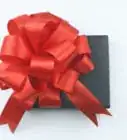
Gift Bow
-
1Cut 7 strips of burlap. Select 1⁄2 to 3⁄4 in (1.3 to 1.9 cm) wide burlap ribbon. Cut 7 pieces of ribbon, creating 3 pairs of ribbon in progressively smaller lengths.
- Make 2 pieces that are 10 inches (25 cm) long, 2 that are 9 inches (23 cm) long, and 2 that are 8 inches (20 cm) long. The final piece should be 4 inches (10 cm) long and should not have its own match.
-
2Loop both ends and staple them in the center. Starting with 1 piece of burlap, fold the end of the strip so that it sits on top of the center of the piece. Fold the other end so that it overlaps the first at this center point.
- With each fold, the top side of the end should meet the top side of the center, creating a pointed loop. The finished appearance should look like a figure-8.
- Staple the center of the figure-8 to hold it together as you continue working.
-
3Repeat with most of the remaining strips. Repeat the folding and stapling process with the other 10 in (25 cm) strip, both 9 in (23 cm) strips, and both 8 in (20 cm) strips.
- Do not, however, loop the final 4 in (10 cm) strip yet.
-
4Crisscross 2 loops. Create an "x" shape from the 2 largest loops by laying one on top of the other, angling them in perpendicular directions.
- Note that the narrow, pointed part of the loops should point downward when you stack them.
- Hold the 2 pieces together by placing a small dab of hot glue in between them.
-
5Stack the remaining loops in pairs. Stack the remaining 4 loop pairs on top of the bottom set, working with 1 size at a time.
- The loops of each evenly sized pair should form a perpendicular "x" shape with one another.
- As you stack the loops on top of one another, try to fill in the gaps left by the previous set. Once you determine the best placement for a loop, hold it in place using hot glue.
-
6Loop the final strip into a circle. Bring the ends of the 4 in (10 cm) strip together, forming a single circular loop.
- Hold the ends together with a staple or a bead of hot glue.
-
7Adhere the final loop to the center. Place a bead of hot glue in the open center of your ribbon stack. Press the seam side of the final loop into the glue.
- Once the glue dries, fluff and readjust the secure loops as needed. Some of the outer loops should slightly overlap the center loop.
-
8Use the bow as desired. The burlap bow should be complete. You can use it to decorate gifts and other packages.


Community Q&A
-
QuestionHow can I make my burlap bow stand up instead of being floppy?
 T. ChinsenTop AnswererGlue on monofilament or heavy fishing line to the edges before assembling the bow. Addition of thin floral wire after the bow has been made is another option. Applying a solid line of glue to the edge of the burlap will provide some rigidity, but may not hold up with wider ribbon due to the weight of the burlap.
Things You'll Need
Basic Bow
- 2 to 4 in (5.1 to 10.2 cm) wide burlap ribbon
- 1 in (2.5 cm) wide burlap ribbon
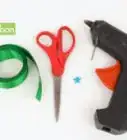
- Scissors
- Wire tie, floral wire, or twine
- Wire cutters
- Hot glue gun
Multi-Loop Bow
- 2 to 4 in (5.1 to 10.2 cm) wide burlap ribbon
- Scissors
- Wire tie, floral wire, or twine
- Wire cutters
- Hot glue gun
Gift Bow
- 1⁄2 to 3⁄4 in (1.3 to 1.9 cm) wide burlap ribbon
- Scissors
- Stapler
- Hot glue gun

References
About This Article
To make a basic burlap bow, start by cutting a 2-3 foot length of burlap and folding the ends into loops crossing over the center point of the ribbon. Next, pinch the ribbon where the ends overlap, and tie it in place with a small wire tie or a piece of twine. After that, cut a 4-6 inch length of burlap that’s narrower than the burlap you used for the bow. Then, wrap it around the wire tie or twine, and tack it into place with some hot glue. Finally, trim the ends of the ribbon at a slant or in a “V” shape to make it look decorative. For instructions on how to make a multi-loop bow or a special gift bow, keep reading!