X
wikiHow is a “wiki,” similar to Wikipedia, which means that many of our articles are co-written by multiple authors. To create this article, volunteer authors worked to edit and improve it over time.
This article has been viewed 74,738 times.
Learn more...
Gift wrapping can be tough, especially around the holidays, but when you do it correctly, it can be quite fun! Read this article to discover multiple ways to tie a bow for your gift.
Steps
-
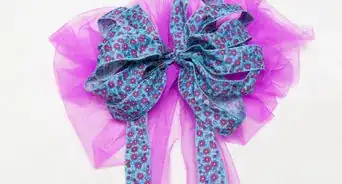
1Cut a long piece of ribbon that fits correctly around your gift and lay it over the top, holding firmly in the middle. This will wrap around your gift and be where the bow sits on top of your gift. The longer your ribbon is, the bigger the bow will be. Make sure the top is long enough for you to tie a (probably) large knot and a bow.
-
2Pull the ribbon around the box and make sure both sides of the ribbon are of the same length. You can measure this by lifting them up and touching ends above the present. Next, pull one end of the ribbon under and over the other, so you have a "T" shape.Advertisement
-
3Sharply twist the fold to the side as tightly as possible. You'll need to do this to create the crossed shape. After this, pull the entire ribbon around the box and meet in the middle with both ends. Now we can get into forming the bow.
-
4Pull tightly into the middle of your box and make a huge knot. Press the middle of your bow with your finger to keep it down, or you can have somebody else hold it. You might also just use a clear piece of tape if you're unable or cautious to do this on your own and nobody's around. Now, make a regular knot. Your safest bet is to make a double or even triple knot, if you have the correct amount of ribbon and it won't be too bulky. This will be the center of your bow.
-
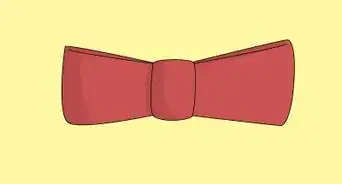
5Tie a bow. Make it as large as you want, and be sure it's tight. You can pull out the edges a bit if you'd like, and make sure the "ears" of the bow and wide and as round as possible. The fluffier and more cartoon-ish look is what you're going for, not a flat or typical bow.
- This will be easier to accomplish with a wired ribbon, but possibly be messier looking, so be careful!
-
6Finally, trim the ends. The ends should have quite a bit extra, so cut them at an angle in either diagonal direction. For an even more elegant and professional look, check the tips below for an alternative (but equally as easy) method.


Advertisement
Warnings
- Don't expect to make a perfect bow the first time, or you might become disappointed or discouraged. The images used are experienced in tying that certain bow, so it may take many tries before you actually get a presentable one.⧼thumbs_response⧽
- Make sure any and all folds or twists are out of the bow. You should follow the bow's path with your fingers when crossing the ribbon over to prevent this, as this is the time you'll be most likely to twist the ribbon around. If you don't stop this from happening, you'll have to redo the entire bow, which may leave creases and folds in your bow, making it useless for a presentable present.⧼thumbs_response⧽
- Remember: The bigger the bow, the more fragile. If your bow is large, you'll have to put it in an especially safe spot and make sure it's on its own or on top of other gifts when you present it to the recipient.
- This applies even more to Christmas - leave a note on it if the gift is put under the tree before all of the presents are. You can remove it on Christmas morning so the recipient is still surprised with a flawless gift.
⧼thumbs_response⧽
Advertisement
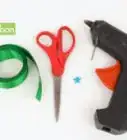
Things You'll Need
- Ribbon (any size suitable for the present)
- A gift (preferably a boxed gift)
- Scissors
- The ability to tie a knot
About This Article
Advertisement