wikiHow is a “wiki,” similar to Wikipedia, which means that many of our articles are co-written by multiple authors. To create this article, volunteer authors worked to edit and improve it over time.
This article has been viewed 17,732 times.
Learn more...
A beatmap is a crucial aspect of a rhythm game, as it consists of all the objects that need to be hit in time to the song. Making a good beatmap has multiple parts: timing, mapping, and finally, testing. While some games like osu!, Beat Saber, and Geometry Dash has built-in level editors to make the process easier, if you are making your own video game, you will either need to design a level editor from scratch or code your own levels together, and you will need to have the client for playing the beatmaps mostly finished.
Steps
-
1Have a basic understanding of music theory. You need this to understand the design choices made with each song. You will want to understand the basic structure of a typical song, as well as understand what certain music-related vocabulary means, like "time signature", "rest", "note", "measure", and "beats per minute". You do not need to understand what every single term means (just the basic ones), just how they influence the song.
-
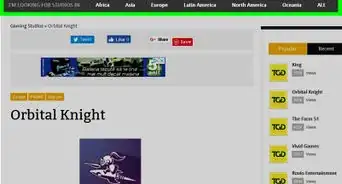
2Choose a song. For rhythm games, there are many songs you can select. A good song for a rhythm game has clearly recognizable beats, patterns, and rhythm. For example, electronic dance music (EDM) tends to be popular as it allows for interesting patterns and rhythms in the song. Other songs that are popular in rhythm games are those that have a high tempo, tempo changes, or other interesting patterns in the music.
- If releasing your beatmap to the public, make sure that you have all the appropriate licensing needed or the legal right to use the music. You could reach out to either the artist or the record label to ask for permission to use the song. Some companies will let you use their music freely, while others are more stringent. If the record label or the artist does not give you permission, you can find freely-licensed music on the Internet, or you can make your own music. Or you can see if your use of their music would qualify as "fair use" or "fair dealing".
- Since licensing can be a very complicated issue, it would be best to get a qualified copyright attorney to help you.
Advertisement - If releasing your beatmap to the public, make sure that you have all the appropriate licensing needed or the legal right to use the music. You could reach out to either the artist or the record label to ask for permission to use the song. Some companies will let you use their music freely, while others are more stringent. If the record label or the artist does not give you permission, you can find freely-licensed music on the Internet, or you can make your own music. Or you can see if your use of their music would qualify as "fair use" or "fair dealing".
-
3Make sure your rhythm game client is mostly complete. At this stage, you should have already decided on the basic rhythm game mechanism, including the indicators that tell the player when to hit a note, as well as various hit objects (i.e. click notes, hold notes, drag notes, flick notes, etc.). You will also need to be able to determine the length of a song as well as have a mechanism for playing music in your game.


Timing Your Beatmap
-
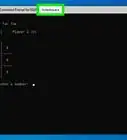
1Listen to the song. You need to listen to an audio recording of the song in order for you to time it accurately. Use a program like Audacity to see the precise timestamp of the song, as you will need it for the most accurate timing. A beatmap that is even slightly off rhythm can be extremely frustrating to play.
-
2Mark the first beat. The first beat in your music is where your song starts and where you will need to begin timing and mapping your song. Note the timestamp.
- Use an Excel or Google spreadsheet to record all the timing information and the beats of the song, unless if you have a program that can make beatmaps. You may also want to include quarter beats as some music heavily utilizes eighth and sixteenth notes. Name the A column "beats" and the B column "timestamps" in row 1. Fill the "beats" column with 0, 0.25, 0.5, 0.75, etc. Leave the "timestamps" column empty for now. This assumes that you will be including quarter beats in your beatmap.
- You may need to make multiple tables, especially if the song changes BPM multiple times.
-
3Count the number of beats per minute. You can use a metronome, or you can use a BPM counter to help with this task. Once you determined the BPM, you can use this to calculate how often a beat needs to occur every second for each note to land on the correct beat.
- You can use dimensional analysis to aid with the conversion. For example, to determine the number of seconds needed between beats for a 120bpm song, use . So, for a 120bpm song, you need to have two beats every second, with each quarter beat spaced 0.5 seconds apart.
- Once you have calculated the distance between beats, you can use a formula to help you fill in the rest. For a song that starts at 0:00:01.2423 with 120bpm, type the following in cell B2: =1.2423+A2*0.5. Then drag the cells down by placing your cursor over the corner of the cell and dragging downward.
The generic formula for determining the timestamps is .
-
4Determine the time signature. Different music has different time signatures. Some commonly used time signatures include 4/4 and 3/4. Other commonly used time signatures include 2/4 and 5/4.
- For a 4/4 song, highlight each fourth cell in the table, including the "zero" cell.
-
5Watch for time signature and BPM changes. Some popular rhythm game songs, such as LeaF's "Aleph-0", has multiple BPM changes. At some point in this song, the BPM increases, and the song gets faster. When this happens, you will need to record the timestamp at which this occurs and the new BPM.
- Restart the "beats" column at zero and recalculate the distance between beats using the formula above. Number up using the same scheme as before. Highlight the new lead beats in your spreadsheet.
-
6Check your timing. If using a level editor, you can do so easily by going to the beginning of the song and watching both the timeline ticks and the built-in metronome. If not, then in your IDE, place a hit object on every top beat. This will depend on the language that you are coming in, but you should use the timestamps from your spreadsheet to guide your coding process. Then compile and test your beatmap. If timed correctly, the notes on every fourth beat should correspond with the top note of every measure.


Making Your Beatmap
-
1Create a few extra columns. This is where you will lay out the hit objects before you place them on the beatmap.
- If you are using a level editor, you can skip this step.
Tip: if coding from scratch, it is always good practice to have a mockup of your beatmap design before you start coding your beatmap. Before you code your beatmap, you should have a design that is intuitive and checked by your coworkers, friends, family, etc.
-
2Allocate different symbols to different hit objects on your spreadsheet. For example, you could allocate "X" to click notes, "O" for hold notes, ">" and "<" for drag notes, and "<>" for flick notes, or you can use different symbols depending on the rhythm game.
-
3Place hit objects where you hear different notes in the object. A rhythm game is supposed to test a player's ability to listen to music cues to hit objects. Placing hit objects where there are no notes undermines that end goal.
-
4Use different types of hit objects for different types of notes in the music. For example, it may be more appropriate to use a held object or a slider for a note held for longer (like a half note or whole note) than to use a click note.
-
5Use patterns to visually represent the melody. For example, in a scrolling-style beat mania-like rhythm game, you may want to use hit objects further to the right to represent higher frequency notes and notes further to the left for lower frequency notes.
-
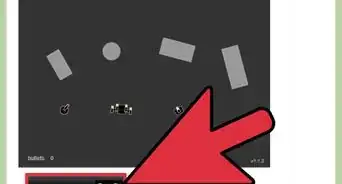
6Think about the mechanics of the rhythm game as a whole. osu!, a rhythm game optimized for mouse and keyboard, does not have notes spaced terribly apart. Cytus, "Kalpa", and "Dynamix", on the other hand, sometimes places notes in a two-lane fashion, and is meant to be played with more than one finger.
-
7Avoid breaking your rhythm game. The goal of a rhythm game is to test a player's ability to listen to music cues to hit objects, not for you to break it. If you break your rhythm game on purpose, it is no longer a game as it a chaotic scramble of notes.
- For community-driven rhythm games like osu!, consider how ranked maps differ from some unranked maps. Maps that are ranked are both fun to play and do not violate the rules of the rhythm game (i.e. no two notes on the same timeline tick for osu!std). Different creators have different standards for beatmaps, so ask the game community for help or view their ranked map guidelines.
-
8Adjust the approach rate as necessary. The approach rate is the speed at which the hit objects appear before you click them. Some rhythm games like Cytus II use variable approach rate that changes with the speed of the judgment line, others like Beat Saber use one fixed approach rate.
-
9Start coding. After you get the right patterns in your Excel spreadsheet, you can transcribe it into your rhythm game client. You may want to create a separate file for each beatmap.


Testing Your Beatmap
-
1Play the beatmap yourself. If you are unable to play it, at least watch the objects on the screen as they appear and imagine another player playing it. A good beatmap should be fun to play and possible to play. It does not have to be easy, but possible and playable. Compile your game if necessary, then test your beatmap.
-
2Asks others for feedback. Ask your coworkers, your friends, your fellow developers, or your rhythm game community. They will help identify potential playability concerns with your beatmap, such as two notes in the same place.
-
3Revise and edit your beatmaps as necessary. Make a few more difficulties for different experience levels. Think about your audience. Not everyone will be able to jackhammer their phone screen at first, so using different difficulty levels can help others improve gameplay.
- Easy difficulties should not use rapid-fire objects like streams. They should be easy enough that even a beginner can pass the beatmap.
- Normal difficulties could use rapid-fire, but they should not use them for prolonged periods of time. Average players should be able to pass them.
- Hard difficulties are for the above-average player. They should be difficult, but not impossible. Streams, including 1/8 streams, can be used to test how fast the player can click hit objects.
- While there are no hard and fast rules for what can count as "easy", "normal", and "hard", consider that beginners are not likely to keep playing if they are unable to work up their skill to an advanced level.