X
wikiHow is a “wiki,” similar to Wikipedia, which means that many of our articles are co-written by multiple authors. To create this article, 18 people, some anonymous, worked to edit and improve it over time.
There are 9 references cited in this article, which can be found at the bottom of the page.
This article has been viewed 341,929 times.
Learn more...
Old saw blades can be recycled into knives if you have the right equipment and enough time. This step-by-step tutorial will show you how to make a guthook knife out of a saw blade from start to finish. Only experts should attempt to carry out these steps, since working with sharp edges and power tools can be very dangerous without proper training and experience.
Steps
-
1Sit down with a pencil and paper and draw out the pattern that you want. When the pattern has been decided on, cut it out and trace it onto a stiffer paper. You can use cardboard or file folders.[1]
-
2Trace it onto the sawblade.[2]Advertisement
-
3Use a Dremel tool with the carbon fiber heavy duty disks to cut it out. The light duty will work, but you might go through a half a pack of them cutting out one blade. A better option is to use the reinforced disks. They cost more but are well worth it. You can cut 4 or 5 blades with just 1 of these cutting disks.[3]
-
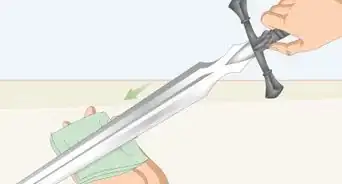
4Clean it up on the bench grinder, and since this is a guthook, use a chainsaw file to get the shape of the gut hook cleaned up.
-
5Hit it with a little 120 grit and an orbital sander to get the rust and scratches removed.
-
6Drill a few holes in the handle to help balance the knife out more. Saw blades are almost impossible to drill through so to drill the holes for pins, heat the handle red hot and let it cool down on its own.
-
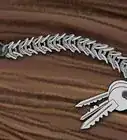
7Make a simple vine down the backbone of the knife. If the blade is thicker, you can do a vine and thorn or an arrowhead design instead. This is a design element and is optional.[4]
- Mark the blade in 1/4" (.635cm) increments. Most designs use the same measurement.
- Use the triangular file just to put in the initial notches, so the round file won't slide all over the place. Pick one side to start and notch every other one. Turn it around and do the other side. Then switch to a small chainsaw file. Try to keep it at around a 20 degree angle and file almost to the opposite edge of the knife.
- Use a large chainsaw file to make the notches wider and then switch to the flat file and round off the shape edges. If the blade is only 1/16" thick, you might be cutting it close with the files. There will be some minor uh-ohs and scratches, but some 150 grit sandpaper wrapped around the file will take care of them.
-
8Freehand the bevel for the edge. Normally you can use a grinder but the hook on this particular type of blade prevents that. Try to leave a flat edge roughly 1/64" wide. During the buffing part, when you use a leather buffing wheel and some buffing compound, the edge will form.
- Use a small C clamp on the front of the grinder to set the angle. Then slowly pull the knife from left to right. Turn the knife facing the other way and do the same for the other side.
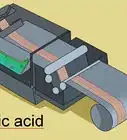
- Lock the belt sander in a vise, upside down and just run the blade over it at about a twenty degree angle.
-
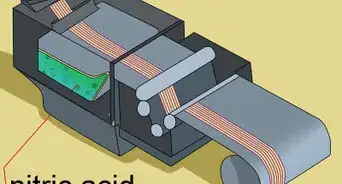
9Heat treat and temper the blade. Most of the blades have a Rockwell hardness of 35 so they will need to be heat treated and tempered to hold an edge. Most industrial grade blades are hard enough and do not need to be treated (but if it is too hard, it will not sharpen easily).[5]
- Run a large stove burner on high. This is not hot enough to get the blade to around 1500F, so use a MAPP gas torch and the burner together. That will take it to a non-magnetic state. Note that the temperatures needed to temper will vary based on the metal. L6 (sawblades), L7 ( large sawmill blades) and tool steel type O-1 are probably the easiest for beginners.
- Once it gets hot enough for the magnet not to stick, hold the temp for a minute to make sure it will be an even heat treat. There's no picture of this being done because it is hard to hold a camera, a torch and pliers with a magnet.
- Quench in vegetable oil that is about 130F for 1 minute. Do not quench in the house with metal any thicker than a saw blade. Thicker metal retains more heat and will make a large plume of smoke and possibly ignite and boil over the oil. Instead, keep it hot with your torch while you go outside to quench it.
- Wipe the oil off the blade and throw it in the oven at 525F for one hour. Do yourself a favor and lay it on some aluminum foil first, that way there are no knife shapes burned into the wife's favorite cookie sheet. It will come out black and a little flaky but some 120 grit sandpaper will take care of that. If you don't wipe it down, the oil congeals on the blade and forms a very sticky mess that is a pain to get off.
-
10Make the handles. This particular example uses blood wood.
- Rip off a couple pieces that are just wide enough to feel comfortable on the knife and trace the pattern for the handle onto the wood. Make sure the sides that touch the metal are perfectly flat so you get the best fit.
- Run the piece of wood through the bandsaw and cut them about 1/16" larger than the handle pattern.
- Once you get them lined up with the handle, mark the holes for the handles on the wood with a sharpie marker and throw a piece of tape around the wood to hold it together while drilling the holes.
- To help keep them from slipping around and getting the holes out of alignment, drill one hole and add a pin, then drill the second hole and add the second pin, and finally the third.
- Switch to a sanding drum and remove the tool marks and round the edges. While you are at it, you can sand in a couple of finger grooves at the front (not shown).
-
11Attach the handles to the knife.[6]
- Clean up the blade. Cover the handles with tape except for where the adhesive will be. While taping, press down where the pins will be inserted. That makes it easier to find the holes and insert the pins while everything is covered with epoxy.
- Use industrial grade heavy duty epoxy. Mix it on old plastic lids. When the leftover is dry, it peels right off and the lid can be reused.
- Insert pins and clamp. Even if the glue label says no clamping is needed, it will help to create a thin glue line. Wait overnight.
-
12Remove the tape.
-
13Cut the pins close with a Dremel tool and grind them flush with the sides of the knife. They can be ground all the way flush, but take your time. The brass gets hot really and can melt the epoxy and come loose. If you used epoxy with less than 2500 lb. per square inch holding strength, you may need to peen the pins.
-
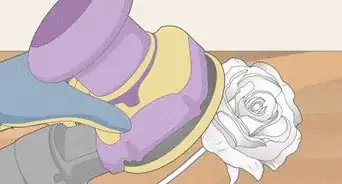
14Use the sanding disk to smooth the handle out and take off the left over epoxy. Then switch to a cloth buffer with black buffing compound to take out most of the scratches, white for the initial shine and brown to really shine it up. Put some tape around the front of the handles to keep the compound from packing into the wood.
-
15Use a homemade leather buffing wheel and the brown compound to shine the edge and to hone down the last 1/164th of an inch. It brings out a razor sharp edge. Some caution should be used when you are using the leather and cloth buffing wheels, especially with a guthook. They can get caught on the blade and hook while spinning. At high speeds, there is no reaction time, the blade can fly across the room or come all the way around the wheel and hit your hand. It helps to angle the leading edge of the blade away from the wheel. There are several other options as well:
- Use a belt sander with fine grit sandpaper to shine and sand the blade.
- The next option is to use a cloth buffing wheel to put a mirror grade shine on the blades and use sharpening stones to apply the final edge.
- The third option is to apply a hand rubbed finish. Take a piece of medium grit sandpaper and rub the blade from the guard/handle to the tip. No back and forth motion. When that grit will no longer shine the blade, switch to a finer grit and repeat. This is very time consuming. You could spend as much as eight hours working from a low 120 grit to a high 1000 grit. Stopping at 320 grit will leave a satin finish, whereas stopping at 1000 grit will leave a mirror finish. If the blade is deeply scratched, which happens sometimes, hand rubbing helps.
- Another alternative is called draw filing.[7] Clamp the blade to a flat piece of metal and lock the metal into a vise. Place a large bastard mill file flat on the blade and pull it toward you. This will slowly work the scratches out. Don't go in the opposite direction--it works, but is more dangerous. While exerting pressure on the file and blade, if your hands or the file slips, you could be impaled by the blade.
-
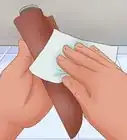
16Re-tape the blade to add the finish to the handles. This tutorial uses tung oil and if it dries on the blade, it is a pain to remove without scratching the blade. Apply three layers of tung oil over three days.[8]
-
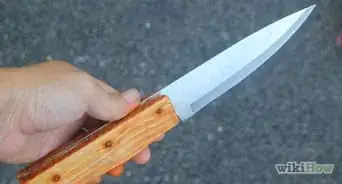
17Use a large chainsaw file to sharpen the guthook. If the blade is thin, only sharpen one side.


Advertisement
Community Q&A
-
QuestionWhat if I don't have metal?
 Community AnswerThe knife is made out of metal, hence, there is no way to create it without metal and still get the same desired result. As the article suggests, using an old saw blade is a good way to re-purpose metal!
Advertisement
Warnings
- Use caution when cutting your saw blade.⧼thumbs_response⧽
- Do not quench a knife indoors with metal thicker than 5mm (1/5").⧼thumbs_response⧽
- Wear leather gloves to prevent burns and cuts.⧼thumbs_response⧽
- Wear eye protection while cutting grinding and quenching to prevent blindness.⧼thumbs_response⧽
Advertisement
Things You'll Need
- Saw blades - a 10" blade from a sawmill is used in this tutorial; smaller 7 1/4" blades can be used for fillet knives, trade points, broadheads
-
For backbone design - triangle file, chainsaw files, a small flat file and an improvised vice to hold the blade while you work
References
- ↑ https://www.youtube.com/watch?v=1X-qkum0W90
- ↑ https://www.youtube.com/watch?v=oJYvXN_qoJg
- ↑ https://youtu.be/oJYvXN_qoJg?t=30
- ↑ https://youtu.be/oJYvXN_qoJg?t=147
- ↑ https://youtu.be/1X-qkum0W90?t=290
- ↑ https://youtu.be/oJYvXN_qoJg?t=320
- ↑ https://www.youtube.com/watch?v=xM5xs-OBDCY
- ↑ https://www.youtube.com/watch?v=KqKzUGkiue0
- PrimitiveArcher.com - Original source, shared with permission.
About This Article
Advertisement