This article was co-authored by wikiHow staff writer, Jack Lloyd. Jack Lloyd is a Technology Writer and Editor for wikiHow. He has over two years of experience writing and editing technology-related articles. He is technology enthusiast and an English teacher.
The wikiHow Tech Team also followed the article's instructions and verified that they work.
This article has been viewed 1,219,380 times.
Learn more...
This wikiHow teaches you how to create a Minecraft server on your Windows or Mac computer by using a free program called Hamachi. Keep in mind that this process will only work for Java editions of Minecraft on desktop; attempting to use this method for the Windows 10, Pocket Edition, or console editions of Minecraft won't work.
Steps
Preparing to Create Your Server
-
1Download Hamachi. Go to https://www.vpn.net/ in your computer's web browser, then click the green Download now button in the middle of the page. The Hamachi setup file will download onto your computer.
- If you're on a Mac and VPN.net prompts a Windows file to download, click the Mac link below the Download now button to force the Mac version to download.
-
2Install Hamachi. Once you've downloaded Hamachi, install it according to your operating system:
- Windows — Double-click the Hamachi setup file, select a language and click Next, check the "I have read" box and click Next, click Next, and click Install. Click Yes if prompted at any point in the installation, then click Finish when prompted.
- Mac — Open the ZIP folder, double-click the extracted Hamachi setup file, click Open, verify the download if necessary, check the "I have read" box, and click Install. Enter your password if prompted, then click Finish when prompted.
Advertisement -
3Download the Minecraft server file. Go to https://minecraft.net/en-us/download/server in your computer's web browser, then click the minecraft_server.1.15.2.jar link in the middle of the page. This will prompt the Minecraft Java server file to download onto your computer.
-
4Create a folder on your desktop. This is the folder in which you'll place and run your Minecraft server. To create an empty folder, do the following:
- Windows — Right-click the desktop, select New, click Folder, type in Minecraft Server, and press ↵ Enter.
- Mac — Click File, click New Folder, type in Minecraft Server, and press ⏎ Return.
-
5Place the Minecraft server file in the folder. Click and drag the downloaded Minecraft server file onto the new folder's icon, then release it there.
- You can also copy it by clicking the server file, pressing Ctrl+C (Windows) or ⌘ Command+C (Mac), opening the new folder, and pressing Ctrl+V or ⌘ Command+V.


Creating a Server on Windows
-
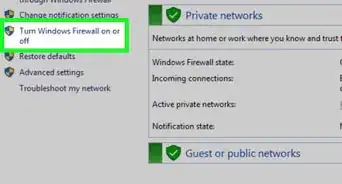
1Make sure that you have the latest version of both Minecraft and Java. The easiest way to do this for Minecraft is by double-clicking the Minecraft launcher and waiting for it to update itself if necessary. For Java, open Internet Explorer, go to https://java.com/en/download/installed.jsp, click Agree and Continue, and follow any on-screen prompts.
- If nothing happens, your Java is up-to-date.
- Since most modern browsers don't support Java, using Internet Explorer is the best way to ensure you don't run into any errors.
-
2Open the Minecraft server folder. Double-click the folder to do so.
-
3Double-click the server file. Doing so will prompt the server files to begin unpacking inside of the folder.
- Make sure you double-click the server launch file, which resembles a gear on a white background, rather than the text document.
-
4Agree to the Minecraft server terms of use. Once the "eula" file appears, double-click it to open it in Notepad, then delete false from the "eula=false" line and type in true. You can then press Ctrl+S to save the changes and exit Notepad.
- The edited "eula" file should now read "eula=true" instead of "eula=false"
-
5Double-click the server file again. This will prompt the server to resume unpacking.
-
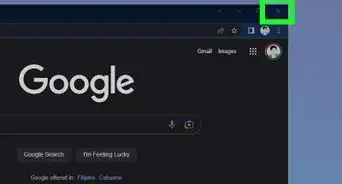
6Close the "Minecraft server" window when it finishes loading. Once you see "Done" in the line of text at the bottom of the window, click the X in the top-right corner of the window. At this point, you're free to configure Hamachi.


Creating a Server on Mac
-
1Make sure that you have the latest version of both Minecraft and Java. The easiest way to do this for Minecraft is by double-clicking the Minecraft launcher and waiting for it to update itself if necessary.
- As of June 2018, the latest version of Java is version 8 Update 251. You can download it from Java's website by going to https://java.com/en/download/ and clicking the Free Java Download button.
-
2Double-click the Minecraft server file. This will cause it to begin unpacking inside of your new folder.
-
3Agree to the Minecraft server terms of use. Once the "eula" file appears, double-click it to open it in TextEdit, then delete false from the "eula=false" line and type in true. You can then press ⌘ Command+S to save the changes and exit TextEdit.
- The edited "eula" file should now read "eula=true" instead of "eula=false"
-
4Double-click the Minecraft server file again. It will resume unpacking files inside of the folder.
-
5Close the "Minecraft server" window when it finishes loading. Once you see "Done" in the line of text at the bottom of the window, you can click the red circle in the top-left corner of the window to close it. At this point, you're free to configure Hamachi.


Configuring Hamachi
-
1
-
2
-
3Sign up for Hamachi. Click the Sign up link in the upper-right corner of the window, then enter your email in the "email" text box, type a password into the "password" text box, re-type your password into the "retype password" box, and click Create account.
-
4Click the Network tab. It's at the top of the Hamachi window. A drop-down menu will appear.
-
5Click Create a new network…. It's in the drop-down menu. Doing so prompts a pop-up window to appear.
-
6Enter a name for your server. In the "Network ID" text box, type in whatever you want to name your server.
- If you select a server name which has already been used, Hamachi will alert you that the name is already taken.
-
7Enter a password for your server. Type your preferred server password into the "Password" text box, then re-type the password into the "Confirm password" text box.
-
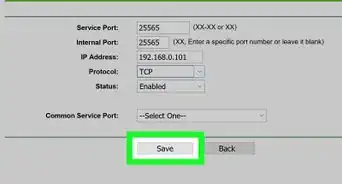
8Click Create. It's at the bottom of the window. This will create your server.
-
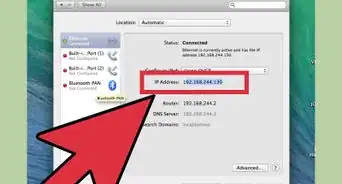
9Paste your Hamachi IP address into your server folder. This is how the server will know to use Hamachi:
- Right-click (or Control-click) the IP address at the top of the Hamachi window.
- Click Copy IPv4 address
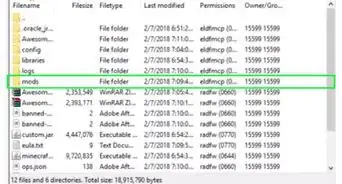
- Rename the "server.properties" text file in your Minecraft server folder to "serverproperties".
- Double-click the "serverproperties" file, then confirm or click your computer's text-editing app.
- Click to the right of the "server-ip=" text line.
- Press Ctrl+V (Windows) or ⌘ Command+V (Mac).
- Save the file by pressing Ctrl+S or ⌘ Command+S, then exit the text editor.
-
10Go online. Right-click (or Control-click) the server name, then click Go online in the drop-down menu.
- If you see Go offline in the drop-down menu, your server is already online.
-
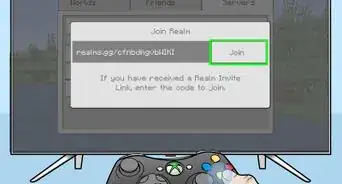
11Have your friends join your server. If you want to have some people join your server, they will have to download and install Hamachi before doing the following:
- Open Hamachi.
- Click Network
- Click Join existing network...
- Enter the server's name and password in the "Network ID" and "Password" text fields, respectively.
- Click Join


Connecting to Your Server
-
1Run the server file. Double-click the Java server file in your Minecraft Server file. This will open the server file's command window.
- You'll also want to ensure that your Hamachi server is running before proceeding.
- To give yourself moderator privileges, type /op username (where "username" is your Minecraft username) into the text field at the bottom of the server run window and press ↵ Enter.
-
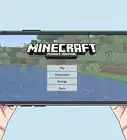
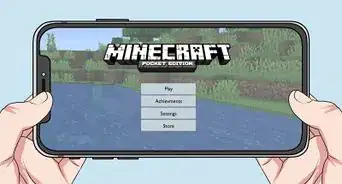
2Open Minecraft. Open the Minecraft launcher by double-clicking or clicking the grass block-shaped Minecraft app icon, then click PLAY at the bottom of the window.
-
3Click Multiplayer. It's in the middle of the main menu.
-
4Click Add Server. You'll find this option at the bottom of the window.
-
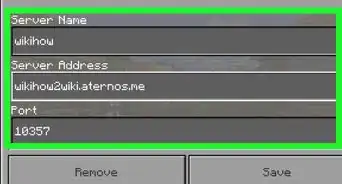
5Enter your server's name. In the "Server Name" text box, type in the name of the server as it appears in Hamachi.
-
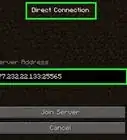
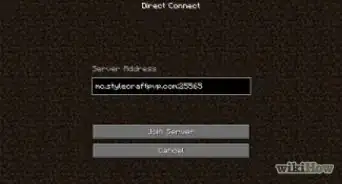
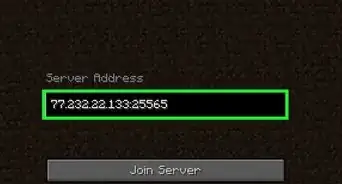
6Paste in your server's address. Click the "Server Address" text box, then press either Ctrl+V (Windows) or ⌘ Command+V (Mac). You should see the IPv4 address you copied earlier appear here.
-
7Click Done. It's at the bottom of the window. This will prompt Minecraft to begin searching for your server.
-
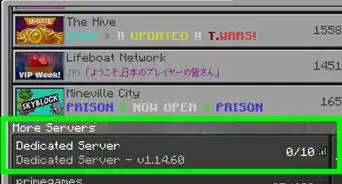
8Select your server. Once your server appears in the search results, click its name once to select it.
-
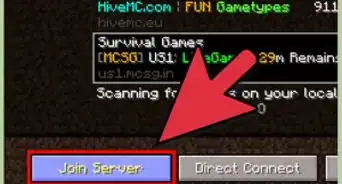
9Click Join Server. This option is at the bottom of the window.
-
10Wait for the server to load. Once the server finishes loading, you'll be placed as a player in the world, at which point you can begin playing as you normally would.
- You may be prompted to enter a password before your world finishes loading. If so, type in the password you used to create your server when you configured Hamachi.


Community Q&A
-
QuestionWhat does Hamachi do for Minecraft?
 wikiHow Staff EditorThis answer was written by one of our trained team of researchers who validated it for accuracy and comprehensiveness.
Staff AnswerwikiHow Staff EditorStaff AnswerHamachi allows you to play LAN worlds with people online. It's the easiest way of playing Minecraft with friends without having to pay for a server or find a Minecraft realm. -
QuestionWhat is the Hamachi IP address?wikiHow Staff EditorThis answer was written by one of our trained team of researchers who validated it for accuracy and comprehensiveness.
Staff AnswerwikiHow Staff EditorStaff AnswerThe Hamachi IP address is what you make on Hamachi that your friends join, direct connect this specific IP, then the port to open to LAN that hosts it. The IP is your IPV4 address in Hamachi. When looking at Hamachi, right-click on the numbers next to the power button and it should say "copy ipv4 address." Try that as the IP, and if that doesn't work, try the IPV6 address. -
QuestionHow do you join a LAN world in Minecraft?wikiHow Staff EditorThis answer was written by one of our trained team of researchers who validated it for accuracy and comprehensiveness.
Staff AnswerwikiHow Staff EditorStaff AnswerYou can join a LAN world in Minecraft either on the same WiFi as someone (usually this will mean you're in the same house/building) or you can do it as explained in the article above via Hamachi, online.
Warnings
- You cannot use Hamachi and the Minecraft server file in conjunction with the Windows 10 version of Minecraft.⧼thumbs_response⧽

About This Article
1. Download Hamachi and the Minecraft server file.
2. Create a "Minecraft Server" folder and drag the file into the folder.
3. Open the server folder and double-click the server launch file.
4. Accept the terms, save, and close the file.
5. Sign into Hamachi and create a new network.
6. Rename the text file in your server folder and delete the period from “server.properties.”
7. Open the file in Text Editor.
8. Paste your IP from Hamachi after "server-ip" and save the file.
9. Click Go Online in Hamachi.