This article was co-authored by wikiHow staff writer, Rain Kengly. Rain Kengly is a wikiHow Technology Writer. As a storytelling enthusiast with a penchant for technology, they hope to create long-lasting connections with readers from all around the globe. Rain graduated from San Francisco State University with a BA in Cinema.
The wikiHow Tech Team also followed the article's instructions and verified that they work.
This article has been viewed 824,421 times.
Learn more...
Do you want to host a free multiplayer Minecraft server for yourself and your friends? If you have Java, you'll be able to download and edit the server setup needed to customize your own server. To allow friends to join you, you'll need to set up port forwarding and share your IP address. Be sure to only share this information with trusted individuals. This wikiHow will show you how to make a Minecraft: Java Edition server for free using your Windows, Mac, or Linux computer.
Things You Should Know
- Download the server setup for Minecraft. Create a "Server" folder on your desktop.
- Change "eula.txt" agreement from "false" to "true", then run "sever.jar" again. Customize your settings.
- You must set up port forwarding on your router to host friends outside of your Wi-Fi network.
Steps
Creating the Server
-
1Download the server setup for Minecraft Java Edition. Go to https://www.minecraft.net/en-us/download/server in a web browser and download the latest version update.[1]
- The download will have a file named "server.jar".
- This method will only work with the Java Edition of Minecraft.
- Make sure you have Java installed on your computer.
-
2Create a new folder. Name it Server or another name that will help you differentiate it. This folder will be for your Minecraft server. For easy access, create the folder on your desktop. You can always change its location later.
- On Windows, right-click the desktop → New → Folder.
- On Mac, click a blank spot on your desktop → File → New Folder.
Advertisement -
3Move the server.jar file into the Server folder. Locate your recent downloads on your computer to find the "server.jar" file.
- Click and drag the file into the Server folder.
-
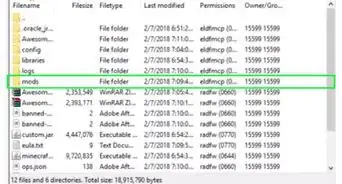
4Double-click the "server.jar" file. This will run the file.
- As the file runs, you'll see new files appear in the Server folder:
- logs folder
- eula.txt
- server.properties
- As the file runs, you'll see new files appear in the Server folder:
-
5Right-click "eula.txt" and click Edit. A text file will open with an agreement.
-
6Delete false and enter true. The end of your text agreement should look like: eula=true.
-
7Click File, then Save. This will save your agreement.
-
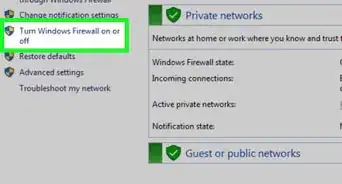
8Double-click the "server.jar" file again. This will run the file again and open the Minecraft server application window.
- As the file runs, Windows Defender Firewall may pop-up with a block warning.
- Check the box to allow Private networks, such as my home or work network.
- Click Allow access.
- As the file runs, Windows Defender Firewall may pop-up with a block warning.
-
9Wait for Minecraft server to finish preparing. You can see the progress in the Log and chat section on the right of the window.
- It will take some time to prepare the spawn area. Do not close the Minecraft server window.
- When it's finished, you should see the following files in the Server folder:
- logs folder
- world folder
- banned-ips.json
- banned-players.json
- eula.txt
- ops.json
- server.jar
- server.properties
- usercache.json
- whitelist.json


Configuring the Server
-
1Open the server.properties file. Right-click server.properties → click Open with → click More apps → select Notepad → click OK. On Mac, the program will be TextEdit.
- Make sure the box is checked for Always use this app to open .properties files.
- The server.properties file will open. This is where you can edit your game settings.
-
2Edit your server settings. In the server.properties file, you'll see a list of settings you can edit.
- Change your server name by editing motd=A Minecraft Server into motd=Your Server Name.
- If you want to turn a setting on, delete false and replace with true.
- To turn a setting off, delete true and replace with false.
- For other settings,
- When finished, click File → Save. Close the server.properties file.
-
3Restart the Minecraft server application. You'll need to restart the server for some of the setting changes to take effect.
- Click the X in the corner, then double-click server.jar again.
-
4Launch Minecraft Java Edition. Click the Minecraft Launcher, then Play to open Minecraft.
- Make sure you run the same version of Minecraft as the server setup.
-
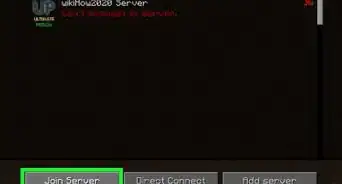
5Click Multiplayer. This will be underneath Singleplayer.
-
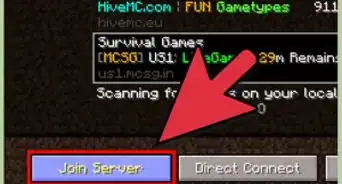
6Click Add Server. This will be next to Direct Connection.
-
7Under "Server Address", enter localhost. This will work for yourself and other people on your Wi-Fi network.
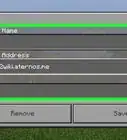
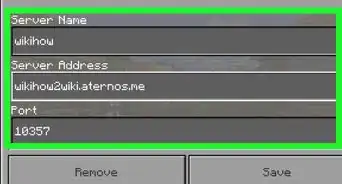
- If desired, you can enter a name under Server Name.
-
8Click Done. The server will be added underneath the Play Multiplayer header. If you have other servers added, you may need to scroll down to find yours.
-
9Double-click your server. You'll begin to connect to your server.
- You can now start building and exploring.
-
10Set your character as the admin (optional). Once you're loaded into your server's world, you can set your character as the admin.
- Switch to the "Minecraft server" application window. This should always be running in the background as you host your server.
- In the "Log and chat" field, enter op [username] and press Enter.
- If your username is "player_one", the command should look like op player_one.
- You'll see the success prompt: "Made player_one a server operator".
-
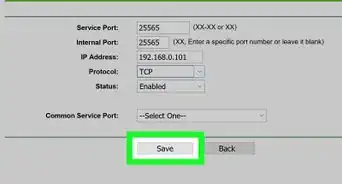
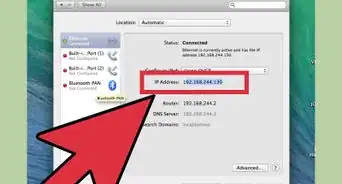
11Invite other players (optional). To play with others, you must set up port forwarding on your router. Once this is completed, you'll be able to find and share the server address.
- Find your IP address.
- If you don't know your IP address, open Google and search "what is my ipv4 address".
- You'll see your public IP address in the search results.
- Find your server port number.
- Open the "server.properties" file.
- Locate server-port. In most cases, the number will be 25565.
- Find your complete server address. This will be your IP address and server port number separated by a colon (:).
- For example, this will look like 77.232.22.133:25565.
- Friends will need to launch Minecraft, click Multiplayer → Direct Connection → input 77.232.22.133:25565.
- You'll now be able to play Minecraft with your friends.
- Find your IP address.


Community Q&A
-
QuestionDo I need to pay if I create a server with these methods?
 Community AnswerNo. These methods are free. However, if you want simpler, easier to work with servers, then you will have to pay on a different website.
 -
QuestionHow do I make it creative?
 Community AnswerYou can go into the "Server Command" section on Home in your Dashboard, and type /gamemode c@p.
 -
QuestionWhat happens if I don't port forward?
 Community AnswerNothing. It will simply give a request refused error as if you didn't have a Minecraft Server at all.


References
About This Article

1. Go to https://www.minehut.com.
2. Create an account.
3. Enter a name for the server.
4. Select a server type and click Create.
5. Click Dashboard.
6. Click Activate Server.