X
This article was co-authored by Zac Churchill. Zac Churchill is from Davidson, North Carolina, and currently attends Tufts University. He has played Minecraft for over eight years and has extensive knowledge on how to play Minecraft and how the game has changed over the different versions. Specifically, Zac has expert experience in survival worlds, large builds on creative mode, and server design/upkeep.
This article has been viewed 304,559 times.
By setting up a Minecraft server on your Mac computer, you'll be able to connect to it from any other computer on the same network. With a few tweaks to your network settings, you'll be able to connect to it from anywhere in the world as well.
Steps
Part 1
Part 1 of 3:
Setting Up the Server
-
1Download the Minecraft Server files. To set up a server, you'll need some files from the Minecraft website:
- Visit https://minecraft.net/en-us/download/server in Safari. [1]
- Download the JAR file for the server program..
-
2Create a new folder for the server files. This will be the folder for your server program.[2] You can place it somewhere easy to access, such as on your desktop. The server can be labeled anything, such as "Minecraft Server."Advertisement
-
3Drag the downloaded JAR file into the new folder. When you run the file, the folder will fill with the various configuration files for the new server. For now, just drag the downloaded server JAR file to the new folder.
-
4Rename the file to "minecraft_server.jar." You'll want to remove the version numbers from the end of the file. This will make it easier to run commands for the server later.
-
5Start the TextEdit application. You can find this in your Applications folder. From the desktop, click the Go menu and select "Applications."
-
6Click the "Format" menu and select "Plain Text." This will switch the new document to a plain text document.
-
7Paste the following commands into the text file. This set of commands will start the server. You can replace -Xms1G -Xmx1G with -Xms2G -Xmx2G to increase the RAM for the server from 1 GB to 2 GB:[3]
#!/bin/bash
cd "$(dirname "$0")"
exec java -Xms1G -Xmx1G -jar minecraft_server.jar
-
8Save the file as .start.command in the same folder as the JAR file. Select "Save" from the TextEdit menu and save the file in the same folder as the server file you downloaded from the Minecraft website.
-
9Open the Terminal. You can find this in the Utilities folder. From the desktop, click the Go menu and select "Utilities."
-
10Type .chmod a+x in the Terminal window. Make sure to include a single space after a+x.
-
11Drag and drop the .start.command file into the Terminal window. This will add the path to that file at the end of the chmod a+x command.
-
12Press ⏎ Return to run the command. This will change the permissions of the start.command file, allowing it to start your server.
-
13Double-click the .start.command file to run it. This will start your server. You'll see some error messages, but this is only for the first time you run the sever. The server will generate several files in the folder its in.
- The server will stop automatically after running the first time.
-
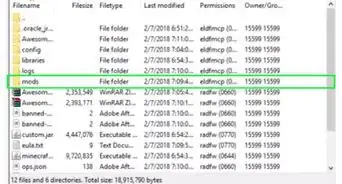
14Open the "EULA.txt" file that is created in the folder. You'll need to make a small change to this file to proceed.
-
15Change the “eula=false” line to “eula=true.” This will indicate that you have agreed to the terms of service for the Minecraft server software. Save the change to the file and close it.
-
16Double-click .start.command again. This will start the server back up and show the server command line. Additional files will be downloaded and the server's world will be generated, which may take a few moments.
-
17Type /op <username> into the server command line. Replace <username> with your Minecraft username. This will give you admin privileges when you connect to the server from your Minecraft account.
-
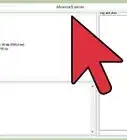
18Make changes to the server properties by editing .server.properties. Double-click this file and select TextEdit when prompted for a program to open it. You can change the values of these entries to change how the server works, but be aware that incorrect entries may cause the server to malfunction. You'll need to restart the server after making any changes.[4]
- The gamemode entry lets you choose from 0 - Survival, 1 - Creative, 2 - Adventure, 3 - Spectator.
- You can change the level-seed entry to enter any seed you'd like to use.


Advertisement
Part 2
Part 2 of 3:
Connecting to the Server on LAN
-
1Determine the server's local IP address. When you're connecting to the server from other computers on the same network, you'll need to know the server's IP address.
- On the Mac running the server, click the Apple menu, select "System Preferences," then select "Network."
- Select your network connection and look for the "IP Address" entry. Make note of this address.
-
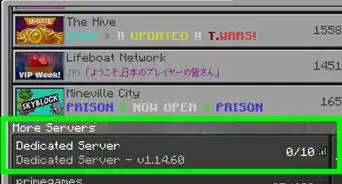
2Open Minecraft on another computer on your network. You don't need to forward any ports or change other advanced settings if the other computer is on the same local network as the server computer. If your server computer is powerful enough, you can run Minecraft on it at the same time, but this isn't recommended for most computers.
- If you want to have your friends join your server over the internet, see the next section.
-
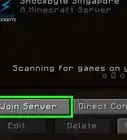
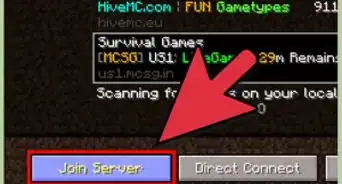
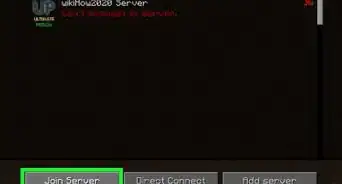
3Select "Multiplayer" on the second computer. This will begin scanning for available games. There's a good chance that you won't see your server available, even though it is.
-
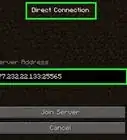
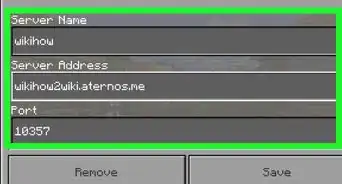
4Click the "Direct Connect" button. This will open a window allowing you to enter an address.
-
5Type in the server's local IP address. After entering the address, you will connect directly to it and the game will load. If you cannot connect, make sure both computers are on the same network.
- Multiple computers can connect to the same server using this address, as long as they are all on the same local network.
- If you are playing on the same computer as the server, enter localhost instead of the server IP address.


Advertisement
Part 3
Part 3 of 3:
Connecting to the Server Over the Internet
-
1Determine the server's local IP address. You'll need this address in order to properly forward ports so that others can connect to your server.
- Click the Apple menu on the server Mac and select "System Preferences."
- Click the "Network" option and then select your active connection.
- Note the "IP Address" line.
-
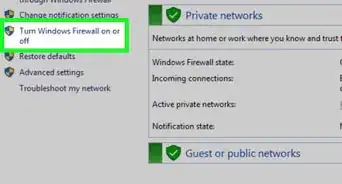
2Open your router's configuration page. In order for others to connect to your server over the internet, you'll need to configure your router to allow incoming connections. To do this, you'll have to access your router's settings. If you are using a router like Netgear or Belkin, you can access your router's configuration page from your web browser. If you're using an Apple AirPort router, you can use the AirPort Utility from your Utilities folder.
- See Access a Router for detailed information on opening your router's configuration page.
-
3Open the Port Forwarding section. The location of these settings will vary from router to router. Generally, you'll find them in the WAN or the Advanced section. It may be labeled "Applications and Gaming" or "Virtual Servers."
-
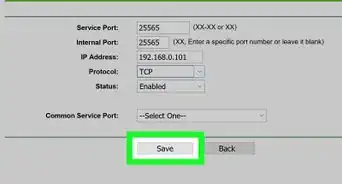
4Open TCP port 25565 for your server's IP address. Enter your server's IP address into the IP address field, then enter 25565 into the Port field. Make sure to select "TCP" as the protocol. Save your changes when complete.
-
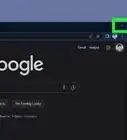
5Determine your public IP address. Your friends will need to enter your public IP address in order to connect to your Minecraft server. The quickest way to determine your public IP address is to open Google on the server computer's web browser and type "my IP." Your public IP will be displayed at the top of the search results.
-
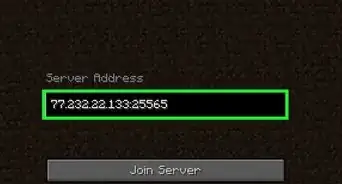
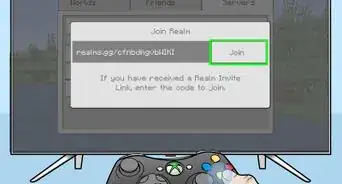
6Enter the server's public IP in the Direct Connect menu on another computer. Now that the server is accessible from the internet, your friends can connect by opening the Multiplayer menu in Minecraft, clicking "Direct Connect," and then entering the server address.
-
7Check your server's public and local IP address on a regular basis. Whenever your server computer restarts, it will get a new local IP address from your router. When this happens, you'll need to change the port forwarding rules to reflect the new address, or no one will be able to connect from the internet. Also, your internet service provider may occasionally change your public IP address, which will need to be entered whenever your friends connect.
- Players can create servers to play with friends or random Minecraft users from different devices.[5]
- For instance, a Minecraft pocket edition server is a Minecraft world on the mobile version.[6]
- Players can also create large servers to allow many players to join and play minigames that put a spin on the regular Minecraft mechanics.[7]


Advertisement
Community Q&A
-
QuestionHow can I make more servers on the same computer?
 Community AnswerJust repeat the process as many times as you want, but you do need to port forward every server if you want to play online with friends.
 -
QuestionThe Minecraft website changed! How do I download step 2?Community AnswerGo to "minecraft.net/download/server" instead of "minecraft.net/download".
-
QuestionDo I need to do port forwarding?
 Community AnswerIf you want to play with other people around the world, then yes. Forward to port 25565.
Advertisement


References
- ↑ https://www.idtech.com/blog/creating-minecraft-server
- ↑ https://www.sportskeeda.com/minecraft-wiki/how-to-update-server-minecraft
- ↑ http://www.howtogeek.com/202958/how-to-run-a-simple-local-minecraft-server-with-and-without-mods/
- ↑ http://minecraft.gamepedia.com/Tutorials/Setting_up_a_server
- ↑ https://www.idtech.com/blog/creating-minecraft-server
- ↑ https://blogs.windows.com/devices/2015/09/18/how-to-play-multiplayer-minecraft-pocket-edition/
- ↑ https://www.tynker.com/minecraft/server-setup-instructions
About This Article

Zac Churchill
Minecraft Specialist
This article was co-authored by Zac Churchill. Zac Churchill is from Davidson, North Carolina, and currently attends Tufts University. He has played Minecraft for over eight years and has extensive knowledge on how to play Minecraft and how the game has changed over the different versions. Specifically, Zac has expert experience in survival worlds, large builds on creative mode, and server design/upkeep. This article has been viewed 304,559 times.
Co-authors: 24
Updated: October 23, 2022
Views: 304,559
Categories: Minecraft Servers
Advertisement