This article was co-authored by wikiHow Staff. Our trained team of editors and researchers validate articles for accuracy and comprehensiveness. wikiHow's Content Management Team carefully monitors the work from our editorial staff to ensure that each article is backed by trusted research and meets our high quality standards.
The wikiHow Video Team also followed the article's instructions and verified that they work.
This article has been viewed 682,346 times.
Learn more...
If you want to delve into the world of soap making, but are too afraid to work with lye, consider making a new bar of soap using old bars of soap. This is a great way to learn the basics of soap making and experiment with additions, such as oatmeal and essential oil. You can also use this method to salvaged botched batches of homemade soap. This process is called hand-milling and produces what's known as "hand-milled" or "rebatch" soap.
Steps
Preparing the Base
-
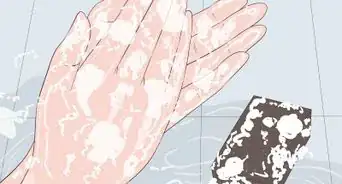
1Choose some soap. You can use any type of soap you want, but something unscented and natural, such as pure-castile soap, would work best. This will give you more options for customization later on. Plan on using about 12 ounces (341 grams) of soap.
- Rebatch soap will have a grainy texture once cured. It will not be as smooth as a regular bar of soap.
- If you are using multiple scraps of soap, try to use the same fragrance, otherwise, you might end up with a not-so-nice fragrance.
- You can use different colors, but keep in mind that they may not always blend together to form a new color. Sometimes, they may appear as specks.
-
2Grate or cut the soap into small pieces. The easiest way to do this would be with a grater, but you can also mince the soap with a knife. The smaller the pieces, the faster your soap will melt.Advertisement
-
3Place the soap into a double boiler. Fill a saucepan with 1 to 2 inches (2.54 to 5.08 centimeters) of water. Set a heat-safe bowl on top; make sure that the bottom of the bowl does not touch the bottom of the pan. Pour the grated soap into the bowl.
- If you have a crock pot, you can use that instead.
- You can also melt the soap directly in a saucepan without the bowl, but make sure that it's small so that the soap doesn't scorch.[1]
-
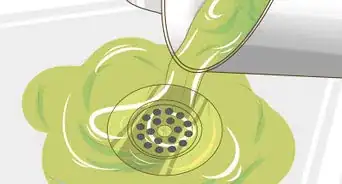
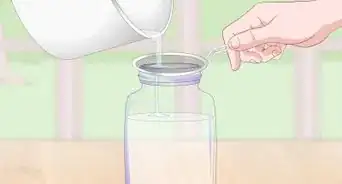
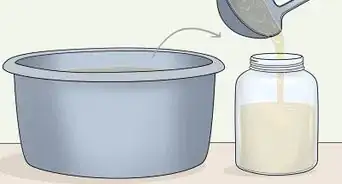
4Pour some water into the soap. You will need 9 ounces (255 milliliters) of water per 12 ounces (341 grams) of soap.[2] This will help soften the soap up. Avoid adding too much liquid, however, or the soap won't dry properly.
- If you want something extra-special, try tea or milk instead. You can also try goat's milk or buttermilk.
- If you are using freshly-made cold process soap, you may not have to use as much liquid, if any at all.[3]
-
5Start heating the soap, stirring every 5 minutes or so. Turn the stove on to medium-high heat and allow the water to come to a boil. Stir the soap every 5 minutes or so with a wooden spoon or rubber spatula. Make sure that you scrape the bottom and sides of the bowl.
- If you are using a crockpot, cover it with a lid and set it to high heat. You will still need to crack the lid open and stir it from time to time so that the soap does not burn.
- If you are heating the soap in a pot, heat it over low heat.[4]
-
6Continue cooking and stirring the soap until it softens. Rebatch soap will never fully melt like melt-and-pour soap. Instead, it will turn into a grainy mixture, sort of like oatmeal or mashed potatoes. Be patient. This can take about 1 to 2 hours.
Adding Extras
-
1Allow the soap to cool down to 150 to 160°F (66 to 71°C).[7] You do not have to add the extras from this section if you don't want to, but they can make your soap feel more luxurious. You also don't have to add in all of the extras. Choose one or two (or three!) that appeal the most to you!
-
2Stir in some fragrance oil or essential oil for a nicer scent. Plan on using about ½-ounce (15 milliliters) per 12 ounces (341 grams) of soap.[8] If your soap is already scented, you might want to skip this step, or use a similar fragrance. For example, if your soap base is lavender scented, you could add in an extra drop of lavender oil.
- You don't need to use as much essential oil as fragrance oil. This is because essential oil is much more potent.
- Do not use candle making fragrance oil. It is not skin safe.
- Another option for fragrance is through spices. This will also give your soap some color. Plan on using 1 to 2 tablespoons (7.5 to 15 grams) of spices, such as ground cinnamon.[9]
-
3Mix in some nourishing oils for extra luxury. If you want your soap extra fancy, add in a few drops of nourishing oils, such as vitamin E oil, jojoba oil, almond oil, etc. Anything that you'd put on your skin is great for soap. Don't get too carried away here, however; too much oil can affect the curing process!
- Another nourishing additive is honey. Not only will it make your soap smell nice and more moisturizing, but it will also give it a nice, golden color. Plan on using ¼ to ½ cup (90 to 175 grams) of honey.[10]
-
4Add a few drops of soap making dye for color. Because soap-making dye is translucent, this option is only recommended for white-colored soaps. Purchase some soap making dye online or from an arts and crafts store. Add in 1 to 2 drops, then stir it in. Keep stirring until no streaks remain. If the color is not deep enough for you, stir in another drop.
- Soap making dye is very strong. Mix in 1 to 2 drops at a time until you get the color you want.
- You must use soap making dye. Do not substitute candle making dye, as it is not skin safe. Food coloring will not work either.
- You can add dye to brighten an existing color. For example, you can deepen a light blue soap base with blue dye.
-
5Add some texture with botanicals and exfoliants. This is great for those with dull or dry skin. The exfoliants gently buff away dry skin, leaving your skin feeling silky-smooth. Great choices include sea salt, oatmeal, and dried lavender buds. Here are the recommended amounts for every 12 ounces (341 grams) of soap:[11]
- ¾ to 1 cup (90 to 120 grams) of exfoliants, such as oatmeal, almond meal, coffee grounds, etc.
- 1 cup (50 grams) of low volatile oil content herbs, such as chamomile, calendula, and lavender. They can be fresh or dried.
- 1 to 2 tablespoons (1 to 2 grams) of high volatile oil content herbs, such as rosemary. They can be fresh or dried.
Pouring the Soap
-
1Prepare the mold. Purchase a plastic soap making mold. If your mold is plain and you want fancy soap, add in a rubber soap making stamp into the bottom, design-side-up. If you want to, lightly spray the inside of the mold with non-stick cooking spray. You can also rub a little bit of petroleum jelly into it.[12]
- You can purchase soap making molds and stamps online and in arts and crafts stores.
- Alternatively, you could use a silicone ice cube tray or baking mold.
-
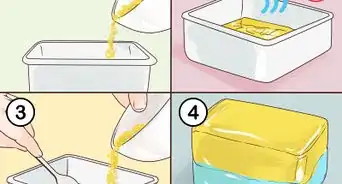
2Scoop the soap into the mold. Because of how thick this soap is, you won't be able to pour in. Instead, use a wooden spoon or rubber spatula to scoop the soap into its mold. Smooth the back of the mold down with the spoon or spatula.
-
3Drop the soap mold. Hold the soap mold about 6 to 12 inches (15 to 30 centimeters) above the counter, then drop it. This will settle the soap in the mold and release any air bubbles. You may need to do this a few times.
-
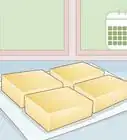
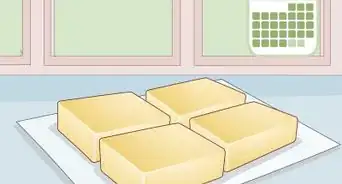
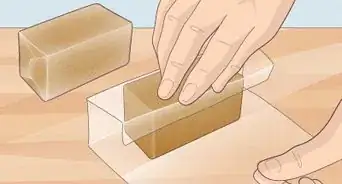
4Allow the soap to dry for 1 to 2 days before de-molding it. Once the soap is dry, carefully pull it out of its mold. If you used a long, rectangular, soap making mold, you can cut the soap into 1-inch (2.54-centimeter) thick slices.
- If you are in a hurry, pop the soap into a freezer for 1 to 2 hours before de-molding it.[13]
-
5Allow the soap to cure, if necessary. Depending on the type of soap you used, your rebatch may still feel a little soft and gummy. In this case, set it down on a wire cooling rack, and let it air dry for 2 to 4 weeks.[14] If you used store-bought soap, you may not need to do this, but if you used freshly-made cold or hot process soap, you most likely will.
- Some types of rebatch soap (typically made from store-bought bases) only need to dry for 2 days.
Community Q&A
Did you know you can get answers researched by wikiHow Staff?
Unlock staff-researched answers by supporting wikiHow
-
QuestionCan I melt a Dove bar soap?
 wikiHow Staff EditorThis answer was written by one of our trained team of researchers who validated it for accuracy and comprehensiveness.
Staff AnswerwikiHow Staff EditorStaff AnswerIt may be possible to use Dove hand soap for melting and reforming into a bar of soap but people report varying degrees of success because there is a lot of moisturizer in Dove soap, and this can impact the effectiveness of the rebatching process. Look for a rebatch recipe specifically focused on Dove soap, and that shows a successful outcome in the photos. If you find it’s just not working, Dove soap is reported to make an excellent liquid soap, although it can be a bit of a pricey way to produce it!
Support wikiHow by unlocking this staff-researched answer.
-
QuestionCan I melt soap in the microwave?wikiHow Staff EditorThis answer was written by one of our trained team of researchers who validated it for accuracy and comprehensiveness.
Staff AnswerwikiHow Staff EditorStaff AnswerYou can melt soap in the microwave, just be sure to use microwave-safe dishes. Use glycerine soap pieces or bar (other soaps may explode in the microwave), and grate or chop the soap into very small pieces. Put the pieces into a microwave-safe dish and either add a lid or microwave-safe food wrap to prevent splatters. Then, microwave on high in spurts of 15 to 20 seconds. Remove and stir, then continue heating in bursts until the melting is done (reduce to 5 second bursts when close to melting). Handle the melted soap with care, as it will be very hot.Support wikiHow by unlocking this staff-researched answer.
-
QuestionCan you melt soap on the stove?wikiHow Staff EditorThis answer was written by one of our trained team of researchers who validated it for accuracy and comprehensiveness.
Staff AnswerwikiHow Staff EditorStaff AnswerYes, melting soap on the stove is a standard way of rebatching soap. The article above explains the full process to follow.Support wikiHow by unlocking this staff-researched answer.
Things You'll Need
- 12 ounces (341 grams) soap
- 9 ounces (255 milliliters) water
- Cheese grater
- Double boiler
- Soap making mold
- Soap making dyes, fragrances, etc. (optional)
- Herbs, spices, etc. (optional)
- Wooden spoon or rubber spatula


References
- ↑ http://frugalkiwi.co.nz/2011/10/how-to-hand-mill-aka-rebatch-soap/
- ↑ http://frugalkiwi.co.nz/2011/10/how-to-hand-mill-aka-rebatch-soap/
- ↑ https://www.savvyhomemade.com/rebatching-soap/
- ↑ http://frugalkiwi.co.nz/2011/10/how-to-hand-mill-aka-rebatch-soap/
- ↑ https://www.savvyhomemade.com/rebatching-soap/
- ↑ https://www.savvyhomemade.com/rebatching-soap/
- ↑ http://frugalkiwi.co.nz/2011/10/how-to-hand-mill-aka-rebatch-soap/
- ↑ https://www.soapqueen.com/bath-and-body-tutorials/rebatch-soap-plastic-baggie-technique-2/
- ↑ http://frugalkiwi.co.nz/2011/10/how-to-hand-mill-aka-rebatch-soap/
- ↑ http://frugalkiwi.co.nz/2011/10/how-to-hand-mill-aka-rebatch-soap/
- ↑ http://frugalkiwi.co.nz/2011/10/how-to-hand-mill-aka-rebatch-soap/
- ↑ https://www.savvyhomemade.com/rebatching-soap/
- ↑ http://frugalkiwi.co.nz/2011/10/how-to-hand-mill-aka-rebatch-soap/
- ↑ http://frugalkiwi.co.nz/2011/10/how-to-hand-mill-aka-rebatch-soap/
About This Article
If you want to make a new bar of soap out of the remnants of old bars of soap, grate or cut the old soap into small pieces and place the pieces into the top part of a double boiler. Pour water into the bottom of the double boiler, then add a little water, tea, or milk into the soap. Slowly heat the soap on medium-high until it’s melted, stirring every 5 minutes or so, for 1-2 hours. When the soap is melted, scoop it into a mold. Tap the mold on your table or counter several times to release any air bubbles, then allow the soap to dry for 1-2 days. To learn more about adding additional oils or exfoliants to your soap, continue reading below!