X
wikiHow is a “wiki,” similar to Wikipedia, which means that many of our articles are co-written by multiple authors. To create this article, 16 people, some anonymous, worked to edit and improve it over time.
This article has been viewed 87,162 times.
Learn more...
You may need a prop iPhone for a home movie, or you may simply love making paper crafts. Making a paper iPhone is an easy paper craft project, and you can even embellish it to make it appear more realistic.
Steps
Part 1
Part 1 of 3:
Making the Screen and Back
-
1Find the proper iPhone template. Use an online image search for the type of iPhone you want. Since different generations of iPhones have different dimensions, you’ll want to do a search for the specific generation you want.[1]
- If you search for the generation you want with “paper craft” also in the search bar, you should come up with several results that are to the proper scale.[2]
-
2Print the paper craft template. Use a high-quality printer to print your iPhone template. You can use plain printer paper, but glossy photo paper is going to give you a much better result.[3]Advertisement
-
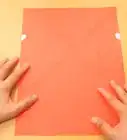
3Cut out the template. Many paper craft templates will actually have the lines around which you need to cut the template. Cut the screen, back, and sides of the phone out of the piece of paper.[4]
- Don’t cut the pieces out separately. You will make folds in the paper to form the shape of the iPhone, so you will need to cut the template out as one piece rather than cutting out the screen, then the back, etc.[5]
-
4Fold the template into the appropriate shape. Make a 90-degree fold on each “side” of the phone. This will give you the general shape of the phone. You will still have small tabs along the outside edge of the phone. Don’t worry about those just yet; they’re where you will eventually glue the folds together.
Advertisement
Part 2
Part 2 of 3:
Assembling the iPhone
-
1Trace the shape of the phone on a piece of cardboard. In order to give the phone some stability and heft, you should place a piece of cardboard inside the template before gluing it together. Start by tracing the screen size on a piece of cardboard.
- If you really want to make a sturdy prop, then you can always make the filler from plywood instead of cardboard.
-
2Cut the filler out from the cardboard. After you have the design traced, cut out the piece of cardboard. Be careful to make straight cuts so that it doesn’t misshape the paper when you place it inside.
- Depending the the thickness of cardboard you use and the dimension of the generation of iPhone you printed, you may need two or even three pieces of cardboard to reach the proper thickness. If this is the case, line all of them up, so they’re flush and glue them together.
-
3Place the cardboard inside the template. Once you have the cardboard to the proper thickness, place it between the front and back portion of the template. Use a small dab from a glue stick to glue the cardboard to the screen and back so that it doesn’t move around inside the finished product.
- The cardboard should be the same size as the folded template, but even a tiny amount of slippage can bulge the paper or make visible creases in it.
-
4Glue the rest of the phone together at the tabs. Use the glue stick on the protruding tabs on the template and finish assembling the phone. It will be as simple as sliding the tab under the overlapping part of the template, lining it up so it doesn’t appear jagged on the printed portion, and holding it for a moment to dry.[6]
- Many paper craft templates may also have slots for you to stick the tabs into to help hold the finished product together.[7]
Advertisement
Part 3
Part 3 of 3:
Embellishing the iPhone
-
1Trace the screen shape on a thin, clear piece of plastic. A thin, clear piece of plastic on the screen will give the printed home screen a more textured and glossy look. Start by tracing the screen size on the piece of plastic.
- The piece of plastic should be rigid but still very thin. The type of plastic that libraries use as jacket covers on hardback books is perfect; however, do not vandalize a library book. If you ask nicely, they might simply give you one, or you can use another similar material.
-
2Cut the screen cover out of the plastic. Make sure you cut very straight and inside the line where you traced the image, so you can’t see the lines you drew on the material.
- Don’t worry if this makes the screen cover very slightly smaller than the iPhone shape since screen covers usually are a tiny bit smaller anyway.
-
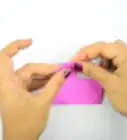
3Use a craft knife to cut a small circle from the bottom. The Home button at the bottom of the iPhone screen is always slightly concave. By cutting a small circle the size of the Home button out of the plastic, you’ll give the space a stronger illusion of depth. Use a craft knife so you can cut out the circle without actually cutting all the way to the edge of the plastic.
-
4Attach with clear double-sided tape. Use a very small piece of clear double-sided tape to affix the screen cover to the screen portion of the phone. With the gloss from the piece of plastic, you’ll hardly be able to see the tape.
- If you print the initial template on glossy photo paper, this will make the tape even more difficult to see.
-
5Finished.
Advertisement
Community Q&A
-
QuestionI cannot change the size of the iPhone template. Any ideas? What is the site name?
 JULIANNA BETHCommunity AnswerPapercraft is the website. I think if you print it off, it won't be small.
 -
QuestionHow do I make it look like I'm really using the paper phone?
 Community AnswerPretend it is a real phone and treat it the same way!
 -
QuestionWhat should I say if people ask me questions about it?Community AnswerJust say it's your new phone. If they ask you if they can use it or something, tell them the battery is about to die.
Advertisement
Things You’ll Need
- A computer
- A printer
- Internet access
- Printer paper (preferably glossy photo paper)
- Craft knife
- Cardboard
- Glue stick
- Clear double-sided tape
- A thin, clear piece of plastic


References
- ↑ https://www.youtube.com/watch?v=nLMqCBb5eZo
- ↑ http://www.cultofmac.com/46359/cant-wait-for-iphone-4-make-a-paper-one/
- ↑ https://www.youtube.com/watch?v=nLMqCBb5eZo
- ↑ https://www.youtube.com/watch?v=nLMqCBb5eZo
- ↑ https://www.youtube.com/watch?v=nLMqCBb5eZo
- ↑ https://www.youtube.com/watch?v=nLMqCBb5eZo
- ↑ https://www.youtube.com/watch?v=4H_zNhxHlTE
About This Article
Advertisement