This article was co-authored by wikiHow staff writer, Jack Lloyd. Jack Lloyd is a Technology Writer and Editor for wikiHow. He has over two years of experience writing and editing technology-related articles. He is technology enthusiast and an English teacher.
The wikiHow Tech Team also followed the article's instructions and verified that they work.
This article has been viewed 644,706 times.
Learn more...
This wikiHow teaches you how to turn a non-wireless printer into a wireless printer by connecting it to a router. If doing that doesn't work for your printer, you can also attach the printer to an Internet-connected computer and share the printer with other computers on your network.
Steps
Using a Router-Connected USB Printer
-
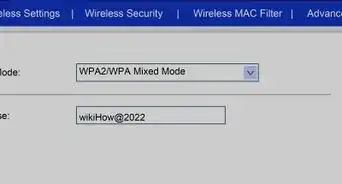
1Check for a USB port on the back of your router. If your router has a USB port on the back of it, you can connect your printer to the router by using the USB to USB cable which came with your printer.
-
2Buy a USB to Ethernet adapter if necessary. If there is no USB port on the router, you'll need to buy a USB adapter that plugs into one of your router's Ethernet ports.
- You can find these adapters online in places like Amazon and eBay, though you may also be able to find them in tech stores like Best Buy.
Advertisement -
3Place your printer near your router. Your printer should be close enough to your router that you can connect the USB cable without bending any of the cable's connections.
-
4Attach your printer to your router. Plug one end of the USB cable into the back of your printer, then plug the other end into the back of your router.
- If you're using a USB to Ethernet adapter, first plug the adapter into one of the Ethernet ports on the back of your router.
-
5Plug your printer into an electrical source. You may need an extension cable or a power strip in order to complete this step.
-
6
-
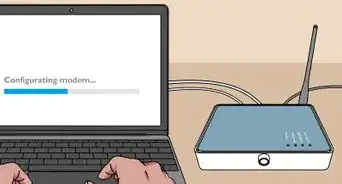
7Wait for 10 minutes. This should give your router enough time to recognize and implement the printer.
- Your Internet may slow down for a few minutes while your router installs drivers for the printer.
-
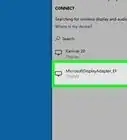
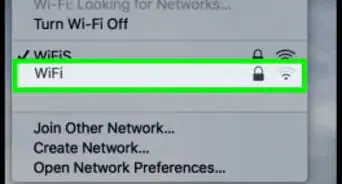
8Attempt to connect to the printer. Make sure that your computer is on the same wireless network as the router into which your printer is plugged, then do one of the following depending on your computer's operating system:
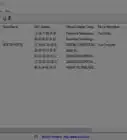
- Windows - Open Start , click Settings , click Devices, click Printers & scanners, click Add a printer or scanner, select the wireless printer, and click Add device.[1]
- Mac - Open the Apple menu , click System Preferences..., click Printers & Scanners, select the wireless printer on the left side of the page, and click Add.[2]
- If you're unable to connect to your router, try one of the following host computer methods instead.


Using a Host Computer on Windows
-
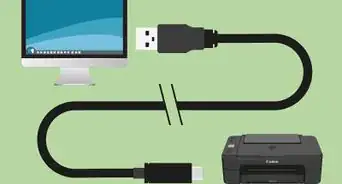
1Attach your printer to the computer that you want to use as the host. This method allows you to use an Internet-connected computer to act as the wireless source for your printer. You'll start by plugging your printer into your computer via the printer's USB cable.
-
2Plug your printer into an electrical outlet. Try to select an electrical outlet close to your computer in order to avoid stretching or bending the cord.
-
3
-
4Follow any on-screen prompts. If prompted to download new drivers or install specific software, you'll need to follow the on-screen directions before proceeding.
-
5
-
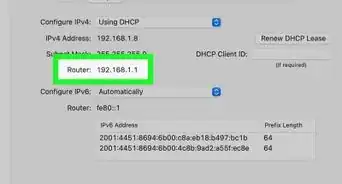
6Open Control Panel. Type in control panel and then click Control Panel when it appears at the top of the Start menu.
-
7Click Network and Internet. It's a heading near the top of the page.
- If you see "Small icons" or "Large icons" to the right of the "View by:" heading in the upper-right side of the window, skip this step.
-
8Click Network and Sharing Center. You'll find this option in the middle of the page.
-
9Click Change advanced sharing settings. It's a link in the upper-left side of the page.
-
10Check the "Turn on file and printer sharing" box. You'll find this option below the "File and printer sharing" heading.
-
11Click Save changes. It's at the bottom of the page.
-
12Click Control Panel. This tab is in the upper-left side of the Control Panel window. Doing so takes you back to the main Control Panel page.
-
13Click View devices and printers. It's a heading near the bottom of the page.
- If you're viewing small or large icons instead, you'll click Devices and Printers here.
-
14Right-click the connected printer. Doing so will prompt a drop-down menu.
- If your mouse doesn't have a right-click button, click the right side of the mouse, or use two fingers to click the mouse.
- If your computer uses a trackpad instead of a mouse, use two fingers to tap the trackpad or press the bottom-right side of the trackpad.
-
15Click Printer properties. It's near the middle of the drop-down menu. Clicking this option opens a new window.
-
16Click the Sharing tab. This is at the top of the new window.
-
17Share the printer with other computers on your network. Check the "Share this printer" box, then click Apply and click OK at the bottom of the window.
-
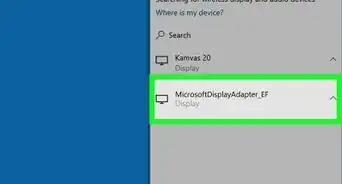
18Attempt to connect to the printer. Using another computer that's connected to the same Wi-Fi network as the host computer, you'll do one of the following depending on your computer's operating system:
- Windows - Open Start , click Settings , click Devices, click Printers & scanners, click Add a printer or scanner, select the wireless printer, and click Add device.
- Mac - Open the Apple menu , click System Preferences..., click Printers & Scanners, select the wireless printer on the left side of the page, and click Add.


Using a Host Computer on Mac
-
1Attach your printer to the computer that you want to use as the host. This method allows you to use an Internet-connected computer to act as the wireless source for your printer. You'll start by plugging your printer into your computer via the printer's USB cable.
- If your Mac doesn't have a traditional USB 3.0 port (the rectangular version), you'll need a USB 3.0 to USB-C adapter.
-
2Plug your printer into an electrical outlet. Try to select an electrical outlet close to your computer in order to avoid stretching or bending the cord.
-
3
-
4Follow any on-screen prompts. If prompted to download new drivers or install specific software, you'll need to follow the on-screen directions before proceeding.
-
5
-
6Click System Preferences…. It's in the drop-down menu. Doing so opens the System Preferences window.
-
7Click Sharing. This option is in the System Preferences window. A new window will open.
-
8Check the "Printer Sharing" checkbox. It's on the left side of the window.
-
9Select your printer. Click your connected printer's name in the "Printers" section of the window.
-
10Attempt to connect to the printer. Using another computer that's connected to the same Wi-Fi network as the host computer, you'll do one of the following depending on your computer's operating system:
- Windows - Open Start , click Settings , click Devices, click Printers & scanners, click Add a printer or scanner, select the wireless printer, and click Add device.
- Mac - Open the Apple menu , click System Preferences..., click Printers & Scanners, select the wireless printer on the left side of the page, and click Add.


Community Q&A
-
QuestionCan I use a smartphone instead of a computer?
 Community AnswerYou may for basic needs, Word, browsing the internet etc. If you want gaming or video editing, I highly recommend a computer.
 -
QuestionHow do I connect my printer to my computer via WiFi?
 Community AnswerUsually, it is done automatically through the printer's drivers. However, if that is not the case.. Here are a few suggestions: 1) Use a driver to install your printer (if not done already). 2) Try installing it via USB first, then try installing it with the WIFI.
Warnings
- Printers can vary heavily based on their built-in software. If you have any questions about your specific brand of printer, it's best to consult your printer's manual or online documentation.⧼thumbs_response⧽


-Step-8-Version-2.webp)
-Step-30.webp)

-Connection-Step-12-Version-5.webp)

References
About This Article
1. Buy a USB-to-Ethernet adapter if necessary.
2. Place the printer near the router.
3. Attach the printer to the router.
4. Plug the printer in and turn it on.
5. Open your Windows Settings.
6. Go to Devices > Printers & Scanners.
7. Click Add a printer or scanner.
8. Click Add device to add your printer.