This article was co-authored by wikiHow Staff. Our trained team of editors and researchers validate articles for accuracy and comprehensiveness. wikiHow's Content Management Team carefully monitors the work from our editorial staff to ensure that each article is backed by trusted research and meets our high quality standards.
There are 11 references cited in this article, which can be found at the bottom of the page.
This article has been viewed 22,827 times.
Learn more...
Seashell planters are a creative and unique way to show off your indoor or outdoor plants. These planters use shells that you can find on the beach or in the ocean to create fantastic-looking pots. You can upgrade an existing pot, or you can use the shells themselves to house your plants. Regardless of what you do, creating and displaying your very own seashell planter is a cheap and easy way to decorate your garden or living space.
Steps
Applying Seashells Directly to a Pot
-
1Get a terracotta, clay, or plastic planting pot. Planting pots can be found at most major department stores or home and gardening stores. Plastic planting pots are the easiest to use for this project because the shells will adhere easier to the plastic than clay or terracotta, which require a hot glue gun to hold the shells in place.[1]
- Spraying a spray cement sealer may also help your shells stick to your pot when using ceramic, clay, or terracotta pots.
- Painting your pot allows you to create a different look for the spaces in between the shells, where the pot's color can be seen.
-
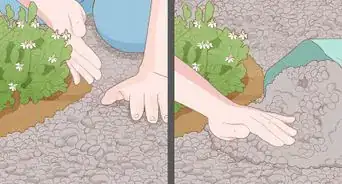
2Rinse your shells under cold water. Rinse and clean your shells so that there isn’t any leftover sand or dirt in them. Once the shells are clean, leave them out in the sun to dry or wipe them down with a dry rag.Advertisement
-
3Lay out your shells on the ground. Lay out your shells so you can get a visual for what they might look like on your pot. You can use any kind of shells and ones that differ in size and shape. Using different sorts of shells will make your planter more unique and eye catching.[2] Try to think of different designs that you can create using different types and sizes of shells.
- For instance, if you have long, thinner shells, you can arrange them in a star position.
- A common seashell planter idea is to get shells of about the same size and cover the entirety of the pot.
-
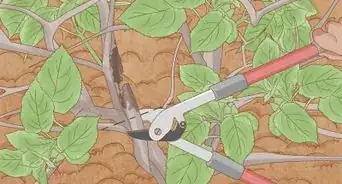
4Glue your seashells to the side of the pot. Starting from the bottom, begin to apply your seashells to the pot using a hot glue gun to hold them in place. Use your hot glue gun to put a dab of glue on the bottom of the shell then apply it to the pot. Once they are held in place, you’ll want to reinforce the shells by using a stronger glue, like Gorilla or super glue, to hold the shells in place for the long run. Drip the glue on the sides of the shell so that it adheres to the pot.
- If you only use hot glue, then your shells will slide off when it gets hot outside.
- Hanging your seashells upside down will prevent them from gathering water inside and attracting bugs.[3]
-
5Apply sanded grout to hold your shells in place. This is an optional step if you want to increase the longevity of your seashell planter and ensure that none of the shells fall off. Apply sanded grout that you’ve purchased from an arts and crafts store over the surface and in between the cracks of the shells on your planter. Allow the grout to set for 20 minutes, then use a warm rag to wipe down any excess grout on top of the shells or in between the cracks.[4]
-
6Allow your seashell planter to dry overnight before using it. If you don’t allow your glue to dry, the shells may come off your seashell planter. Once the glue on your planter is completely dry, you can place it outside in your garden, or inside depending on what kind of plant it is.


Creating a Miniature Planter
-
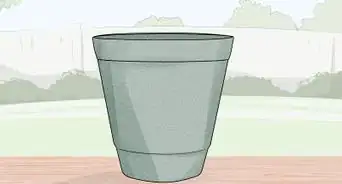
1Find a suitable seashell. Look for a hollowed shell that is big enough to house a succulent plant and some dirt. Succulent plants don’t require as much water as other indoor houseplants and can thrive in a smaller habitat like the inside of a seashell.[5] Look for larger clamshells or other seashells that are of a suitable size. Scour beaches and try to find a hallowed shell.
- There are also online stores that sell hallowed seashells.[6]
- You can also find man-made synthetic seashells online.
-
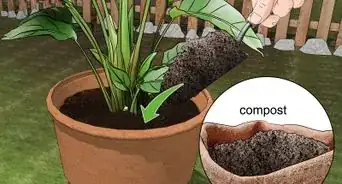
2Fill your shell ¾ of the way with soil. You can use soil that you’ve found in the yard or fertilizer. Succulents thrive in loose soil that has good drainage. When choosing a soil choose things like coarse sand or perlite with potting soil to create good drainage.[7] Make sure to fill your shell outside or over a sink so that you don’t make a mess.
- You can also purchase succulent specific soils at most home and gardening stores.
-
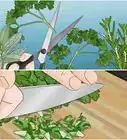
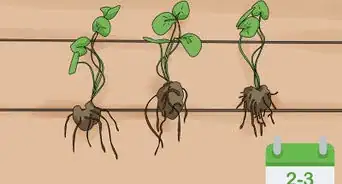
3Plant your succulent into the soil. Use your finger, or a chopstick to create a hole in the soil. Place your succulent into the holes that you make. Place more holes for more succulents until you have a full arrangement within your planter. Once your plants are in the holes, you can put more soil to fill the remainder of the holes and hold your plants in place.[8]
- When placing your holes, make sure to do so strategically so that your arrangement is aesthetically pleasing to you.
-
4Decorate your seashell planter. While this step is optional, decorating your planter with paint or small gems is a good way to enhance its look and make it more unique. One method of painting your shell is to use watercolor paint. Mix colors together to create a tie dye seashell planter.[9] Another method of painting is to use a metallic spray paint and spray the shells to give them a shiny, metallic look.[10] Lastly, you can hot glue small gems or stones onto the surface of the shell to give it a more glamorous feeling.
-
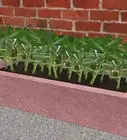
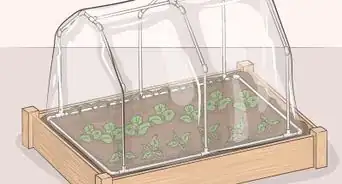
5Place your miniature seashell planters on a shelf or windowsill. Because these planters are more delicate and are likely to get destroyed if placed outside, it’s probably a good idea to keep them inside your house. Find a place, like a window that leads to outside, where the succulents can get enough sunlight.
- Allow the soil to dry out before watering your seashell planters.[11]
-
6Hang your seashell planters with fishing line. Find the small holes that are usually found in many shells and thread a fishing line through them in order to hang them. If there are no holes in your shells, you can drill small pilot holes using an electric drill.[12] Hang the planters in areas that won’t obstruct people’s walking paths.
- Good locations to hang your miniature planters include the porch or a shed.


Community Q&A
-
QuestionDo sea shells add good minerals to the plant soil?
 Becky GreenCommunity AnswerYes! Seashells are full of calcium, which is good for the soil and is full of nutrients to help the plant grow.


-Oven-Step-15.webp)

References
- ↑ https://us.billabong.com/blog/post/seashell-planter-diy
- ↑ http://opulentcottage.typepad.com/opulentcottage/2010/05/decorative-shellencrusted-flower-pot.html
- ↑ http://www.sandandsisal.com/2016/07/diy-shell-planter.html
- ↑ https://newengland.com/yankee-magazine/living/crafts/seashell-planter/
- ↑ http://www.bhg.com/gardening/houseplants/projects/top-10-succulents-for-home/
- ↑ https://www.etsy.com/shop/ByTheSeashoreDecor
- ↑ http://getbusygardening.com/diy-succulent-potting-soil/
- ↑ http://www.detroitnews.com/story/life/home-garden/2016/07/21/turn-seashells-nautical-succulent-planters/87402150/
- ↑ http://fun-a-day.com/shell-painting-easy-ocean-art-for-kids/
About This Article