wikiHow is a “wiki,” similar to Wikipedia, which means that many of our articles are co-written by multiple authors. To create this article, volunteer authors worked to edit and improve it over time.
wikiHow marks an article as reader-approved once it receives enough positive feedback. In this case, 95% of readers who voted found the article helpful, earning it our reader-approved status.
This article has been viewed 79,249 times.
Learn more...
Sprouting seeds at home is a great way to give yourself access to healthy, tasty sprouts around the clock. Sprouts can be eaten raw, have numerous health benefits, and add a nice, crisp texture to salads and other dishes. Fortunately, it is very easy to make a seed sprouter at home, so you can be enjoying crisp home-grown sprouts in no time.
Steps
-
1Decide what type of seeds you want to sprout. There are many different options; all grains and legumes work well as sprouts. Alfalfa and clover are 2 of the most popular seeds for sprouting. Also popular are pumpkin, sunflower, almond and cabbage seeds. Taste and nutritional value are 2 things to consider when choosing a seed variety.
-
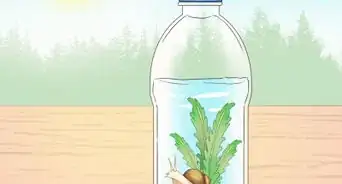
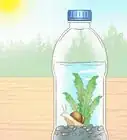
2Select a jar in which to sprout your seeds. The best thing to use is a glass canning jar; pint or quart (half-liter or liter) jars work best. Any glass jar will do in a pinch, though, including empty pickle or jelly jars.Advertisement
-
3Wash your jar with warm soapy water. Rinse the jar and then wipe it dry with a clean cloth.
-
4Cut a piece of cheesecloth into a square that is slightly bigger than the opening of your jar. This will be used to drain water from the jar. In place of cheesecloth, you could substitute nylon stockings or fine wire mesh. Anything that will let water pass through but won't allow the seeds to pass through is sufficient.
-
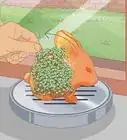
5Place your seeds in the jar. A few tablespoons (30 ml) or so worth of seeds is appropriate, although there is a wide margin for error. Adding too many seeds will generally result in some of them not receiving enough light to germinate.
-
6Fill the jar with room-temperature water. Place the cheesecloth square over the top of the jar, and then use the canning lid ring to secure it. If you are using a jelly or pickle jar, you can secure the cheesecloth tightly with a few rubber bands.
-
7Let the seeds soak overnight. The next morning, drain all the water from the jar by turning it upside-down over the sink and letting the water run through the cheesecloth.
-
8Each day, add just enough water to the jar to cover the seeds. Immediately drain the water off (the seeds should be wet, not fully submerged). Shake the jar so that some of the seeds stick to the sides of the jar; this allows them to reap the maximum amount of sunlight. Place the jar in a sunny location, and continue this rinsing routine once or twice a day until the sprouts appear.
-
9Enjoy your sprouts. Once the sprouts are 1 inch (2.5 cm) long, they are ready to be eaten. They can be enjoyed fresh in a salad or cooked in a stir-fry. Be sure to wash, rinse and dry your sprouting jars before using them again for sprouting. It is best to replace the cheesecloth every once in a while as you continue growing sprouts.
-
10Finished.


Community Q&A
-
QuestionDo they have to be sprouting seeds or will regular seeds do?
 Community AnswerRegular seeds will work.
 -
QuestionYour article refers to sprouting seeds needing the maximum amount of sunlight, whereas others I have read say it is essential to keep spouting seeds away from the light. So which advice is correct?The length of the sprout depends on how much light the seed gets. Traditional methods keep the seeds away from light to prevent the plant section from forming. If you want shorter sprouts, then following the article would be the preferred method.
-
QuestionCan I grow the seeds to maturity?Placing the sprouts in more direct light will force the plant to emerge. As the seed starts to disappear, the plant will need soil and/or plant food to mature completely.
Things You'll Need
- Seeds
- Canning jar
- Soap
- Water
- Clean cloth
- Cheesecloth
- Scissors
- Canning lid ring