wikiHow is a “wiki,” similar to Wikipedia, which means that many of our articles are co-written by multiple authors. To create this article, volunteer authors worked to edit and improve it over time.
wikiHow marks an article as reader-approved once it receives enough positive feedback. In this case, 93% of readers who voted found the article helpful, earning it our reader-approved status.
This article has been viewed 309,693 times.
Learn more...
A sofa slipcover can give new life to an older piece of furniture, as well as provide a room with a fresh appearance. While it is possible to buy slipcovers, making your own is more cost-effective and offers the benefit of using fabric that is exactly the color and texture desired. Best of all, it is possible to make a sofa slipcover using just a few basic resources and a couple hours of your time.
Steps
Preparing the Slipcover Material
-
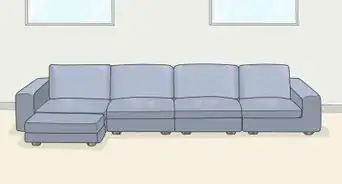
1Determine how much material you need. The following are general guidelines for fabrics in solid colors; patterns may need more in order to match the different pieces up. Note that fabric is sold by the yard, which is the measurement lengthwise. Bolts of fabric at the craft store have predetermined width, which you'll need to verify before purchasing. Typical widths range from 32 to 60 inches (81 to 152 cm), with 45 and 60 inches (114 and 152 cm) being the most common. The following measurements are based on fabric that is 54 inches (137 cm) wide.
- For a two-cushion sofa, use 16 yards (16 m)
- For a three-cushion sofa, use 18 yards (18 m)
- For a six-cushion sofa, use 22 yards (22 m)
- For a two-cushion love seat, use 13 yards (13 m)
- For a four-cushion love seat, use 17 yards (17 m)[1]
-
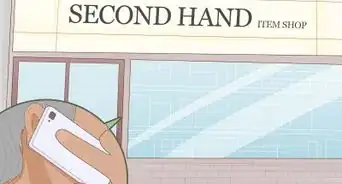
2Buy the slipcover material. You can purchase it at a fabric store or online.
- Consider a fabric in a solid color. Matching patterns or stripes across large panels can be tricky, so unless you're ready to put in this extra effort, look for a cover material that's a single tone.
- Opt for a fabric with a lot of drape – this will be much easier to work with.[2]
Advertisement -
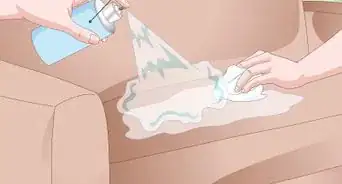
3Wash and dry the slipcover material. This softens the material and also accounts for any shrinkage that may occur. Don't skip this important step: the beauty of a slipcover is that it can be easily removed and washed, but you need to make sure it won't shrink after you've made it.[3]
- Be sure to follow care instructions for the particular fabric you're working with.
-
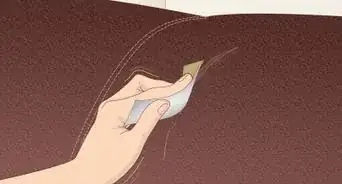
4Iron the material before attempting to begin work on the slipcover. Wrinkles could cause puckering in the finished product, so this ensures a smooth and accurate fit.


Creating the Slipcover Pattern
-
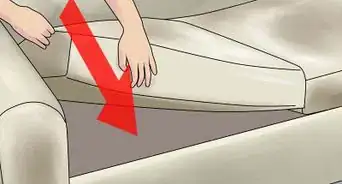
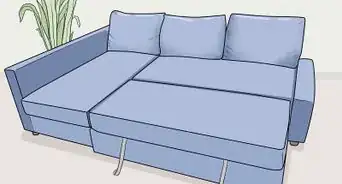
1Drape the sofa with cheap muslin or butcher paper and tuck in loosely. This mock cover should conform to the sofa's general shape. Since you're creating the pattern at this point, you can decide whether you want a close-fitting slipcover, or one that drapes more loosely.
- Note that it's okay if you need to use two or three large, separate pieces. In that case, you may need to secure sections to the sofa with safety pins.[4]
- The arm fronts don't need to be covered at this stage; see Step 3 for more details.
- If you're feeling confident, you can skip the mock-up and drape the sofa with the material you're going to use, wrong-side up (that is, the color or pattern should be facing down). In this case, you can trace the pattern onto the fabric itself with chalk.
-
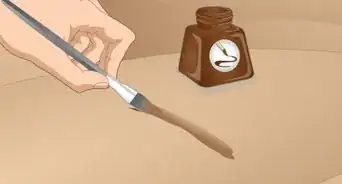
2Mark the pattern sections with chalk. Use chalk to identify where to cut out the pattern (with the exception of the arm fronts, which you'll do in Step 3). You should have a few different sections:
- the outside back of the sofa
- the seating area (including the backrest and front section that drops to the floor)
- the sides of the slipcover, which start on the outside and come up and over the inside of the armrests
-
3Measure the arm fronts. These are the two vertical sections on either side of the front of the sofa. It's easiest to create the pattern for them separately. Note that you need only make one pattern, which you can use to create both pieces.[5]
- Cut out one rectangular piece of paper or muslin, roughly the size of the arm front.
- Use pins to hold it to one of the arm fronts.
- Trace with chalk along the outline of the arm front.
- You'll use this piece for both armrests
-
4Cut out the pattern sections. Use the scissors to cut carefully along the chalk outlines you've made.


Sewing the Slipcover
-
1Cut out the sections for the sofa slipcover. Place large sections of the slipcover fabric on a flat surface, then cover with each of the pattern sections. Mark the dimensions on the fabric with the chalk and cut out each section, allowing about 1 inch (2.5 cm) seam allowance for hemming.
- Seam allowance is a bit of extra fabric you leave so that you can sew the pieces of fabric together.
- If your arm fronts are asymmetrical, be sure to flip the pattern over before tracing the second one.
-
2Pin the sections of the slipcover together. Lay the pieces of the fabric on the sofa, wrong-side out (i.e., pattern or colored side facing in to sofa). Use straight pins to assemble the sections of the cover, taking care to affix the pins just on the inside of the chalk lines. This will create the general shape for the slipcover.
-
3Sew the arm fronts to the armrest sections. Remove these sections from the sofa (you'll need to unpin them from the other sections, but don't touch the pins connecting the arm fronts). Use a sewing machine to stitch the sections together, using the chalk line as the "road" for the stitching.
- Remember to place the fabric into the sewing machine wrong-side up, so that your seams end up smooth on the right side.
- Remove the pins once you've sewn the pieces together.
-
4Sew the body of the slipcover. Remove the other two pieces (the back and seating area) from the sofa, taking care not to lose the pins. Use a sewing machine to join these two pieces together.
- Remove the pins once you're done.
-
5Return the body and sides to the sofa and re-join. Make sure the cover fits snugly and falls evenly. Add pins to join the sides and body once again.
-
6Sew the side sections to the body. Use the pins and chalk lines to guide you.
- Remove the pins from the seams as you go.
-
7Check the slipcover's fit. Place the cover back on the sofa, wrong-side out. Make sure the seams are straight and the cover fits smoothly across the surfaces.
- If there are any spots that need fixing, now is the time. Remove problem seams with a seam ripper and rework them so that they are straight.
-
8Trace a hemline along the bottom of the slipcover. Remove the slipcover from the sofa and spread it out on a large work surface. Use chalk to trace a hemline along the bottom, about 1/2-1 inch (1.25-2.5 cm) from the edge. Use a tape measure to make sure your line is straight.
-
9Pin the hem. Fold along the hemline (wrong side to wrong side) and secure the fabric with pins.
-
10Iron the hem. This step helps ensure a clean, straight hemline, and makes sewing easier.
-
11Hem the ends for a finished look. Use the sewing machine to make the hem. Pause from time to time to make sure the stitches are even and holding properly.
-
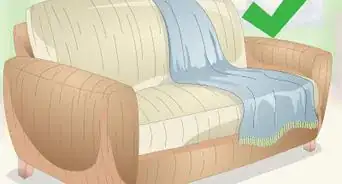
12Try the slipcover on for size. Turn the slipcover so the right side is facing out and place it on the sofa, carefully tucking the cover into place.


Community Q&A
-
QuestionI am making a slipcover for a sofa. Do I use the fabric going length-wise, or do I piece it together width-wise to get necessary width?
 Community AnswerThe fabric runs from sofa top to bottom, so you have to piece it to get the width you want. If your fabric is patterned, you will need extra length to match the pattern across so the design covers the sofa uninterrupted.
 -
QuestionIf my pillows are sewn in the back, should I remove them and cover separately, or should I cover over them?
 Community AnswerSome sofas may have been upholstered with cushions attached to the back, and sometimes the upholstery fabric may not have been used behind the cushions. However, if you want a fitted slipcover, it's best to remove the back sofa cushions and cover separately.
Things You'll Need
- Slipcover Pattern (in muslin or butcher paper)
- Fabric for Slipcover
- Scissors
- Straight Pins
- Chalk
- Sewing Machine
- Measuring Tape
References
- ↑ https://www.fabric.com/SitePages/SlipCovers.aspx
- ↑ http://www.dummies.com/how-to/content/tips-for-making-slipcovers.html
- ↑ http://www.thenester.com/2010/03/how-to-make-slipcovers.html
- ↑ http://www.honeybearlane.com/2011/06/how-to-make-a-couch-slipcover-part-1.html
- ↑ http://www.honeybearlane.com/2011/06/how-to-make-a-couch-slipcover-part-1.html
- ↑ http://www.dummies.com/how-to/content/tips-for-making-slipcovers.html
About This Article
To make a sofa slip cover, start by buying 16 yards of the material of your choice for a 2-cushion sofa, or 18 yards for a 3-cushion sofa. Then, measure the dimensions of your sofa and draw them onto the material using chalk. Next, take a pair of scissors and cut out the pieces of your cover, including any patterns. Once you've cut the pieces out, pin them together in the shape you want the cover to be sewn in. Sew the side sections to the arms of the sofa before sewing the back and seating area together. Finally, put the body part of the cover on the sofa and sew it to the arms. For tips on how to make a pattern for your slip cover, keep reading!