This article was co-authored by Kpoene Kofi-Bruce. Kpoene Kofi-Bruce is a tailor, couture wedding gown designer, and the Creative Director of Mignonette Bridal and Ette the Wedding Tailor in Chicago, Illinois. With nearly two decades of experience as a wedding gown designer, small business owner, and vintage sewing enthusiast, Kpoene specializes in wedding gown design and the social history of wedding dresses. She received a BA in Creative Writing from Middlebury College and studied the business of fashion at the Fashion Institute of Technology. She is also a graduate of the Goldman Sachs 10KSB program and the Chicago Fashion Incubator and has written about wedding fashion for Jezebel, Catalyst, the Sun Times, and XO Jane.
This article has been viewed 12,767 times.
By using elastic thread to add shirring to the material, you can make a sundress that is both simple and figure-flattering. Use double-fold bias tape to add no-fuss straps to the dress, or leave the dress strapless and allow the elastic to hold it up without assistance.
Steps
Part One: Prepare the Pattern
-
1Measure your bust. Wrap the measuring tape around the fullest part of your bust, keeping it parallel to the ground and taut without squeezing it into your body.
- Pinch the tape together at the front of your body and write down the measurement. This is your bust measurement.
- Multiply your bust measurement by 1.5, then add a seam allowance of 1/2 inch (1.25 cm). This will be the bust measurement you'll need to use for the pattern piece.[1]
- For example, if you have a bust measurement of 34 inches (86.36 cm), you would need to calculate the following: 34 * 1.5 + 1/2 = 51.5 inches (86.36 * 1.5 + 1.25 = 130.79 cm)
-
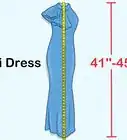
2Determine your desired length. Extend a measuring tape from the top of your bust (just beneath your armpit) down to the point you would like the bottom hem to hit. Stand up straight and keep the tape as straight as possible, too.
- Write down the measurement. This will be the final length of the dress.
- To calculate how much material you'll need to cut, take this length measurement and add 1-1/2 inches (3.75 cm) for the top seam allowance and 3 inches (7.6 cm) for the bottom hem.
- For example, if you want the sundress to be 30 inches (87.55 cm) long, you would need to calculate the following: 30 + 1.5 + 3 = 34.5 inches (76.2 + 3.75 + 7.6 = 87.55 cm)
Advertisement -
3Transfer the measurements onto your fabric. Use a measuring stick and fabric pencil to sketch a large rectangle on the wrong side of the fabric. The rectangle should have a width matching your altered bust and a length matching your altered length.
- If the material has a pattern on it, make sure that the pattern is upright with respect to the length of the dress.
- This tutorial only calls for one rectangle of fabric, but if you want even side seams, you could split the pattern into two separate rectangles. To do that, you'll need to add another 1/2 inch (1.25 cm) to your altered bust measurement, then divide the entire altered bust in half; doing so should give you the necessary width of each rectangle.
-
4Cut out the material. Double-check your measurements, then carefully cut out your rectangle of fabric using fabric scissors, fabric shears, or a rotary cutter.
- From this point on, you'll only need to work with your measured rectangle of fabric. You can set aside the remaining material and save it for another project.


Part Two: Sew the Edges
-
1Fold and press both hems. Double fold the top hem and bottom hem according to your calculated seam allowances, then use an iron to press and hold the fold in place.
- For the top hem, fold over the edge toward the wrong side of the fabric by 1/2 inch (1.25 cm), then fold it over again by another 1/2 inch (1.25 cm).
- For the bottom hem, fold over the edge toward the wrong side of the fabric by 1 inch (2.5 cm), then fold it over again by another 1 inch (2.5 cm).
-
2Stitch along both hems. Prepare your sewing machine and sew a straight stitch along the entire top hem. Break, then sew another straight stitch along the entire bottom hem.
- Stitch along the innermost fold of the pressed hem for both the top and bottom edges.
- You could technically save or alter the bottom hem after you add shirring to the dress, but the top hem must be completed beforehand since the shirring will make it too difficult to get a straight top edge.
-
3Sew the side seam together. Fold the material in half with the right sides facing each other. Pin it in place, then sew a straight stitch down the entire open length, using a seam allowance of 1/4 inch (6 mm).
- If you choose to use two pieces of material instead of one, you'll need to sew along both open length-wise sides.
- Since the raw edges will remain visible, you should also consider stitch back over them with an overlock or zigzag stitch. Doing so will help neaten the edge and prevent it from fraying or scratching against your skin.


Part Three: Stitch the Shirring
-
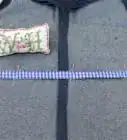
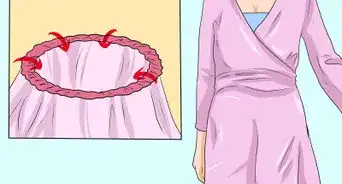
1Mark shirring guidelines on the material. Turn the material right-side out. Using a fabric pencil and a straight edge, mark horizontal shirring lines across the top of the fabric, placing the lines 3/8 inch (9.5 mm) apart.
- Place the first shirring line 1/4 inch (6 mm) down from the top hem of the material, but space all consecutive shirring lines 3/8 inch (9.5 mm) apart.
- The exact number of shirring lines will vary depending on the size of your bust. You'll likely need somewhere between 12 to 16 shirring lines, though. Mark out at least 12, then increase the amount later if necessary.
-
2Load the sewing machine with elastic thread. Wind the bobbin with shirring elastic by hand instead of doing so using the bobbin winder. Keep the elastic firm as you wind it, but do not stretch it or keep it taut.
- Note that you may need several bobbins of elastic to complete this dress, so it's a good idea to prepare two or three.
- Place the wound bobbin in the bobbin case and pull up the thread. Load the top of the machine with normal thread that matches the color of your dress material.
- Increase the stitch length by several notches and loosen the upper thread tension by one or two marks. The exact settings will vary depending on your machine and the material you use, so it's a good idea to test the settings on some of your leftover scrap material before working on the actual dress.
-
3Stitch along the shirring lines. Sew along each shirring guideline using a standard straight stitch. Start with the top guideline and gradually work down toward the bottom.
- Keep the material right-side up so that the elastic ends up on the wrong-side of the dress.
- Back stitch at the beginning and end of each row as you usually would.
- Hold the material as flat as possible while stitching the shirring lines. The first line of shirring won't cause much bunching, but with each consecutive row, the fabric will gather up more.
- Don't worry too much if your rows aren't perfect since small mistakes will be masked by the shirring. As long as the rows are mostly parallel and the material doesn't double up, the end result will likely be fine.
-
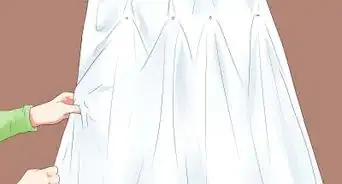
4Try on the dress. After working approximately 12 rows of shirring, try the dress on and evaluate the way it fits.
- You may need to add a few more rows of shirring. Try to gauge the point from which you'd like the dress to flare out, then add more lines of shirring to reach that point, spacing each additional line 3/8 inch (9.5 mm) apart.
-
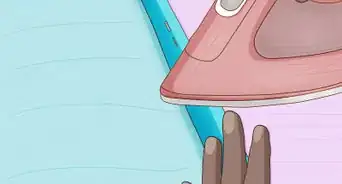
5Steam the material. Heat up a steam iron and lightly steam the elastic thread along the wrong-side of the dress without pressing it. As the steam flows, the thread should shrink and the material should look neater.
- Alternatively, give the right-side of the material a light press with a steam iron to accomplish the same result. Do not allow the hot iron to come into direct contact with the elastic, though.


Part Four: Add Optional Straps
-
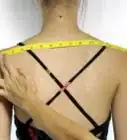
1Measure the necessary strap length. Try the dress on and stand in front of a mirror. Using a measuring tape, measure the distance between the front top and back top of the dress over your shoulder.
- This measurement is easier to find if someone else takes it. If you need to take the measurement yourself, err on the side of excess to prevent yourself from accidentally cutting the straps too short.
-
2Mark the correct placement. While you still have the dress on, mark the correct placement of your straps along the front and back using safety pins.
- If you're wearing a bra while doing this, the start and end point of your bra straps will usually be a good guideline.
- Note that this is another step that will be easier to complete with the help of someone else.
-
3Cut the bias tape down. Cut two lengths of extra-wide double-fold bias tape. Each length should match the necessary strap length, plus 1 inch (2.5 cm).
- Since bias tape is thick and neatly pressed, it's a convenient choice to use when adding straps to the dress.[2]
- For daintier straps, consider using ribbon instead of bias tape. Since the shirring should keep the dress snug against your body without the addition of straps, the actual straps won't need to do the work of holding the dress up.
- For coordinating straps, use some of your scrap material instead of bias tape. Double fold the material to hide any raw edges and press the folds in place with an iron. Make the straps as thick as desired, usually between 1/2 inch and 2 inches (1.25 cm and 5 cm).
-
4Stitch along the open edge of the bias tape. Load the sewing machine with normal thread (both top and bobbin), then sew a zigzag stitch along the open length of both strap pieces.
- Since you do not need to lock any raw edges into place, you could opt for a straight stitch instead of a zigzag stitch if you would prefer the look of a straight stitch.
-
5Attach the bias tape to the dress. Pin both straps to the strap marks of your dress, leaving 1/2 inch (1.25 cm) of strap beneath the top edge of the dress. Top-stitch the connecting points to the dress.
- Ideally, you should stitch the straps to the top of the dress following the upper hem stitch. Doing so should help mask the stitch marks.
- If necessary, neaten the raw edges of the straps using a zigzag stitch.
-
6Try on the dress. Try the dress on again and stand in front of the mirror. Check the placement and length of both straps.
- If you need to readjust the placement of your straps or shorten the length, pull out the connecting seams and make the necessary adjustment. Work carefully when ripping out the seam to avoid disturbing any of the shirring beneath it.
-
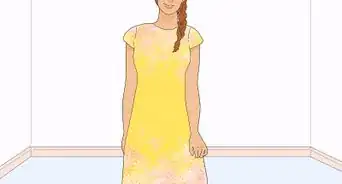
7Enjoy your new dress. At this point, your dress should be complete and ready to wear.


Things You'll Need
- 2 yards (2 meters) cotton, linen, or similar fabric
- 3 yards (3 meters) extra-wide double-fold bias tape
- Coordinating thread
- Sewing machine
- Elastic thread (shirring elastic)
- Measuring tape
- Measuring stick
- Fabric pencil
- Scissors, shears, or rotary cutter
- Straight pins
- Safety pins
- Steam iron
- Ironing board


References
About This Article