wikiHow is a “wiki,” similar to Wikipedia, which means that many of our articles are co-written by multiple authors. To create this article, 15 people, some anonymous, worked to edit and improve it over time.
This article has been viewed 92,075 times.
Learn more...
If you don't live in NYC, the saying goes, "You can't find a good bagel in this town!" Many folks will tell you it's the water in Manhattan that makes a good bagel. Don't be too sure. Here's how you can make those bagels you remember buying from a traditional Jewish deli right at home, whether you live in Manhattan, Miami, Anchorage or Seattle! This makes 1 dozen large bagels or 24 mini bagels.
The inspiration for this recipe was derived in part, from a water bagel recipe in Peter Reinhart's book, "The Baker's Apprentice", (c)2001, Ten Speed Press.
Ingredients
Sponge
-
4 cups or 520 grams of high-gluten bread flour (King Arthur brand) OR –
-
4 cups or 520 grams of bread flour + 4 tablespoons of vital wheat gluten
-
1 teaspoon instant (rapid rise) yeast
-
2-1/2 cups or 700 ml of water at room temperature
Dough
-
3-3/4 cups or 575 grams of bread flour
-
1/2 teaspoon instant (rapid rise) yeast
-
2 tablespoons of non-diastatic malt powder (or 1 tablespoon of barley malt syrup)
-
2 tablespoons of honey (optional)
- 3 teaspoons of salt
- Time:
-
Sponge: 10 minutes mixing, 2-hour rise;
-
Dough: 1 hour kneading, resting and shaping
-
Slow rise: Overnight
- Baking: 15 – 25 minutes.
Steps
-
1Make the sponge:
- Mix 4 cups of bread flour, 1 teaspoon of instant (rapid rise) yeast, and 2-1/2 cups of water in a 4 quart mixing bowl. It should look like thick pancake batter.
- Cover the bowl with plastic.
- Let the yeast do its job and allow the mixture to double in size (at least two hours).
-
2Make the dough.
- Mix 2 tbsp of malt powder (or 1 tbsp of barley malt syrup), 2 tbsp of honey, 1/2 tsp yeast, 3 tsp salt and about 3 cups of the bread flour to the sponge. Save the remaining 3/4 cup of flour for kneading. This step is easily accomplished in a bread machine or stand mixer. If you’ve used the high-gluten flour, this step might take additional strength and effort (your bread machine might overheat!)
- Once all of the ingredients have been mixed in, knead the dough by hand, adding the remaining flour as necessary for about 6 to 10 minutes, until the dough is a little stiff (not tacky) and a little springy. It should be satiny and smooth, without any dry bits of flour.
Advertisement -
3Divide the dough:
- Once the dough has been kneaded, divide it into one dozen pieces at approximately 4-1/2 ounces per piece. 3-7/8 oz. to 4 oz. yields about 16.
- Shape these into round smooth balls by using your thumbs to pull one surface of the dough around to that it forms a nice smooth skin and squeeze the folds on the bottom together to seal this ball. Take it and roll it between both cupped palms to further smooth out the folds and form a nearly perfectly round ball.
- Place these on a piece of greased parchment paper on a cookie sheet. You can let them rest for about 10 – 20 minutes to allow the gluten strings to reform before shaping them or begin shaping them once the last ball has been formed.
-
4Shape the bagels: Grab a ball of dough and push your thumb into the center and poke a hole. With fingers of both hands, begin enlarging the hole until it is at least 3″ in diameter. Work your hands around the circle so that the dough remains the same thickness around the hole. As the hole closes up, keep stretching it until it shrinks to no less than about 2″ diameter when relaxed. As each bagel is formed, place them on the greased parchment, or an oiled silicone baking mat. 6 – 8 large bagels will fit on one cookie sheet, or up to 12 if they're smaller. It’s essential that the bagels lift off of the parchment without stretching when ready to move towards the baking steps, so be sure that the surface is well greased.
-
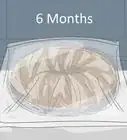
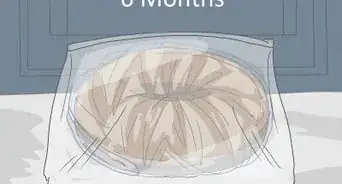
5Let the dough sit — ah, here’s the big secret! Once the bagels have been formed, let them rest for a few minutes to allow them to proof. You can tell if they’re ready by dropping a test bagel into a pot of room temperature water. If it floats, pat it dry. They’re ready for retarding. If it sinks, allow the bagels to rest for a few minutes longer. Spray the bagels with a light cooking oil spray and lay a sheet of plastic wrap over them. Now place them in the refrigerator to sit overnight or up to 36 hours. Retarding the dough allows the yeast to work on the proteins in the dough and yields some of the classic flavors that make bagels taste like bagels.
-
6Commence the famous boiling step...If you ask someone the secret around baking bagels and they’ll invariably tell you that it’s the boiling that makes a bagel a bagel. It’s true, but it is only a small part of the whole picture. The preceding steps have just as much to do with baking an authentic bagel as the boiling does.
- Place two baking racks in the center of the oven and preheat to 500 °F (260 °C).
- Fill a pot with water and add two tablespoons of the malt powder (or one tablespoon of barley malt syrup) while the water is still cool. Optional step: add 1 tbsp of baking soda to make it a little more alkaline. Bring it to a boil.
- Prepare a couple of baking sheets. If you’re using the oiled parchment, sprinkle some cornmeal or semolina flour on the parchment. If you’re using a silicone baking mat, the cornmeal or semolina is optional.
- Take the bagels out of the refrigerator. Carefully lift them and gently place 2 to 3 of them at a time in the boiling water, without crowding them. If you put too many in the water at once, you’ll cool it down below boiling.
- Boil them for 30 seconds to a minute on one side and then flip them over and boil for an additional 30 seconds to one minute on the other side. The longer you boil them, the tougher and more chewy the crust will become. Forty-five seconds to 1 minute per side seems to be ideal.
- (Note: If you desire a chewier bagel, you can boil these up to two minutes per side. The consistency and flavor will be fine, but there's a small trade-off - your bagels won't rise to a nice rounded height quite as much - they'll tend to be a little flatter when finished.)
- Take a slotted spoon and drain them. Place them on the baking sheet and sprinkle them with a topping or leave them plain. You can sprinkle them with a small amount of kosher salt or sesame seeds. Poppy seeds work really well, too. At this point the bagels may appear lumpy and misshapen — not to worry. The magic of the oven will take care of that in no time.
-
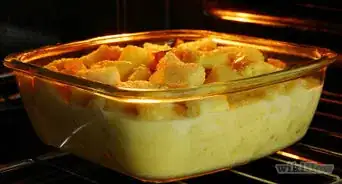
7Bake: Place the cookie sheets in the center of the oven and bake for five minutes at 500 degrees. After five minutes, lower the oven temperature to 450 degrees. Rotate the sheets by turning them around 180 degrees and put the top sheet on the bottom and vice versa. After another five minutes, rotate them as desired. Some ovens require that you swap positions at least one more time, but other ovens may vary. Put them back in and bake for approximately 7 to 10 minutes until they’re golden brown (or until they look like the bagels you want). Once they’re done, place them on cooling racks and let them sit for about 15 minutes. Then enjoy!>
-
8Finished!
-
9


Community Q&A
-
QuestionWhat do you do with the sponge that you prepared?
 KkeydelCommunity AnswerIn step 2, the remaining flour and ingredients are then mixed into the sponge to form the large batch of dough. The sponge just allows the yeast to hydrate and come alive. You add the flour to the sponge and begin kneading it in so that it is well blended and stiff.
 -
QuestionWhy do my bagels always deflate? I've tried moving them straight to the fridge after shaping, proofing until floating in water, etc. Every time they hit the boil they come out deflated.
 Community AnswerTake them out the water slowly.
 -
QuestionIs the flour in the dough mix high-gluten just like the flour in the sponge?
 Ann HupeCommunity AnswerTechnically, the King Arthur Sir Lancelot flour (their signature high-gluten flour) and standard bread flour are different flours due to protein content. I've used just the Sir Lancelot flour as the only flour in the recipe for bagels, so if you get just that one flour, you're set.
Warnings
- Don't let your bagels rise too long before proofing them in the refrigerator. If they do, they'll deflate like flat tires after the boiling stage. They should begin to float in a pan full of water after shaping. If they're at that stage, get them to the refrigerator for proofing/retarding right away!⧼thumbs_response⧽


References
- http://keydel.wordpress.com/2009/01/04/yes-you-can-make-a-good-bagel-at-home - Original source, shared with permission.