wikiHow is a “wiki,” similar to Wikipedia, which means that many of our articles are co-written by multiple authors. To create this article, 30 people, some anonymous, worked to edit and improve it over time.
This article has been viewed 303,407 times.
Learn more...
Do you love those cool pictures that seem to shift before your eyes? Are you fascinated by the shapes blending into each other? Tessellations are pictures formed by fitting together replicas of the same shape, so as to make amazing pattern formations. Tessellations can be found both in nature and through human creativity in art, murals, buildings, etc. A translation tessellation is a non-regular tessellation in which the pattern slides a polyiamond along the plane. It's easier to first try an easy shape and then try a more complicated one. Here's what to do.
Steps
-
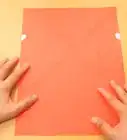
1Find an A4 size piece of paper. The piece of paper should correspond to the volume of your tessellation. If you want a larger tessellation, choose larger paper. If you want a smaller tessellation, choose smaller paper.
-
2Cut out a small square or parallelogram. This will form the basic shape from which your tessellation will be generated. Any translation tessellation can be constructed starting from a parallelogram-based tessellation. While not strictly necessary, using graph paper or making ruler marks along the edges will help with the next step.Advertisement
-
3Convert this base tessellation into a more interesting shape. By following these steps, you ensure that your shape will always be able to tile the plane.
- If you find it easier to work from a rectangular base, but want your tessellation to have slide symmetry, cut off one of the triangular flaps and append it to the opposite side. In the computer-generated image shown, the angle of the parallelogram was needed to determine the extent of the glide; if doing this by hand, you could start from this tessellation directly.
- Cut one side of the square and tape it to the opposite side. Do not flip it over or make any other movements other than sliding the paper to the opposite side. Use the ruler markings to ensure the cut portion is attached to the corresponding part of the opposite edge. In the image, a triangular region was moved to the opposite side.
- Repeat this cutting and pasting as desired. Moving one more triangular region creates the tessellation shown in the next step.
-
4Trace it on the 3" x 6" (7.5cm x 15cm) paper until it is full. Fill in the blank spaces with a color of your choosing.
-
5Go over the lines with a black permanent marker. Then make a design in the black permanent marker.
-
6Color it in anyway you like. Use contrast to create three dimensional effects or use free coloring the small or large paper with any favorite color.
-
7Ink it all over. Scrape off any extra ink.
-
8Let dry. Do not let the extra ink dry or it won't come off.
Community Q&A
-
QuestionWhat is the idea behind this tessellation?
 T. ChinsenTop AnswererIt demonstrates the basic principle in constructing a tessellation piece. The design is the simplest form to give you a visual representation of how the shape will look when applied to a sheet of paper.
 -
QuestionHow do I do a puzzle piece tessellation with a 3-inch square?T. ChinsenTop AnswererFollow the article instructions at Step 3. Instead of cutting a straight edge, make a more intricate line. Cut this out and attach to opposite uncut edge. Repeat this step with the remaining straight sides. You will now have a template to draw a tessellated image.
Warnings
- Ink stains easily; work on a newspaper covered surface and wear old clothes.⧼thumbs_response⧽
- Don't ever get the tessellation wet, except for the ink. It will crinkle up or tear if it gets wet.⧼thumbs_response⧽
- Younger children need supervision.⧼thumbs_response⧽
Things You'll Need
- Paper
- Scissors
- Markers
- Poster tack for pinning up the end design (optional)