wikiHow is a “wiki,” similar to Wikipedia, which means that many of our articles are co-written by multiple authors. To create this article, 200 people, some anonymous, worked to edit and improve it over time.
This article has been viewed 3,013,257 times.
Learn more...
If you’re in love the OS X interface, but prefer the customizability of your Windows PC, you can modify your Windows environment to mimic that of Mac OS X. With just a few simple programs, your desktop will be virtually indistinguishable from OS X.
If you want to actually install OS X on your Windows computer, you will need to ensure that you have the right hardware installed, as only certain components are compatible. Click here for a detailed guide on installing macOS on your PC.
Steps
-
1Download the "Yosemite Skin Pack". A "skin pack" will change the look of the Windows interface so that it mimics OS X functionality. All of your Windows programs. This is available for free from skinpacks.com.
- If you prefer to make Windows look and act like an older version of OS X, such as Mountain Lion, you can download skin packs for older versions from the same site.
- Make sure to download the correct installer for your version of Windows.
-
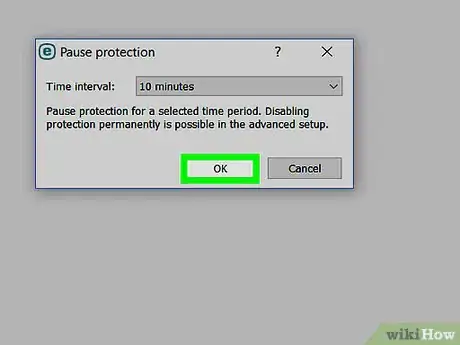
2Disable your antivirus. Since the skin packs will modify some system files, some antiviruses will block the installation. Disable your antivirus before proceeding with the installation.
- Most antivirus programs can be disabled by right-click on the icon in your System Tray and selecting Stop, Disable, or Exit/Quit.
Advertisement -
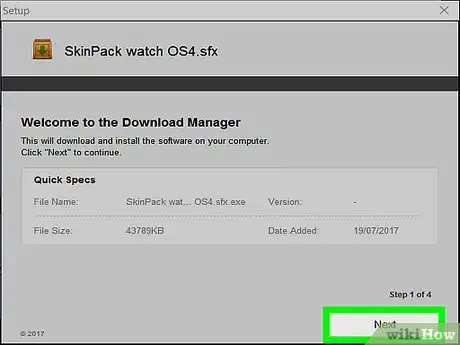
3Run the installer. It will take a few moments to unpack all of the files.
-
4Check the box to agree to the terms and conditions. This is required to install the Mavericks Skin Pack.
-
5Review the various components that will be installed. By default, all of the components will be checked to give Windows the most OS X appearance and functionality as possible.
-
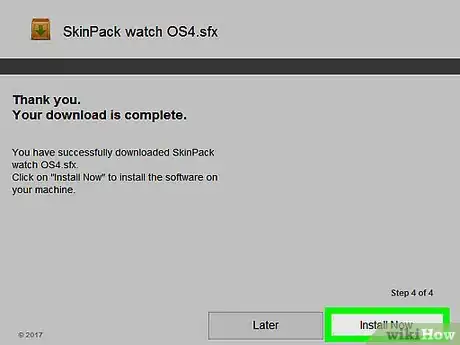
6Click .Install to install all of the visual components. If you don't want to include certain ones, uncheck them from the list first.
- Make sure that the "Restore Point" box is checked. This will create a restore point in Windows that will allow you to quickly revert back if you don't like the new look.
-
7Wait for the installation to complete. You will see the changes applied to your desktop as they are installed.
-
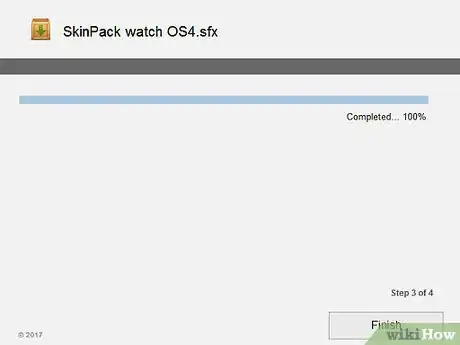
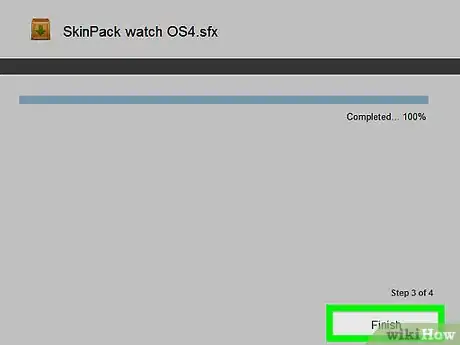
8Click .Finish to complete the installation. Your Windows interface will now be very similar to the OS X version that you chose to mimic.
-
9Revert to Windows. If you decide you don't like the way the skin pack works, you can return to the original layout by performing a system restore. Your files will be unaffected.
- Click here for instructions on using the system restore tool. Make sure to choose the restore point that was created during installation.
Community Q&A
-
QuestionI can't download a program because I get a notice that my computer must be 64 bits. What should I do?
 Community AnswerIt means that your computer runs in an older 32 bit format, which you'd have to reinstall Windows to change unless there are options to download it in 32 bit. Your installation disk should have both a 32 bit and 64 bit version of Windows on it. Your CPU has to be able to cope with a 64 bit version of Windows for it to install, though. You can check if you can run 64 bit Windows by opening the Start menu, clicking Control Panel, Performance Information and Tools, and then Performance Information and Tools again. Then, click view and print detailed performance and system information, and look at 64 bit capable in the System section. Remember to back up your files if you do decide to upgrade!







-Step-6.webp)


