Explore this Article
IN THIS ARTICLE
Other Sections
X
wikiHow is a “wiki,” similar to Wikipedia, which means that many of our articles are co-written by multiple authors. To create this article, 22 people, some anonymous, worked to edit and improve it over time.
This article has been viewed 589,639 times.
Learn more...
Have you ever seen those funny GIF animations from videos and wished you could make them too? Now you can make them easily! Just follow this guide to making them in Photoshop CS5.
Steps
1
Import the video.
-
To turn a video into an animated GIF, you'll need to turn each frame into a separate layer. This is really easy to do in CS5, as long as your video is in the MOV, .AVI, .MPG, .MPEG, or .MP4 format. Here's how:
- Click the File menu and select Import.
- Click Video Frames to Layers.
- Select the video and click Load.

Advertisement
2
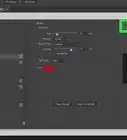
Choose which frames to use.
-
Check the appropriate selections under "Range To Import." To select only a few frames, check "Selected Range." This option will allow your GIF to be converted much faster. The size/layers will also be smaller so that you can easily edit the GIF. If you do this, move the slider in the video to your starting point, then hold shift and drag towards the ending point to ensure that a section has been highlighted.
- If you have a high frame rate video (over 60 frames per second) then check "Limit to Every [x] frames" and type a number in place of 'x'. This will select every xth frame which will make conversion faster and image size lower (and lower quality) by dividing frame rate by 'x'. You would want a frame rate of around 15-30.

3
Click "OK."
4
Open the Animation panel.

5
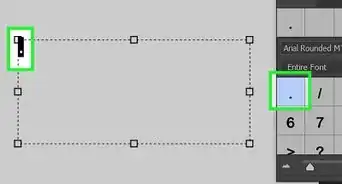
Clean up your frames.
-
In the animation panel, trim any unnecessary frames until your animation looks how you want it. This is also the time to add any new frames. Remember that if the number of frames is low, the size will be smaller and the GIF will take less time to load when you post it on a website.
- Check the time of the animation as shown on the screenshot at the right. Bigger numbers means slower animations that run less smoothly.
Advertisement
6
Turn on forever looping.

7
Crop the animation.

8
Resize the animation.

9
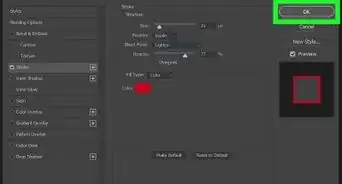
Save the animation as a GIF.
-
Saving a file as a GIF is a little different than saving in other formats.
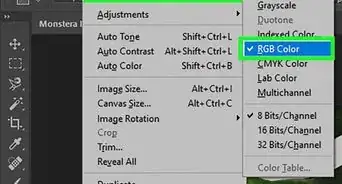
- Click the File menu and choose Save for Web & Devices.
- Change the setting to "GIF" to make sure it's animated.
- Click Preview to make sure everything looks right. If you want to change anything, you can always click Cancel to go back to Photoshop.
- The settings in the GIF menu apply compression. A lower file size will load faster in a browser but may look bad. GIF compresses by throwing away colors as you can see if you experiment with the settings.
- It's useful to choose 2 up on the upper tabs of the save for web dialog box. This allows a view of "before and after" and includes a preview with a file size.
- If everything looks fine, click Save. Fill in the file name and save it.

Advertisement
Things You'll Need
- Adobe Photoshop CS5
- A video file (.MOV, .AVI, .MPG, .MPEG)
- QuickTime 7.1 or higher (for Mac)
You Might Also Like
 How to Add Strokes to Text in Photoshop on PC or Mac
How to
Insert an Image in Photoshop
 How to Trace an Image in Photoshop on Windows or Mac
 4 Easy Ways to Insert a Bullet Point in Adobe Photoshop

How to
Add a Hyperlink to a Jpeg in Photoshop
 3 Ways to Simply Import Fonts to Photoshop
How to
Install Plugins in Adobe Photoshop
How to
Import an Image Into Photoshop
 Easily Unlock Any Layer in Photoshop: Even the Background Layer

How to
Design an ID Card Using Adobe Photoshop
 How to Rotate Objects in Photoshop: Using Image Rotation or Transform
How to
Add Text in Photoshop
How to
Make a Gradient in Photoshop
How to
Combine Layers in Photoshop
Advertisement
About This Article
wikiHow is a “wiki,” similar to Wikipedia, which means that many of our articles are co-written by multiple authors. To create this article, 22 people, some anonymous, worked to edit and improve it over time. This article has been viewed 589,639 times.
How helpful is this?
Co-authors: 22
Updated: June 2, 2022
Views: 589,639
Categories: Featured Articles | GIF | Adobe Photoshop
Advertisement