This article was co-authored by wikiHow Staff. Our trained team of editors and researchers validate articles for accuracy and comprehensiveness. wikiHow's Content Management Team carefully monitors the work from our editorial staff to ensure that each article is backed by trusted research and meets our high quality standards.
There are 8 references cited in this article, which can be found at the bottom of the page.
The wikiHow Video Team also followed the article's instructions and verified that they work.
This article has been viewed 185,443 times.
Learn more...
Let the Christmas crafting begin! All you need is a square piece of paper and a little bit of creativity to get started. If you’re a beginner, try making a simple origami Christmas tree or, if you’re ready for something more advanced, fold a 3D version. You’ll be rocking around the (paper) Christmas tree in no time.
Steps
Folding a Basic Origami Christmas Tree
-
1Lay a square piece of paper on a flat surface with the color side facing down. For example, if 1 side of your paper is green and the other is white, place the green side down on the surface. While you can use any size paper, make sure your sheet is a perfect square.[1]
- If you’re using paper that has color on both sides, it doesn’t matter which side you place face-down.
- You can use any type of paper, like origami paper or computer paper.
-
2Fold the paper in half diagonally then open it back up. Bring 1 corner over onto the opposite corner, creating a diagonal fold. Crease the fold firmly, then unfold the paper so it lies flat again.[2]
- It doesn’t matter which corners you fold together. For example, you could fold the top left and bottom right, or the top right and bottom left.
Advertisement -
3Bring the top left and right corners into the center so the edges of the paper align with the crease. Fold the top 2 corners in so that the edges of the paper line up with the crease in the center. This creates a kite shape. Run your finger along each fold to secure it in place.[3]
- Line up the 2 edges in the center so that they just barely touch. Don’t overlap them or leave a large gap between them.
-
4Flip the paper over and fold the left and right corners in so the top edges line up in the center. Bring the 2 corners in towards the middle, making the edges of the top of the paper flush with the center fold. This forms an even narrower kite shape.[4]
- Crease your folds so that they stay in place without you holding them down.
-
5Turn the paper over and fold it in half, bringing the bottom corner up to the top. Make a horizontal crease from the left corner to the right corner. Check that the 2 halves of the kite are perfectly aligned before pressing down on the fold to secure it. This turns your paper into a triangle shape.[5]
Did you know?
This type of fold is known as a valley fold in origami. It’s where you fold a piece of paper up and onto itself, creating a “V” shape if you were to open it back up.
-
6Fold 2/3 of the top corner back down so it hangs over the bottom of the triangle. This is the trunk of your tree. Crease the paper about 1/3 up from the base of the triangle shape so that the folded-down corner extends past the triangle at the bottom.[6]
- The further down you pull the corner below the triangle, the longer your trunk will be.
-
7Fold about 1/3 of the trunk up, creating a flat bottom. After you’ve created the trunk at the base of the triangle, take the very tip of the pointed corner and fold it back up. This flattens your trunk so it looks more realistic.[7]
- Don’t fold more than just the tip of the trunk, or you’ll end up with a very short base.
Making a 3D Origami Christmas Tree
-
1Set a square piece of paper color side down and fold it diagonally both ways. Lay the paper so that the blank white side is facing up, then fold 1 corner across to the opposite corner. Open the paper back up before folding along the opposite diagonal, too.[8]
- It doesn’t matter which side is facing down if you’re using a piece of paper that’s colored or patterned on both sides.
-
2Open the paper back up, then fold it in half vertically and then horizontally. After you make your diagonal creases, unfold the paper and bring 1 edge over onto the opposite edge, folding it in half horizontally. Crease the fold before opening the paper again. Then fold it in half the vertically.[9]
- Crease each fold firmly by running your finger along the fold while applying pressure.
Tip: To deepen your folds, you can go back and fold each crease in the opposite direction, too. Flip the paper over and fold the paper up along each fold you already made, creasing it in the reverse direction. This will make it easier to work with later on.
-
3Bring 2 opposite corners into the center, collapsing the paper into a square. Pinch the left corner and right corner in each hand and push them together to meet in the middle. As you do this, the paper collapses along the creases you made, forming a smaller square.[10]
- If you’re having difficulty getting the paper to fold in on itself, go back and deepen your previous folds so that the creases are less stiff.
- Press your palm down over the small square once you’ve folded it to secure it.
-
4Fold the corner of the top flap into the center. After you create your small square, there are flaps on each side. Line up the edge of 1 flap with the center crease by bringing the corner into the middle, then crease the fold.[11]
- You can start with either the left flap or the right flap.
-
5Slide your finger into the flap to open it, then flatten it against the square. Lift the flap up before opening it and then gently pressing it down, creating what’s known as a squash fold. The crease that you just made is now in the middle of the flattened shape. [12]
- Make sure the paper doesn’t get crumpled while you’re pressing down on it. Smooth out any wrinkles if necessary.
-
6Repeat the squash fold on the remaining 3 flaps. Once you’ve flattened 1 flap, do the same to the other 3 flaps. Flip the square over and fold the corner of the next flap in to the center before opening it up and pressing it down against the square. Continue until all of the flaps have been flattened.[13]
- You can flatten the flaps in any order you’d like. For example, you can work around the square clockwise or counter-clockwise.
-
7Fold the bottom corners up into the center of the tree to create a straight edge. This allows your tree to stand up. Take the 4 pointed corners and fold them each underneath themselves, so the paper is tucked inside the center of the shape.[14]
- If you have trouble making straight folds into the middle of the tree, fold the corners up in the opposite direction first. This makes a crease that you can use to guide your fold underneath.
Decorating Ideas for Origami Christmas Trees
String a couple of trees together if you want to make a festive garland.
Glue a tree to the front of a blank card to create homemade Christmas cards.
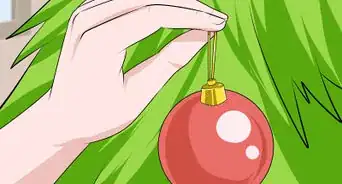
Tie a string or ribbon to the top of the tree for a pretty ornament.
Community Q&A
-
QuestionDo I have to use origami paper? Would it still fold nicely even with regular printing paper?
 Community AnswerOrigami paper is thinner than most other paper, and would fold much more easily than writing paper. Gift tissue might work if it's not too soft.
 -
QuestionIs there a simpler way to do this?
 Community AnswerNot really. Take your time and try to follow the instructions step by step.
 -
QuestionHow do you make an easy origami Christmas tree?
 Drew Hawkins1Community AnswerTake a square piece of paper and lay it on a flat surface with the color side facing down. Fold the paper in half diagonally to create a crease and then open it back up. Then, bring the top left and right corners into the center so the edges of the paper line up with the crease. Flip the paper over and fold the left and right corners in so the top edges line up at the center. Turn the paper back over and fold it in half by bringing the bottom corner up to the top. Finally, fold 2/3 of the top corner back down so it hangs over the bottom of the triangle and fold about 1/3 of the trunk up to make a flat bottom.


References
- ↑ http://www.origami-instructions.com/easy-origami-christmas-tree.html
- ↑ http://www.origami-instructions.com/easy-origami-christmas-tree.html
- ↑ http://www.origami-instructions.com/easy-origami-christmas-tree.html
- ↑ http://www.origami-instructions.com/easy-origami-christmas-tree.html
- ↑ http://www.origami-instructions.com/easy-origami-christmas-tree.html
- ↑ http://www.origami-instructions.com/easy-origami-christmas-tree.html
- ↑ http://www.origami-instructions.com/easy-origami-christmas-tree.html
- ↑ https://youtu.be/cU7StM0q9a0?t=114
- ↑ https://youtu.be/cU7StM0q9a0?t=128
About This Article

To make an origami Christmas tree, start by folding a square piece of paper in half diagonally and then unfolding it. Then, rotate the paper so it looks like a diamond, and fold the left and right points down to the center crease. Next, flip the paper over and fold the left and right points in to the center again. Once you've done that, turn the paper over again and fold the bottom point up to the top to create a horizontal crease across the middle. Finally, fold 2/3 of the top point down and fold 1/3 of the trunk up to create a flat bottom. To learn how to make a 3D origami Christmas tree, scroll down!


-Step-19-Version-4.webp)