This article was co-authored by wikiHow Staff. Our trained team of editors and researchers validate articles for accuracy and comprehensiveness. wikiHow's Content Management Team carefully monitors the work from our editorial staff to ensure that each article is backed by trusted research and meets our high quality standards.
There are 10 references cited in this article, which can be found at the bottom of the page.
This article has been viewed 61,060 times.
Learn more...
Radio controlled cars can provide hours of enjoyment straight out of the box, but their speed often leaves something to be desired. Luckily, all it takes is a few small tweaks to make them even more exciting. By installing a powerful lithium ion battery in place of the standard battery the car came with, you can up the juice up the voltage to the wheels and send the car off like a rocket. Other modifications, like switching out the individual motor gears, upgrading the tires, and removing excess weight from the chassis, can also have a serious impact on your RC car’s top speed and acceleration.
Steps
Replacing the Motor
-
1Invest in a high-performance brushless motor. Brushless motors are rated for a lower number of turns than the standard brushed motors that most consumer-grade RC cars come with. This allows them to run much faster and more efficiently. You can shop around for brushless motor systems where RC vehicles and accessories are sold.[1]
- If you’re don’t have an RC store in your area, take a look at specialty suppliers online.
- Brushless motors may also be rated by “motor velocity constant” (Kv)—the higher the number, the more powerful the motor.[2]
-
2Open up the body of the RC car. Loosen the screws on the plate covering the underside of the car, then remove the plate and set it aside. You’ll now have access to the inner workings of the car.
- Place the screws in a dish or small baggie nearby so you don’t lose them.
- Higher-end models often have open designs that allow you to see each of the car’s mechanical parts. On this type of car, you may only need to remove the small gear cover enclosing the motor compartment.[3]
Advertisement -
3Locate the motor. In most newer RC cars, the motor is a cylindrical unit in the rear of the chassis. It is connected by a series of colored wires to the electronic speed control (ESC) unit used to control the car.[4]
- Examine the internal layout of the car closely so you’ll be able to reassemble each component in the correct order.
- Some inexpensive models have two separate motors, one that turns the front wheels left and right and a larger one in the rear that actually powers the car. These types of motors are not meant to be modified, and may not be replaceable.
-
4Disconnect the motor from the mount. Pinch the connectors at the ends of the colored wires running from the motor to release them. Pull out the connectors carefully, then remove the entire motor unit in one piece. [5]
- Hold onto the old motor for now. You can use it as a backup in case there’s a problem with the new one.
-
5Insert the new motor. Fit the upgraded motor into the slot where old unit was, double checking that all wires and connectors are properly aligned and oriented. Slide the connectors into the ports until you hear them click.
- The power wires are color-coordinated, so be sure to match each connector with the color indicated on the port.
- If the model you’re running features dual motors for more complex controls, make sure you replace both of them so they’ll have an even amount of torque.


Installing a More Powerful Battery
-
1Purchase a high-output battery. No matter how tricked out your RC car is, it can only go so fast with a subpar battery. If you really want to leave your competition in the dust, opt for a battery with a greater voltage capacity, such as a nickel-metal hydride (NiMH) lithium-polymer (Li-Po) pack.[6]
- RC cars have been known to attain speeds of up to 100 mph (160 km/h) with cranked-up batteries. You can potentially add 15–20 mph (24.1–32.2 km/h) to your car’s top speed by upgrading the battery, even without making any other modifications.[7]
- To ensure that you get the right fit, measure your car’s battery compartment and buy a battery of the appropriate size.
-
2Make sure your motor can handle the extra power. When it comes to working with high-output batteries, a little boost goes a long way. Start small—if your car came equipped with a single cell battery, move up to a 2-cell or 3-cell. You can then increase the voltage incrementally from there, provided your motor can handle the jump.[8]
- If your car feels unusually hot after a session, it may mean that the upgraded battery is placing too much strain on the motor. In this situation, it's safest to just move down a size, since you won't be able to effectively make use of the extra power anyway.
- Using a battery that’s too powerful for your car could cause permanent damage to the motor or ESC.[9]
-
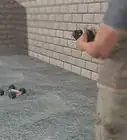
3Remove the existing battery. Pinch the connectors at the end of the colored wires and slide them out of the ports. Take out the battery and set it aside. You can put it into storage as a backup power source, or toss it out to free up room in your tool kit for superior packs.
- If you decide to keep your old battery, perform a before-and-after test run alongside the new one. You’ll most likely be surprised by the difference the sleeker, higher-output battery makes.
- Make sure you take your old batteries to the proper waste disposal or recycling site when it's time to get rid of them. Never throw rechargeable batteries in the trash.[10]
-
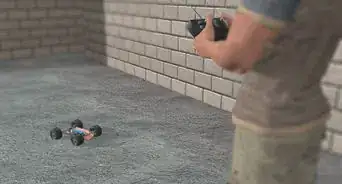
4Place the new battery into the compartment. Insert the battery carefully, matching up the wires according to color. Slide the connectors into the ports until they click. Replace the battery cover, if your model has one, then switch the car on and take it for a spin.
- Test the battery’s fit to make sure there are no loose connections or unnecessary movement in the pack itself.
-
5Charge your battery regularly. It’s important to be systematic about replenishing the cells in your new battery in order to keep it performing at its best. After every few hours of use, plug the battery pack into a dedicated charging unit and give it some juice. It’s also a good idea to charge batteries after they’ve been exposed to colder temperatures or have been in storage for a while.
- Make sure your RC car’s battery is fully charged before you take it out for a practice session or race.[11]
- If possible, pick up an extra battery or two so you’ll always have a spare on hand.


Making Other Small Tweaks
-
1Alter the gear ratio. Inside the body of the car you’ll find two interlocked circular gears, the small metal pinion, and the larger plastic spur. Unbolt both gears and lift them out of place to make room for their replacements. Since speed is your goal, you’ll get the best results using a larger pinion (with a larger number of teeth) and a slightly smaller spur (with fewer teeth).[12]
- If you’re more focused on improving your car’s acceleration than maxing out its top speed, go with a smaller pinion and a larger spur. You’ll be sacrificing a little bit of velocity, but you’ll make up for it with more precise cornering and cooler running temperatures.
- Changing the size of the gears is one of the simplest and least expensive ways you get your car running faster.
-
2Replace cheap bushings with ball bearings. Unscrew the bolts holding the wheels in place and slide the wheels off the axles. Remove the washers from the ends of the axles, then use a Phillip's head screwdriver to open the housing around the drive shaft and pop out the bushings inside. Insert four high quality ball bearings and reassemble the drive shaft and axle.[13]
- Most consumer-grade RC cars are outfitted with cheap brass bushings that turn the wheel on the axle. These bushings aren’t designed for high-output performance, and can slow your car down drastically.[14]
- The ball bearings are able to spin more freely than bushings. This eliminates drag, which can reduce engine strain, and increase battery life.
-
3Switch out the wheels. While you’ve got the wheels off, consider trading them out for a new-and-improved set. Select wheels with a tread that’s suited to your preferred racing style. That way, you can be sure that they’ll hold up under the most demanding conditions and make the most of the speed offered by your car’s other modifications.[15]
- Full spikes will offer more traction on uneven surfaces like mud and damp grass.[16]
- Mini pins perform well on carpet, turf, and other uneven terrain.
- Bald, slick treads and softer tire types are the best choice for hard, smooth paths like paved roads.
- If you’re looking for a good all-around tread, try mini spikes. They strike a balance between speed, grip, and maneuverability.
-
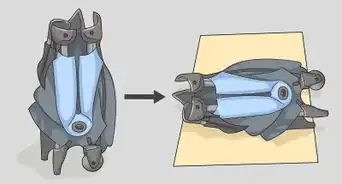
4Remove excess weight. Consider swapping out the stock frame of your RC car with a lightweight alternative such as aluminum or graphite. These materials will reduce the pressure on the wheels, which means they won't slow down the car as much as dense plastic and heavier metal pieces. Keep in mind that the lighter your car is, the less traction you'll have when changing direction.[17]
- If you're skilled with a rotary tool, use it to cut off unnecessary plastic sections of the chassis and surrounding body, like the bulky area around the battery socket or the speed control tray.[18]
- Trimming the majority of the bulk from the front end of the car can also help make it more aerodynamic (and also make it less likely to flip over when stopping at high speeds).


Things You'll Need
- Brushless RC motor
- NiMH or Li-Po battery pack
- Portable high-output battery charger
- Ball bearings for 1/10-sized RC car
- New pinion and spur gears
- Phillip's head screwdriver
- Multitool (usually included with the RC car)


References
- ↑ http://rcroundup.com/radio-controlled/rc-cars/how-to-make-an-rc-car-faster/
- ↑ http://learningrc.com/motor-kv/
- ↑ https://www.youtube.com/watch?v=G3QhLCZDeMU&feature=youtu.be&t=21
- ↑ http://www.radiocontroltips.com/how-to-make-your-rc-car-faster-electric-cars/
- ↑ https://www.youtube.com/watch?v=G3QhLCZDeMU&feature=youtu.be&t=6
- ↑ https://ourpastimes.com/mod-cheap-rc-cars-8323532.html
- ↑ https://www.youtube.com/watch?v=Zo05bKRwQTU&feature=youtu.be&t=207
- ↑ http://www.radiocontroltips.com/how-to-make-your-rc-car-faster-electric-cars/
- ↑ http://rcroundup.com/radio-controlled/rc-cars/how-to-make-an-rc-car-faster/
- ↑ http://www.businessinsider.com/how-to-recycle-batteries-2015-10
- ↑ http://www.radiocontroltips.com/how-to-make-your-rc-car-faster-electric-cars/
- ↑ https://ourpastimes.com/mod-cheap-rc-cars-8323532.html
- ↑ https://www.youtube.com/watch?v=j539gdEJGHY&feature=youtu.be&t=59
- ↑ https://www.youtube.com/watch?v=Zo05bKRwQTU&feature=youtu.be&t=57
- ↑ http://www.radiocontroltips.com/how-to-make-your-rc-car-faster-electric-cars/
- ↑ http://rcroundup.com/radio-controlled/rc-cars/how-to-make-an-rc-car-faster/
- ↑ http://rcroundup.com/radio-controlled/rc-cars/how-to-make-an-rc-car-faster/
- ↑ https://ourpastimes.com/mod-cheap-rc-cars-8323532.html
About This Article