This article was co-authored by wikiHow Staff. Our trained team of editors and researchers validate articles for accuracy and comprehensiveness. wikiHow's Content Management Team carefully monitors the work from our editorial staff to ensure that each article is backed by trusted research and meets our high quality standards.
This article has been viewed 115,443 times.
Learn more...
Silver was a popular metal used in coins for centuries, until its price reached the point that the metal in the coins exceeded the face value of the dimes, quarters, and half dollars that used it. While its price is significantly less per ounce than that of gold, some choose to melt old silver coins that are too damaged to have collector value to recover the silver in them. You’ll want to clean the coins first before melting them down.
Steps
Cleaning Silver Coins
-
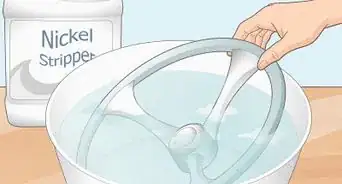
1Choose a non-metallic container. It should be more than large enough to hold the coins you want to clean. Keep in mind you’ll also need to pour water into this container so choose your container appropriately.[1]
-
2Place a sheet of aluminum foil at the bottom of your container. Unroll a sheet of aluminum just large enough to cover the bottom of your container and cut to size. Don’t worry if you have to fold up the corners of the foil for it to fit in your container.[2]Advertisement
-
3Boil water and pour it into the container. Pour water into a saucepan and bring it to a boil on a stovetop. Pour it into your non metallic container until it’s a few inches from the top. You may want to wear gloves or oven mitts in case the water splashes.[3]
-
4Add salt and baking soda to the container. Measure half a cup (170g) of baking soda and one tablespoon (14g) of salt. Add them both to the water. Use a stirring stick to help the two substances dissolve in the water.[4]
-
5Drop the coins into the solution. Be careful not to drop the coins too quickly, as this could cause the water to splash and burn you. Make sure the coins are placed on the foil in a single layer. If necessary, you can use a toothpick or a knife to nudge them so they don’t stack.
- You’ll see the baking soda start to react with the aluminum foil, stripping any tarnish the coins may have accumulated.[5]
-
6Remove the coins from the solution. It’s best to use tongs to remove the coins as they may be quite warm. Place them on a soft cloth and allow them to cool.
-
7Scrub any remaining grime with water and baking soda. If the coins are still dirty after their dip in hot water, you may need to give them a good scrub. Run the tap, keeping the water warm but not too hot. Take a pinch of baking soda, rubbing it onto the coin under the tap. The baking soda will mix with the water, creating a paste that makes for an efficient, non-abrasive cleaner.
- You can use an old toothbrush to help scrub the grime from the coin.[6]
-
8Dry the coins. Make sure the coins are rinsed thoroughly, clean of any grime or baking soda. Turn off the tap and use a dry cloth to scrub the coins dry.[7]


Melting the Coins Down
-
1Wear the right safety gear. At the very least, you should wear safety goggles to prevent heat or debris from harming your eyes. Consider wearing an apron and gloves to protect yourself as well.
-
2Place the coins in a crucible. Crucibles are typically made of fire clay, and can withstand temperatures that would melt metal. Try to lay the coins down in a single layer. It will take more time for heat to travel to coins laying at the bottom of a pile. Make sure you use tongs to hold the crucible, don’t try to hold it with your hands.
- If you don’t have access to a crucible, you can place the coins on a brick. Be aware that because it’s a flat surface, the melted silver won’t be as easy to pour if you need to do so.[8]
-
3Light a blowtorch. Some blowtorches have a self-starting system with a trigger; for these, simply press the trigger to light the torch. Just make sure you’ve turned the knob to give the torch some gas.
- Other torches are manual and need a striker to start. For these torches, turn the knob to let the gas flow, then place the striker near the mouth of the torch. Squeeze the striker to create a spark. If the torch doesn’t light, squeeze the striker until it does.[9]
-
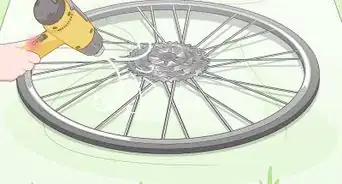
4Hold the flame on the silver coins. Make sure to pass the flame over the coins evenly. Keep in mind it will take several minutes of heating for the coins to start melting. You’ll notice any inscriptions or markings on the coin will melt first. Then, the coins will start glowing bright red before finally melting.[10]
-
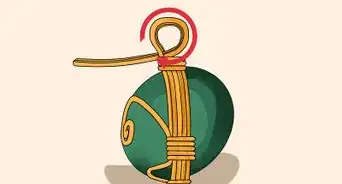
5Mold the molten silver. Whether you’re molding it into a specific shape or a bar, make sure to keep your mold close by. Pour quickly so the silver doesn’t have a chance to solidify. Pour evenly to prevent the silver from splashing.
- Alternatively, you let the silver cool in your crucible or on your brick. It will solidify into a nugget that you can keep, store and melt down later. Try to avoid touching or prodding the silver until it’s completely cooled.[11]


References
- ↑ http://www.ebay.com/gds/How-to-Clean-Junk-Silver-Coins-/10000000178722995/g.html
- ↑ http://www.ebay.com/gds/How-to-Clean-Junk-Silver-Coins-/10000000178722995/g.html
- ↑ http://www.ebay.com/gds/How-to-Clean-Junk-Silver-Coins-/10000000178722995/g.html
- ↑ http://www.ebay.com/gds/How-to-Clean-Junk-Silver-Coins-/10000000178722995/g.html
- ↑ http://www.ebay.com/gds/How-to-Clean-Junk-Silver-Coins-/10000000178722995/g.html
- ↑ http://www.ebay.com/gds/How-to-Clean-Junk-Silver-Coins-/10000000178722995/g.html
- ↑ http://www.ebay.com/gds/How-to-Clean-Junk-Silver-Coins-/10000000178722995/g.html
- ↑ https://www.youtube.com/watch?v=phipphYQZs4
- ↑ https://www.youtube.com/watch?v=JQMHwthAlrM
Community Q&A
-
QuestionWhat should the oven temperature be set at?
 Community AnswerPure silver melts at a temperature of 1,761 degrees F. Your oven's not hitting that...
 -
QuestionIs it illegal to sell or melt US coins?
 Community AnswerDespite rumors to the contrary, it is not illegal to melt U.S. silver coinage for its metal value. It was illegal from 1967 to 1969 to do so, during which time the government recalled as much silver coinage from circulation as it could.
 -
QuestionIf I melt down a 40% silver half dollar with a torch and cast it, is it still 40% silver, or does the torch dissolve the other metals?
 Community AnswerIt will still be 40% silver, as you are not removing any of the other materials from the coin. You will need to bring chemistry into this equation, which is hard to do with the availability of the required materials.
Warnings
- Do not use the above steps to melt U.S. pennies or nickels to recover the copper and nickel in them, as it has been illegal since December 2006 to do so. As with the 1967 law barring melting silver coinage, the reason it is illegal is to prevent profiteering from the fact that the base metal value of the copper and nickel used in these coins exceeds their face value.⧼thumbs_response⧽
Things You'll Need
- Blowtorch
- Striker
- Fire clay crucible or brick
- Tongs
- Silver coin(s)
- Heat-resistant gloves
- Safety goggles
- Non metallic container
- Aluminum foil
- Water
- Baking Soda
- Salt
- Dry cloth


About This Article

Before melting your silver coins, make sure to put on protective gear, including safety goggles and a heat-resistant apron. Then, place the coins in a crucible or on a brick in a single layer, light a blowtorch, and pass the flame over the coins evenly. Once the coins have fully melted, pour the liquid silver into a mold, making sure to pour quickly so the metal doesn’t have a chance to solidify. Alternatively, let the silver cool in your crucible on on your brick to turn it into a silver nugget. To learn more, including how to clean your silver coins before melting them, scroll down!