This article was co-authored by Patrick Coye. Patrick Coye is the owner and operator of Patrick’s Painting & Home Improvement in Alexandria, Virginia. With over 15 years of experience in residential construction, Patrick specializes in painting, wallpaper removal/installation, drywall, staining decks and fences, and kitchen cabinetry painting. To date, Patrick and his team have painted over 2,000 houses and stained over 800 decks. Patrick's Company won a "Top Job" award from the American Painting contractor magazine in 2020.
There are 14 references cited in this article, which can be found at the bottom of the page.
wikiHow marks an article as reader-approved once it receives enough positive feedback. In this case, 82% of readers who voted found the article helpful, earning it our reader-approved status.
This article has been viewed 449,819 times.
Boring or scratched-up laminate cabinets can bring down the vibe of your kitchen faster than you can say “what’s for dinner?” Since replacing all of your cabinets is as expensive as it is time-consuming, try painting them instead for a quick refresh. The trick to dealing with laminate, in particular, is priming it properly. And of course, don’t forget to update the handles and hinges, too, for the nicest cabinets.
Steps
Prepping the Cabinets
-
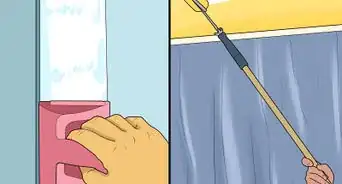
1Cover the area around the cabinets with drop cloths or tarps to protect it. This is especially important if you’re painting near appliances or above carpet that could easily be damaged by paint. Lay a drop cloth over the floor or drape a plastic tarp over the counters, for example.
- Old bed sheets also work well as makeshift drop cloths. Use multiple layers if you're worried about the paint soaking through.
- To safeguard counters, you can tape large sheets of craft paper on top of them, making sure to cover all the way from the edges to the wall.
- Protect the wall behind the cabinets by laying painter's tape along the edges of the cabinets.
-
2Remove the cabinet doors if possible. If you can see the hinges, or if the doors are easily removable, take them off the cabinets. This will not only make it easier to paint them, it will also protect the surfaces and furniture around your cabinets from drips or splatters. Set them on a work bench or sawhorse for painting. [1]
- Label the doors before you remove them to remember where they each go. For example, take a pencil or marker and write the door’s location, like “upper right,” on the back.
- Be sure to lay a drop cloth under the bench or sawhorse to catch drips.
Advertisement -
3Take off hardware, like handles or hinges. This prevents the pieces from getting paint on them and also allows you to roll paint over the doors without having to edge around knobs or pulls. Most hardware can be easily removed with a screwdriver.[2]
- If you can’t remove the hardware, cover it with painter’s tape. Press the tape securely around all areas you don’t want painted so that the paint doesn’t seep underneath.
-
4Wipe the cabinets with a cleaning solvent to remove grease and grime.[3] A popular cleaning solution to use before painting is trisodium phosphate (TSP). It removes grease, along with the glossy finish on laminate, to help paint stick to the cabinet. Dip a cloth into the TSP and rub vigorously on the surface of the cabinets.[4]
- You can also use xylol or a TSP substitute, which can both be found at hardware stores or paint stores.
- Wear gloves when using harsh chemical cleaners to protect your hands. You might want to wear a mask, too, in case of fumes.
- If you use a chemical cleaner, wipe it off with a damp cloth afterwards, then dry it with a clean towel. Otherwise, the paint won’t stick to the cabinet.[5]
-
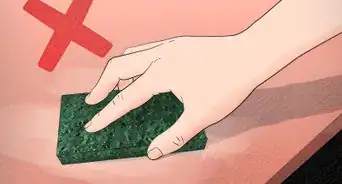
5Sand the cabinets with a medium-grit sandpaper to get rid of the gloss. Sanding the cabinets creates a rough surface that the paint and primer can adhere to better.[6] Choose a sandpaper that’s between 150 and 220 grit, which will scuff the cabinets without destroying the laminate itself.[7]
- Avoid using an electric sander for this as it’s too intense and will likely over-sand the cabinets.
- Wear a mask and protective eyewear when sanding.
- Wipe the cabinets with a damp cloth after sanding, if necessary, to clean off any dust.


Painting the Cabinets with a Roller
-
1Roll on at least 1 coat of bonding primer. A bonding primer, preferably one that’s oil-based, creates a surface that the paint can stick to, and also prevents the paint from chipping easily. You can apply multiple coats with a foam roller if you feel like your cabinets are very glossy.[8]
- The primer might also say “for shiny surfaces” or “for glossy surfaces” on the package.
- If you notice the primer is bubbly or streaky when you apply it, that means it isn’t adhering to the laminate very well. Wipe off what you already applied if it's still wet, then use a different primer. If it's already dry, sand it off.
- Have your primer tinted to match the color of your paint if you’re painting your cabinets a darker shade. This reduces the number of coats you’ll have to paint to cover the primer. Any paint store will be able to tint your primer for you.[9]
-
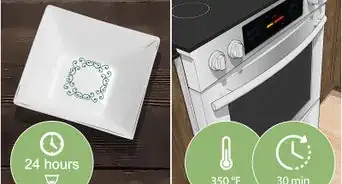
2Let the primer dry for at least 3 hours. This is a good rule of thumb to follow if you aren’t sure how long to let your primer dry. However, the can of primer should have the dry time for that specific type on the packaging. For example, some primers dry in as little as 30 minutes![10]
- Open a few windows or use a fan to diffuse the fumes from the primer.
- There’s also fast-drying primer that you can buy at a paint store or hardware store. Check that it’s compatible with whatever paint you’re using first.
- Do the fingernail test to check if the primer is done drying—if you can scratch it off with your fingernail, you don't have good adhesion and probably shouldn't paint over it.[11]
-
3Paint 2 to 3 thin coats of paint with a roller, letting each one dry. Stir your paint and pour it into a paint tray so you can saturate the roller easily. Then, instead of 1 thick coat, roll on even, thinner coats. Make sure each coat is dry before you start painting the next one or you’ll end up pulling off the previous coat.[12]
- Cover the entire visible surface of the cabinets, including the doors, sides, top, and bottom.
- You can use a paintbrush instead of a roller but it will be easier to see brushstrokes and will take much longer.
- It should take each coat about 4 hours to dry enough for you to add a new coat.
- Sand in between each coat with fine, 150 to 220 grit sandpaper if you notice any bumps or bubbles.
How to Choose Paint for Laminate Cabinets
Go for a glossy, semi-gloss, or satin finish. Eggshell and matte finishes are impractical and will show every smudge.
Pick an oil-based paint. It dries more evenly, is more durable, and is easier to clean than a water-based paint.[13]
Look for a paint specifically made for laminate if you don’t want to mess with primer. Laminate paints don’t require you to prime the surface.[14]
Skip the stain. Laminate cannot be stained.
-
4Use an angled paintbrush to get to any hard-to-reach areas. While rollers are easy and practical for flat surfaces like the sides and doors of the cabinet, you’ll need a smaller paintbrush, preferably with an angled tip, to coat the edges or borders. Paint with long, steady strokes to avoid visible brushstrokes.[15]
- A small watercolor brush will work as a substitute for the angled paintbrush if you don’t have one.
- It's best to do this when you paint your final coat. You don't need to let the final coat dry before you start touching up.
-
5Let the paint dry for 6 to 8 hours. Check your paint can to find the exact dry time for your brand and type. You’ll know when the paint is dry when it no longer feels tacky to the touch.[16]
- If you completely removed the cabinet doors, you may want to wait longer than the recommended dry time, so you don’t nick the paint. Leave them to sit overnight to be safe.
-
6Apply a coat of polycrylic if you want extra protection on your cabinets. While not necessary, a layer of sealant like polycrylic will make your paint job last longer and prevent chips. Brush it on after the paint has dried, then let the sealant dry completely prior to using your cabinets.[17]
- You can also use polyurethane, furniture wax, or any other paint sealant.
- Sealants come in different finishes, just like paint. So if you choose semi-gloss, for example, your cabinets will end up having a slight sheen to them.
- Avoid an eggshell or matte finish that will show fingerprints easily.
- Polycrylic or polyurethane typically take about 24 hours to fully dry.[18]
- Attach the cabinet doors back in their original spot and clean up any drop cloths, protective paper, or painter's tape that you used.


Spray Painting the Cabinet Hardware
-
1Set the hardware on a drop cloth or tarp outside. To protect the space where you’re spraying, place the pieces on something you don’t mind getting paint on. Remember to always spray paint outside or in a well-ventilated area so you don’t inhale the fumes.[19]
- For an easy way to coat hinges, knobs, and pulls, stick them in a thick piece of cardboard. Their screws will puncture the cardboard, so the hardware stands up without you having to hold it.
-
2Spray 1 to 2 coats of oil-based primer and let it dry for at least 3 hours. If you don’t use primer, the spray paint will easily rub off of handles or knobs. Spray a thin coat over the entire piece of hardware. Let it dry, and then spray another coat if you feel it’s necessary.[20]
- Shake the primer thoroughly, for about 1 minute, before you start spraying.
- An oil-based primer is ideal for metal, as it prevents rust.
- Wait until the primer is completely dry before painting the hardware, for best results.
- If you can't remove the hardware, use a paintbrush to apply a standard oil-based primer instead.
-
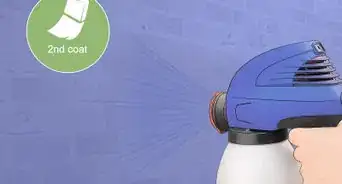
3Spray the hardware with 2 to 3 thin coats of paint. Hold the can about 8 to 12 inches (20 to 30 cm) from the hardware. Move it back and forth as you spray, so the paint doesn’t drip or clump up in one area. Wait for each coat to dry before you spray the next coat.[21]
- Shake the can for at least 1 full minute before you use it. Otherwise, you could get a bubbly texture.
- It should take each coat about 1 to 2 hours to dry enough for you to apply the next coat.
- If you get drips on your pieces, sand them off with a fine, 150 to 220 grit sandpaper when the coat has dried.
- For hardware that can't be removed, apply paint with a small paintbrush.
-
4Let the paint dry for at least 6 hours. The spray paint can should have instructions on how long the paint needs to dry. Keep in mind that high humidity and cool temperatures make paint dry slower. Try to set your hardware somewhere that’s dry and room temperature or warmer.[22]
- To prevent chips or smudges, you can spray a sealant over the paint, too. Wait until the paint is dry before you apply the sealant.
- Choose an enamel sealant, which is very durable and perfect for cabinets that are opened and closed often.
-
5Reattach the newly painted hardware to the cabinets. Carefully screw the pulls or knobs back into the cabinet doors. Make sure they're attached securely so they don't fall off or wobble.
- Clean up any drop cloths and remove any painter's tape you used while painting.
- If your hardware gets chipped over time, simply repeat the painting process to touch it up.


Expert Q&A
Did you know you can get expert answers for this article?
Unlock expert answers by supporting wikiHow
-
QuestionCan you paint over laminate?
 Patrick CoyePatrick Coye is the owner and operator of Patrick’s Painting & Home Improvement in Alexandria, Virginia. With over 15 years of experience in residential construction, Patrick specializes in painting, wallpaper removal/installation, drywall, staining decks and fences, and kitchen cabinetry painting. To date, Patrick and his team have painted over 2,000 houses and stained over 800 decks. Patrick's Company won a "Top Job" award from the American Painting contractor magazine in 2020.
Painting SpecialistYes, you can. First, you want to degrease everything with a decent degreaser solution, anything from Spray Nine to TSP should work. Then, lightly sand the cabinets and prime them. Once the primer stays put even if you scratch at it with your fingernail, you can paint over the top of it.
Support wikiHow by unlocking this expert answer.
-
QuestionHow do I paint old wooden cabinets?
 Community AnswerSand it, prime it, paint it. Mix a 1/4 cup of water to a gallon of paint to prevent brush streaks. Use multiple light coats and use mid-grade or higher paint. If you're inexperienced plan on spending a few days or more on the project for a quality job, it is very tedious. If you can remove the doors and hinges and paint the doors while they are off, that will save a lot of time.
 -
QuestionI have old kitchen cupboards that were laminated in the 80's with oak hand trim at the bottom. Can I re-laminate them?
 Community AnswerYes, you can. I would use 1/32 inch laminate and contact cement on both surfaces. It will probably be easier if you can bring the cabinets down off the wall. Be sure to rough up the old cupboards to help the contact cement stick too.
Things You’ll Need
Getting the Cabinets Ready for Painting
- Cleaning solvent
- Cloth or towel
- Sandpaper
- Screwdriver
- Mask
- Protective eyewear
- Rubber gloves
- Drop cloth or tarp
- Painter’s tape (optional)
Painting the Cabinets with a Roller
- Foam roller
- Angled paintbrush
- Primer
- Paint
- Paint tray
- Stir stick
- Polycrylic (optional)
Spray Painting the Cabinet Hardware
- Spray primer
- Spray paint
- Drop cloth or tarp
- Spray sealant (optional)


References
- ↑ https://www.bhg.com/kitchen/cabinets/styles/painting-laminate-cabinets-qa/
- ↑ https://www.bhg.com/kitchen/cabinets/styles/painting-laminate-cabinets-qa/
- ↑ Patrick Coye. Painting Specialist. Expert Interview. 19 August 2020.
- ↑ https://www.thisoldhouse.com/how-to/painting-over-plastic-laminate
- ↑ https://homemadelovely.com/how-not-to-paint-kitchen-cabinets/
- ↑ Patrick Coye. Painting Specialist. Expert Interview. 19 August 2020.
- ↑ https://brepurposed.porch.com/2017/09/07/add-trim-paint-laminate-cabinets/
- ↑ http://www.livelovediy.com/2013/06/how-to-paint-laminate-furniture.html
- ↑ https://www.theweathereddoor.com/2014/11/how-to-paint-over-laminate-and-why-i.html
- ↑ https://www.thisoldhouse.com/how-to/painting-over-plastic-laminate
- ↑ Patrick Coye. Painting Specialist. Expert Interview. 19 August 2020.
- ↑ http://www.washingtonpost.com/wp-dyn/content/article/2005/09/21/AR2005092100593.html
- ↑ https://www.thisoldhouse.com/how-to/painting-over-plastic-laminate
- ↑ https://www.bhg.com/kitchen/cabinets/styles/painting-laminate-cabinets-qa/
- ↑ https://www.familyhandyman.com/kitchen/diy-kitchen-cabinets/surprising-tips-for-painting-kitchen-cabinets/view-all/
- ↑ https://www.cravingsomecreativity.com/protect-painted-furniture-polyurethane-polyacrylic-top-coat/
- ↑ https://www.thisoldhouse.com/how-to/pro-secrets-painting-kitchen-cabinets
- ↑ https://www.blessthismessplease.com/how-to-paint-furniture/
- ↑ https://www.thisoldhouse.com/how-to/painting-over-plastic-laminate
- ↑ https://www.classyclutter.net/how-to-paint-hardware-the-right-way/
- ↑ https://www.younghouselove.com/how-you-like-them-handles/
- ↑ https://www.theweathereddoor.com/2014/11/how-to-paint-over-laminate-and-why-i.html
About This Article

To paint laminate cabinets, start by removing the hardware, cleaning the surface, and sanding the cabinets with medium-grit sandpaper until the surface feels smooth. Next, roll on a coat of bonding primer and let it dry completely. Then, roll on 2-3 coats of paint, letting each coat dry completely before adding a new one. You can use an angled paintbrush to paint the areas that your roller can't reach easily, such as the edges and borders. Finally, let the paint dry for 6-8 hours before applying a polycrylic sealant. For tips on spray painting cabinets and hardware, read on!