This article was co-authored by Sam Adams and by wikiHow staff writer, Eric McClure. Sam Adams is the owner of Cherry Design + Build, a residential design and construction firm, which has been operating in the Greater Seattle Area for over 13 years. A former architect, Sam is now a full-service contractor, specializing in residential remodels and additions.
There are 11 references cited in this article, which can be found at the bottom of the page.
This article has been viewed 14,965 times.
Painting your cabinets can give them a fresh look, but if the cabinets have already been stained, you'll have to do a little prep to get the paint to adhere. First, you'll need to strip the stain off of your cabinet surfaces before applying primer and paint. Once you've done that, use a primer or putty to prep your wood for painting, then apply your topcoat. Remember to always take the proper safety precautions by wearing a dust mask or respirator when working with oil-based paints and primers!
Steps
Cleaning and Prepping Your Cabinets
-
1Remove all appliances and containers from your countertop. Before you do anything, remove everything from your countertops to make cleaning, stripping, and painting easier. If there is a table or any other furniture in the area, move it to a different part of your house to avoid bumping into things while you’re working around the room.[1]
- If you haven't already, you may want to empty the cabinets, as well.
-
2Clean your cabinets by wiping them down with a damp cloth. Put a little bit of warm water on a clean cloth and wring out the excess water. Rub every exterior section of your cabinets to remove any dust, dirt, or grime. Add 1-2 drops of mild dish soap to the cloth if you have trouble cleaning any particularly dirty areas.[2]
- For cabinets that are above a stove or microwave, you may need to use a degreaser to remove oil or grease. Spray greasy areas with your degreaser or cleaning agent and scrub aggressively with a thick sponge.
- Don’t forget to clean the areas where the doors overlap on top of the frame.
Advertisement -
3Wipe your cabinets dry and let them air out. Use a clean cloth to rub your cabinets dry. Rub in the direction of the grain to avoid missing indentations in the wood. Once every cabinet surface is dry, open a window and let the cabinets air out for 3-4 hours.[3]
Tip: Even if you think your cabinets are dry after you’ve wiped them down, you should still let your cabinets air dry. You don’t want to trap any moisture in your wood.
-
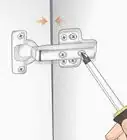
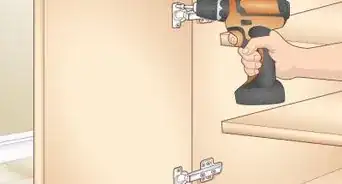
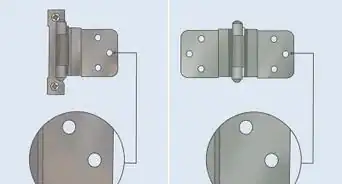
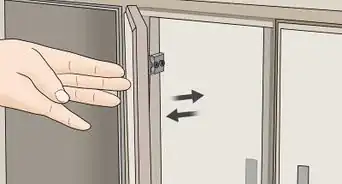
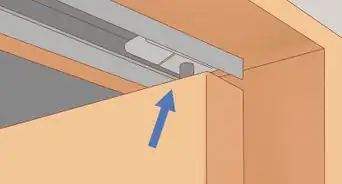
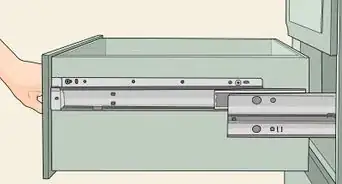
4Remove and label every door and drawer. Use a flathead or Philips-head screwdriver to remove every bracket and screw attaching your doors to the frame. Lift every drawer out of its slot and set all of your pieces aside. Label each drawer and door after you remove it by putting a piece of tape on it and writing its location on the back. This way, when it comes to reinstalling the drawers and doors, you won’t need to worry about trying to find the right space for each door or drawer.[4]
- On the label, you can describe each piece’s location or use an organizational label. For example, you could write, “third door, top” or assign each row and column a letter and number, making the top left cabinet “A1” and the cabinet below it “B1.”
- You can draw a diagram and use numbers to label your cabinets if you prefer.
- You can choose to do this before you clean your cabinets, but it could make cleaning more difficult since you’ll have to brace each door and drawer against something to wipe it.
-
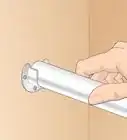
5Lay drop cloths down on your countertop and floor. Set out one drop cloth on top of your counters and one drop cloth on the floor along your toe kick or baseboard. This will prevent primer, wood dust, or paint from getting on your counters or kitchen floor.
- A toe kick refers to the wood or plastic barrier at the bottom of your cabinets. It is designed to prevent structural damage to the wood from accidental kicks or spills.


Stripping and Sanding the Cabinets
-
1Put on a dust mask or respirator and a thick pair of gloves. The fumes in most stripping agents, lacquer thinners, and primers are lung irritants. Prevent damage to your lungs by wearing a thick dust mask or respirator. Wear a pair of thick gloves to avoid getting stripping agent on your skin.[5]
- Open a window if you haven’t already. The ventilation will prevent fumes from building up in your kitchen.
-
2Apply a gel or liquid stripping agent to your cabinets with a natural brush. Wood stripper can be purchased at a local hardware store or online. Select a stripper designed for cabinets by reading the label carefully. Fill a paint tray with your stripping agent and apply it to every stained section with a natural brush. Wait 15-30 minutes to give your stripping agent time to eat into the varnish or stain.[6]
- There are different stripping agents for fence posts, exterior walls, and delicate furniture. Select a stripper that is designed for cabinets or wood furniture.
- For each cabinet door or drawer, do each step with your removable pieces set on top of a set of sawhorses or a stable work surface.
Warning: You can use a heat gun to melt the varnish or stain, but this can be dangerous and may burn the cabinets. Unless you have experience using a heat gun, it’s best to stick to traditional stripping methods.
-
3Set a bucket or pan underneath the area that you’re going to scrape. When you scrape the stripper away, the agent that you applied will pool up in the direction that you scrape. To catch it as it drips off, keep a bucket or pan underneath each section that you’re scraping.[7]
- Move the bucket or pan with you as you work from area to area.
-
4Scrape the varnish or stain away with a scraper or putty knife. Hold your putty knife or scraper at a 20-45 degree angle and use the sharp edge of a scraper or putty knife to scrape off the stripping agent. Press the blade of the scraper or putty knife down into the wood by putting your index finger on top of the blade and pressing down. Scrape in the direction of the wood grain.[8]
- Don’t worry if you wear away a layer of wood as you’re doing this, you need to sand the cabinets anyway and this will make the process easier.
-
5Use lacquer thinner and steel wool to scrub the cabinets. Lacquer thinner is a solvent that dissolves paint, varnish, and other chemicals. Use a lacquer thinner designed for cleaning or stripping and dip some steel wool in it. Scrub your cabinets in the direction of the wood grain to remove the stripping agent. Scrub each section until you see no stripping agent remaining on the wood.[9]
- Use your bucket or pan to catch the stripping agent drips as you apply it.
- You can use a sponge if you’re worried about damaging your cabinets.
- Don’t use a lacquer thinner designed for thinning paint. The residue will make it hard to achieve a clean paint job. Avoid lacquers that are oil-based as well, as they can be hard to sand away.
- You can buy lacquer thinner online or at your local hardware store.
-
6Wipe your cabinets dry with paper towels or a clean cloth. Remove the lacquer by rubbing your cabinets dry. You can use paper towels or a clean cloth to rub every section down. After you’ve removed the majority of the lacquer, let your cabinets air dry for 6-12 hours.[10]
-
7Sand your cabinets using a 220-grit sandpaper or extra-fine sponge. Use 220-grit sandpaper sheets or an extra-fine sanding sponge to remove the top layer of wood. This will allow the primer to soak into the grain of your wood. Sand each section of your cabinets lightly by using back-and-forth strokes in the direction of the grain.[11]
- You can sand with a coarser sandpaper if you don’t see any wood dust coming off of your sanding sponge or sheet.
-
8Vacuum the debris and wipe your cabinets with a dry cloth. Use a vacuum with a hose attachment to remove wood dust from each section of your cabinets by running the hose 0.5–2 inches (1.3–5.1 cm) away from the wood. After vacuuming, wipe your cabinets down with a dry cloth to remove any remaining splinters, dust, or debris.[12]


Priming Your Cabinets
-
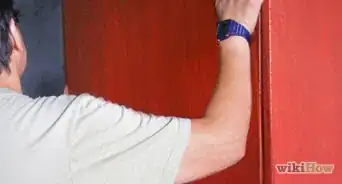
1Tape any edges that you want to keep dry using painter’s tape. Use painter’s tape to cover any areas that you want to keep dry, such as the walls next to your cabinet or the backsplash above your counters. Pull out a length of painter’s tape and press the edge flush against a surface. Pull out the rest of the length of tape and press it into the surface to smooth it out.[13]
- Painter’s tape isn’t perfect. If you get a lot of paint on it, it can bleed through. Use it as a guide, not a perfect safety measure.
-
2Pour 3⁄4 gallon (2.8 L) of oil-based primer or putty into a paint tray. Mix your primer or putty with a mixing stick before pouring it. Use an oil-based primer for woods with a tighter grain, like cherry or maple. Use an oil-based brushing putty for thicker-grain woods, like oak, ash, or mahogany. Pour your priming material into the paint try slowly, and wipe off any drips with your brush or a spare rag.[14]
- Wear a dust mask or respirator if you’re using oil-based primer. The fumes can be a lung irritant.
Tip: Use a paint tray with hooks for hanging it off of a ledge if you’re going to be using a ladder to paint the upper cabinets. This way you won’t need to go up and down the ladder every time that you want to reload your brush or roller.
-
3Apply your primer to each cabinet and door with a roller and brush. Use a nylon-polyester brush to paint edges and trim around each door. Work in the direction of the wood grain, and use back-and-forth strokes to cover each section.[15] For flatter panels or surfaces, use a 6 in (15 cm) foam roller to apply your primer.[16]
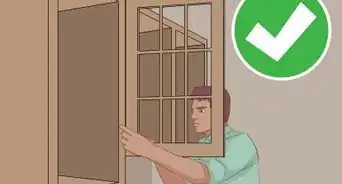
- You can choose whether or not you’re going to paint the inside of your cabinet doors. If you do, wait for each side to dry before flipping them over to paint the other side.
-
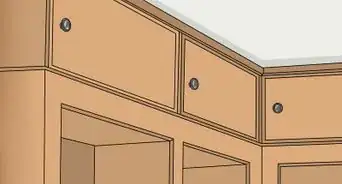
4Prime your cabinet frames and wait for them to dry. Use the same roller and brush to cover your cabinet frames. Start with the trim and paint around the top and bottom of your cabinets. Use a foam roller to cover the flat sections of your cabinets. Wait 12-24 hours after applying your primer to ensure that it dries properly.[17]
- You don’t need to use the brush to paint the thin panels in between doors. You can roll the face of each panel to make things easy.


Painting the Cabinets
-
1Sand your cabinets again with 220 grit sandpaper. Use a fine-grain sponge or sandpaper to sand your primed surfaces.[18] This will ensure that any thick layers of primer will be removed while making it easier for the paint to soak into your wood grain.[19]
- Wipe your cabinets clean and vacuum them again to prepare your cabinets for painting.
- If you used a putty to prime your cabinets, you may need to use a sandpaper with a grit between 100-150.
-
2Choose a latex or oil-based gloss paint for your topcoat. Select a color that you want and choose a latex paint if you want a uniform finish. If you like the look of brushstrokes and want some texture, use an oil-based paint. Opt for a gloss or semi-gloss paint to prevent oil or grease from sticking to your cabinets.[20]
- If you don’t paint the insides, line them with drawer liners to keep the wood safe.
Warning: If you’re painting the insides of your cabinets, choose an eggshell finish in the same color as your exterior paint. Gloss and semi-gloss paint will stick to your dishware.
-
3Pour 3⁄4 gallon (2.8 L) of your paint into a clean paint tray. Use a flathead screwdriver to pry the top off of your can of paint. Mix the paint with a mixing stick until the color is even and uniform. Slowly pour it into a fresh paint tray by holding the handle and tilting the can. Use your brush or a clean rag to wipe any drips off of your paint can.[21]
- If you’re using a latex paint, you don’t have to wear a dust mask. The fumes can be kind of strong if you’re working in a poorly-ventilated area though.
-
4Apply paint to the drawers and doors using a brush and roller. Use an angled sash brush to paint the edges and trim of each drawer and door. Use a clean, 6 in (15 cm) foam roller to cover larger, flatter surfaces. Paint in the direction of the wood grain. Wait 6-12 hours before painting the other side of each piece if you want to paint both sides.[22]
- Get a high-quality brush and roller. You don’t want to leave streaks or gaps in the grain because you opted for a cheaper brush.
-
5Paint the cabinet frames with the same brush and roller. Use the same brush and roller to ensure that your paint’s texture is the same on your drawers, doors, and frame. Apply paint to the trim around the walls and edges first, and use your foam roller to apply paint to the flat panels in your cabinet frame. Keep your brush strokes consistent and work in the direction of the grain to keep your topcoat uniform.[23]
-
6Wait 24-36 hours to let the paint dry and remove your tape. Let your paint air dry for at least 24 hours before handling anything. If your paint isn’t consistent or you want a deeper color, apply a second layer of paint and wait an additional 24 hours. After your paint has dried, remove your painter’s tape by carefully and slowly peeling it off.[24]
- You’re going to be handling your cabinets pretty heavily when you install your doors and drawers. It is best if you can manage to wait longer before reinstalling the doors and drawers.
-
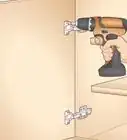
7Reinstall your doors and drawers and clean up. Use a flathead or Phillips-head screwdriver to reinstall each cabinet with the proper bracket. Use your labels or corresponding diagrams to match each drawer and door in the proper location. Once everything is back where it belongs, lift up your drop cloths and shake them outside or over a trash bin to remove the debris. Sweep your floors with a broom and put everything back to enjoy your new cabinets![25]


Expert Q&A
-
QuestionCan you pain over stained cabinets without sanding?
 Sam AdamsSam Adams is the owner of Cherry Design + Build, a residential design and construction firm, which has been operating in the Greater Seattle Area for over 13 years. A former architect, Sam is now a full-service contractor, specializing in residential remodels and additions.
Professional ContractorNo, it's just not going to work. I mean, it may work temporarily, but that paint is going to start peeling off and flaking once it dries. You really have to get in there with the sandpaper if you want to paint your cabinets. -
QuestionDo I have to use primer?Sam AdamsSam Adams is the owner of Cherry Design + Build, a residential design and construction firm, which has been operating in the Greater Seattle Area for over 13 years. A former architect, Sam is now a full-service contractor, specializing in residential remodels and additions.
Professional ContractorThe steps here are going to be pretty unnegotiable, and the primer is mandatory if you want a clean, uniform finish. -
QuestionThis seems like a lot of work. Is there anything else I can do to give my cabinets a little love and breathe new life into them?Sam AdamsSam Adams is the owner of Cherry Design + Build, a residential design and construction firm, which has been operating in the Greater Seattle Area for over 13 years. A former architect, Sam is now a full-service contractor, specializing in residential remodels and additions.
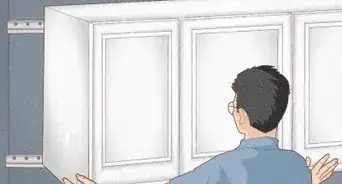
Professional ContractorYes! If painting seems like a ton of work for you (and to be fair, it is a lot of work), then just replace the doors. They usually get beat up on over time, and new doors will give your cabinets a fresh look.
Things You’ll Need
- Drop cloth
- Water
- Cloths
- Dust mask or respirator
- Thick gloves
- Stripping agent
- Putty knife or scraper
- Lacquer thinner
- Steel wool
- Bucket or pan
- Ladder (optional)
- Painter’s tape
- Paint tray
- Brush
- Sandpaper
- Vacuum
- Oil-based primer or putty
- Foam roller
- Nylon-polyester brush
- Sash brush
- Paint
- Broom


References
- ↑ https://www.thisoldhouse.com/how-to/pro-secrets-painting-kitchen-cabinets
- ↑ https://www.familyhandyman.com/kitchen/diy-kitchen-cabinets/surprising-tips-for-painting-kitchen-cabinets/
- ↑ https://www.familyhandyman.com/kitchen/diy-kitchen-cabinets/surprising-tips-for-painting-kitchen-cabinets/
- ↑ https://www.familyhandyman.com/kitchen/diy-kitchen-cabinets/surprising-tips-for-painting-kitchen-cabinets/
- ↑ https://www.popularmechanics.com/home/outdoor-projects/how-to/a5888/how-to-safely-remove-paint/
- ↑ https://youtu.be/W0A1Z_79zDA?t=157
- ↑ https://youtu.be/W0A1Z_79zDA?t=253
- ↑ https://youtu.be/W0A1Z_79zDA?t=253
- ↑ https://refinishingfurniture.net/mineral-spirits-vs-paint-thinner/
- ↑ https://youtu.be/W0A1Z_79zDA?t=409
- ↑ Sam Adams. Professional Contractor. Expert Interview. 4 June 2019.
- ↑ https://www.familyhandyman.com/kitchen/diy-kitchen-cabinets/surprising-tips-for-painting-kitchen-cabinets/
- ↑ https://www.familyhandyman.com/painting/tips/using-masking-tape-when-painting/
- ↑ Sam Adams. Professional Contractor. Expert Interview. 4 June 2019.
- ↑ Sam Adams. Professional Contractor. Expert Interview. 4 June 2019.
- ↑ https://www.thisoldhouse.com/how-to/pro-secrets-painting-kitchen-cabinets
- ↑ https://www.thisoldhouse.com/how-to/pro-secrets-painting-kitchen-cabinets
- ↑ Sam Adams. Professional Contractor. Expert Interview. 4 June 2019.
- ↑ https://www.familyhandyman.com/kitchen/diy-kitchen-cabinets/surprising-tips-for-painting-kitchen-cabinets/
- ↑ https://www.bobvila.com/articles/best-paint-for-kitchen-cabinets/
- ↑ https://www.bobvila.com/articles/best-paint-for-kitchen-cabinets/
- ↑ https://www.bobvila.com/slideshow/how-to-paint-kitchen-cabinets-2351#sand-primed-surface
- ↑ https://www.bobvila.com/slideshow/how-to-paint-kitchen-cabinets-2351#sand-primed-surface
- ↑ https://www.bobvila.com/slideshow/how-to-paint-kitchen-cabinets-2351#sand-primed-surface
- ↑ https://www.familyhandyman.com/kitchen/diy-kitchen-cabinets/surprising-tips-for-painting-kitchen-cabinets/
About This Article