This article was co-authored by Patrick Coye. Patrick Coye is the owner and operator of Patrick’s Painting & Home Improvement in Alexandria, Virginia. With over 15 years of experience in residential construction, Patrick specializes in painting, wallpaper removal/installation, drywall, staining decks and fences, and kitchen cabinetry painting. To date, Patrick and his team have painted over 2,000 houses and stained over 800 decks. Patrick's Company won a "Top Job" award from the American Painting contractor magazine in 2020.
This article has been viewed 39,866 times.
Old vinyl can look dated, but all you need to give it a fresh, modern look is a coat of paint! We'll show you how to prepare and paint your vinyl floor for long-lasting results.
Steps
Cleaning and Deglossing Your Vinyl
-
1Test the paint in an inconspicuous spot. Dab a little paint onto a discreet section of your vinyl, such as under your fridge or in a corner. This gives you a chance to see if you like how it looks on the vinyl. Use an art paintbrush to smooth out the dab of paint to make it look realistic.[1]
- Leave the paint to dry for a few hours in order to get the most accurate understanding of how it will look.
-
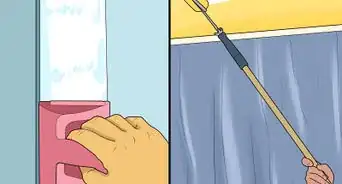
2Line the trim around the floor with painter's tape. This helps to stop the paint and primer from marking the trims around your vinyl flooring.[2] Rip off pieces of tape and stick them to the trim. Continue to place pieces of tape over the trims until they are completely covered with painter's tape.[3]
- Purchase painter's tape from a hardware store.
- Remove the tape once you have finished taping. The tape will easily peel off the trims.
Advertisement -
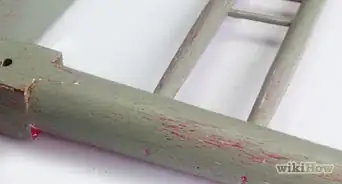
3Remove the shiny surface of the vinyl with 220-grit sandpaper. This helps to remove the shiny surface layer and makes it easier for the primer to stick to the vinyl.[4] Place a good amount of pressure on the sandpaper and then rub it back and forth in a vertical motion over the vinyl. Work your way across the whole floor until all the vinyl looks dull and lacklustre.[5]
- If your sandpaper loses its roughness, use a new piece.
- Use a dust mask when you are sanding if you are sensitive to dust particles.
-
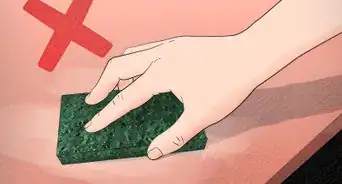
4Use a damp cloth to remove all the dust and dirt from the flooring. Lightly wet a cloth and then squeeze out any excess water. Crouch down and wipe the damp cloth in circular motions to pick up all the dust from the vinyl. This helps to ensure that your paint job looks smooth.[6]
- Microfibre cloths work particularly well for this job.
- If you notice the cloth smearing dust across the vinyl, simply rinse it in water and then continue dusting the surface.
-
5Apply a thin coat of liquid deglosser to the floor. This helps to create a more adhesive surface for the paint and primer to stick to. Use a paint roller with an extendable handle to apply the liquid deglosser to the floor to make it easier to roll on the paint. Start at the opposite corner to the entrance and then work your way back toward the door. This ensures that you don’t get trapped in a corner of the room.[7]
- Apply the liquid deglosser with long, even strokes to create a smooth finish.
- Purchase liquid deglosser from the paint section of a hardware or paint store.
-
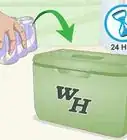
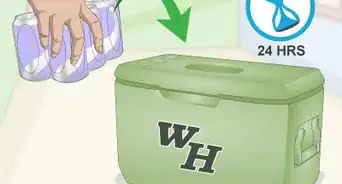
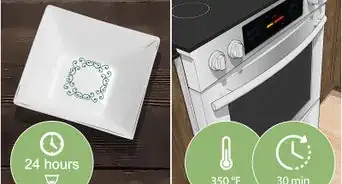
6Leave the deglosser to dry for 12 hours. This gives the liquid deglosser time to adhere to the vinyl and harden. Keep any pets and children away from the area to prevent the wet surface from being marked.[8]
- If the vinyl still feels sticky after 12 hours, leave it to dry for another 12 hours or until it is dry.


Applying Primer and Paint to Your Floor
-
1Apply a thin layer of primer over the vinyl. Use an extendable roller brush to apply the primer. This helps to create a smooth surface for the paint to adhere to and increases the longevity of the paint.[9] Use the same rolling technique that you used when applying the liquid deglosser to ensure that you don’t get trapped in a corner of the room.[10]
- If you have trouble getting the paint flush against the trim, use a paintbrush to give you more control in these areas.
- Any kind of paint primer will work for this task.
-
2Leave the primer to dry for 12 hours. This ensures that the primer is completely dry and won’t smudge or get marked when you paint over it.[11] If you find the smell of the primer strong or unpleasant, open the windows to increase the airflow in the room.[12]
- If you live in a hot, dry climate, the primer may dry a little faster. Tap the floor with your finger to check if it is dry. If the surface still feels sticky, this shows that it still needs to harden and requires a little more drying time.
-
3Apply another coat of primer and allow it dry. Once again, dunk the roller in primer and apply a thin coat to the entire floor. Use consistent length strokes to create a smooth and even surface.[13]
- It may seem a little tiresome to apply 2 coats of primer; however, you will end up with a much more professional and long-lasting result.
-
4Paint the floor with enamel floor paint. This paint is the best choice, as it is hard-wearing and not easily marked, which is crucial for a flooring surface. Stir the paint with a mixing stick for a few minutes and then dunk the extendable roller into the paint. Roll the paint onto the floor with long, even strokes to make the surface look flawless and professional.[14]
- Avoid using chalk paint, as this isn’t long-wearing and will quickly get marked from people walking on it.
- Use grey paint to make your flooring look like stone or use brown paint to give a wooden effect.
-
5Leave the paint to dry for 12 hours. If it is dusty outside, close any windows and doors to minimise the dust in the room. Also, keep pets and children away from the room to ensure that the paint doesn’t get walked on before it is dry.[15]
-
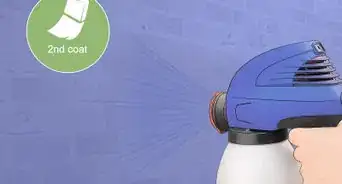
6Apply another layer of paint to the vinyl, if desired. If you are happy with how the paint looks, leave it as it is. If you want a deeper, richer colour, simply roll on another layer of paint. This will also help to make the surface look smoother.[16]
- Once again, allow the paint to dry for 12 hours or until it is dry to touch.


Expert Q&A
-
QuestionHow long should I sand vinyl floors before painting them?
 Patrick CoyePatrick Coye is the owner and operator of Patrick’s Painting & Home Improvement in Alexandria, Virginia. With over 15 years of experience in residential construction, Patrick specializes in painting, wallpaper removal/installation, drywall, staining decks and fences, and kitchen cabinetry painting. To date, Patrick and his team have painted over 2,000 houses and stained over 800 decks. Patrick's Company won a "Top Job" award from the American Painting contractor magazine in 2020.
Painting SpecialistYou want to scuff it up to a point where the primer is going to be able to grab and adhere to it. Sand the area until it becomes a porous surface. -
QuestionDoes the laquer come in a matte finish?
 Community AnswerLacquer does come in a matte finish, and you can buy it on Amazon if you cannot find it in a store near you.
Things You'll Need
- 220-grit sandpaper
- Painters tape
- Liquid deglosser
- Paintbrush
- Roller brush with an extendable arm
- Primer
- Enamel floor paint
- Mixing stick
- Cloth


References
- ↑ https://www.bhg.com/decorating/paint/how-tos/how-to-paint-vinyl-flooring/
- ↑ Patrick Coye. Painting Specialist. Expert Interview. 22 July 2020.
- ↑ https://www.bhg.com/decorating/paint/how-tos/how-to-paint-vinyl-flooring/
- ↑ Patrick Coye. Painting Specialist. Expert Interview. 22 July 2020.
- ↑ https://www.bhg.com/decorating/paint/how-tos/how-to-paint-vinyl-flooring/
- ↑ https://www.bhg.com/decorating/paint/how-tos/how-to-paint-vinyl-flooring/
- ↑ https://www.bhg.com/decorating/paint/how-tos/how-to-paint-vinyl-flooring/
- ↑ https://www.bhg.com/decorating/paint/how-tos/how-to-paint-vinyl-flooring/
- ↑ Patrick Coye. Painting Specialist. Expert Interview. 22 July 2020.
- ↑ https://www.myrepurposedlife.com/how-i-painted-my-vinyl-floor/
- ↑ Patrick Coye. Painting Specialist. Expert Interview. 22 July 2020.
- ↑ https://designertrapped.com/how-to-paint-your-linoleum-floors-yes/
- ↑ https://www.myrepurposedlife.com/how-i-painted-my-vinyl-floor/
- ↑ https://www.bhg.com/decorating/paint/how-tos/how-to-paint-vinyl-flooring/
- ↑ https://www.bhg.com/decorating/paint/how-tos/how-to-paint-vinyl-flooring/
- ↑ https://www.bhg.com/decorating/paint/how-tos/how-to-paint-vinyl-flooring/
About This Article