wikiHow is a “wiki,” similar to Wikipedia, which means that many of our articles are co-written by multiple authors. To create this article, volunteer authors worked to edit and improve it over time.
This article has been viewed 49,616 times.
Learn more...
Watercolor galaxies are all the rage right now on Instagram. You can easily paint your own once you know how.
Steps
Painting Your Background
-
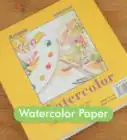
1Tape the edges of your watercolor paper to a flat surface. Taping the edges of your paper will prevent the paper from warping or wrinkling, providing a smooth flat painting.
-
2Wet the entire page with a light wash of clean water. This will prepare the paper to soak up the paint and allow the colors to blend together.Advertisement
-
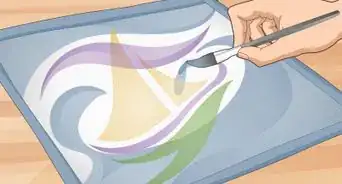
3Apply your desired paint colors to the page. For this example, you will be using shades of pinks, purples, and blues to obtain the "traditional" galaxy look. You can make any color combinations you'd like, though.
-
4Add both light and dark splotches of paint across the paper. Be sure to fill the entire page with color, this is only the first layer so don't be afraid to go a little crazy. Let this layer dry fully.
-
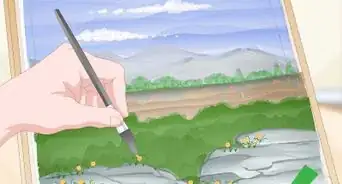
5Begin adding more splotches of paint across the page creating more depth with each paint stroke. There is no correct drying time, use the back of your hand to lightly touch the painting to see if it is dry. If you are unsure if you are doing it the "correct" way, you can always reference back to a photo. There is no real correct way of creating a watercolor galaxy; it is all about having fun.
-
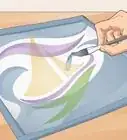
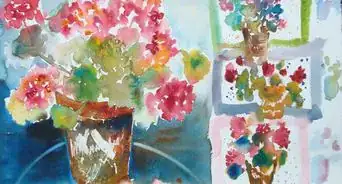
6Continue adding colors until you have painted your desired galaxy look. If you think your painting is too light, add accent points of deep dark colors like a violet or indigo. If you think your painting is too dark, simply take a clean wet paintbrush and go over the darker colors and use a swiping motion to lift away the colors.
- Let your painting dry fully before continuing.


Adding Stars
-
1Grab your white acrylic paint, your toothbrush or stiff paintbrush, and your plastic cup. Your painting must be completely dry before adding the stars; if not, the acrylic paint will bleed into the watercolor paint creating unappealing streaks.
-
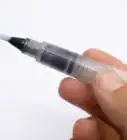
2Mix a small amount of white acrylic paint with an even smaller amount of water. You want the consistency to be liquified but not too watery. If you think your paint is too liquidy, you can add more acrylic paint until the consistency is correct.
-
3Take your toothbrush or stiff paint brush and lightly dab it into the acrylic paint and water mixture, do not submerge the entire brush. If using a toothbrush, drag your thumb across the bristles of the toothbrush above your painting, flicking the paint onto the paper. If you are using a paintbrush, tap the paintbrush on your index finger above your painting to splatter the paint.
-
4Let the painting dry completely until adding more if necessary.


Finishing Up
-
1Add extra detail as desired. Take your white gel pen and add accent stars throughout your painting to add to the ambiance.
- Let the painting dry again before continuing.
-
2Peel off the blue painters tape carefully and slowly.
-
3Enjoy your work of art. You are free to enjoy or display your painting any way you'd like!


Community Q&A
-
QuestionIf I do not have watercolors or watercolor paper, what else can I use for this?
 Renee GrattonCommunity AnswerYou can use acrylic paint. If you'd like to get that watercolor look, you can blend the acrylic paint with a little bit of water.
 -
QuestionWhat if I have no acrylic paint? How do I do the stars?
 Community AnswerYou could use white watercolor and repeat the flashing to make the stars. Also, acrylic paints are not expensive, so get your parents to buy some for you.
Warnings
- Wait until the painting is completely dry before adding the acrylic paint stars.⧼thumbs_response⧽
- While watercolor paint is water soluble, it's best to paint on a surface that you don't mind getting messy. That applies to the clothes you will be wearing for this tutorial.⧼thumbs_response⧽
Things You'll Need
- A reference photo (optional)
- Watercolor paints (any beginners set will be just fine)
- Watercolor paper
- Brushes of your choosing
- Blue painters tape
- White acrylic paint
- A toothbrush or a stiff paintbrush
- A white gel pen (optional)
- A plastic cup
- A cup of water
About This Article
With a variety of colors and a couple of different brushes, you can paint your own watercolor galaxy. First, tape the edges of your paper to a surface to prevent it from warping or wrinkling from the paint. Dip a large brush in water and wet the whole page to soak up the paint and help the colors blend together. Then, cover the page with background colors, like various shades of pink, purple, and blue. Try to achieve a good mix of dark and light colors for a realistic galaxy. Once you’re happy with your background, use a small paintbrush or toothbrush to flick white paint onto the paper for stars. Drag your finger across the bristles of your toothbrush or tap a paintbrush on your finger just above the painting to get the right effect. For more tips, including how to add larger stars to your galaxy, read on!