This article was co-authored by Kelly Medford. Kelly Medford is an American painter based in Rome, Italy. She studied classical painting, drawing and printmaking both in the U.S. and in Italy. She works primarily en plein air on the streets of Rome, and also travels for private international collectors on commission. She founded Sketching Rome Tours in 2012 where she teaches sketchbook journaling to visitors of Rome. Kelly is a graduate of the Florence Academy of Art.
There are 7 references cited in this article, which can be found at the bottom of the page.
This article has been viewed 139,196 times.
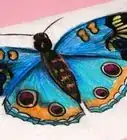
If you enjoy drawing, coloring, or painting, watercolor brush pens can be a fun addition to your creativity toolkit. With their vibrant colors and smooth brush tops, these pens offer excellent precision and control while creating the effect of traditional watercolor, all with no mess and little to clean up. Whether you enjoy drawing your own designs or are looking for a new way to enjoy coloring, these pens will spark your inner artist.
Steps
The Basics
-
1Buy watercolor brush pens. You can find watercolor brush pens at a local craft store or online. When purchasing a set, look for an exciting color palette and make sure it comes with a refillable clear water pen.
- Clear water pens usually come empty. To use, simply unscrew their top and fill with water.[1]
- Watercolor brush pens have moist tips that resemble a paintbrush. They offer you the effect of watercolor painting with the ease and control that you'd typically find in a marker or pen.
- Get a feel for what it's like to hold them and move them across a page. In the beginning, tracing paper can offer a nice smooth surface for learning how to use them, despite its lightweight.
-
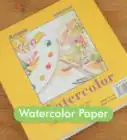
2Choose heavy-weight and smooth paper. Because watercolor brush pens are a very wet medium, you'll need to think about the kind of paper you want to use. Choose a paper that is both heavy-weight and has a smooth surface. The weight of the paper will prevent your pen from leaking through, while the smooth surface will ensure a nice even look.
- Depending on the look you want, paper with a rougher surface may work for you, but it can also wear out the brushes on your pens more quickly.
- A sturdy cardstock is a great choice when working with these pens.
- You can also use these in coloring books. Just look for a book that has high-quality, thick pages.
- You can paint with anything on anything, really, but it makes a huge difference to paint on watercolor paper, since it's specifically made to be absorbent and painted over.
Advertisement -
3Make an outline of a basic shape. Start out simple. Draw one half of a rectangle, leaving it open and unfinished. Try to keep light but even pressure on your brush tip as you move it across the page. [2]
- You can try this with a variety of basic shapes.
- Start out with a small shape to conserve your watercolor ink.
-
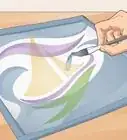
4Use the clear water pen to fill in the shape. Without waiting for the ink to dry, apply the clear water pen to the inside of one of your lines. Move the brush towards the inside of the shape at first. This will give the effect that watercolor paint provides by giving a lighter shade of the ink you first applied.
- Continue to pull your colored ink with the clear pen to fill in and complete your shape.
-
5Care for your pens so they last. After blending, dip your pen tips in water and wipe them on a clean sheet of paper to remove any leftover color.
- Keep their caps sealed tightly when storing them so that they don't dry out.


Blending Effects
-
1Layering two colors. Select your two colors and draw the outline of the shape you wish to make with the lighter color. Once your shape has dried, try outlining a portion of it with a second, darker color. Use the clear water pen to pull your second color into the first. This is how you can begin layering and blending additional colors in your artwork.
- Once you've finished layering, clean your pens by dipping them in water and wiping them on a piece of scrap paper.[3]
-
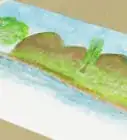
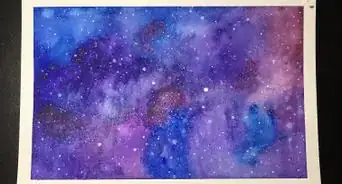
2Use complementary colors and a water pen to create a gradient. Choosing at least three complementary colors. Put the lightest of your three colors on the paper first and create a solid block of color. Above and below this color block, put down some strokes of your second color. Then, place the third color so that it caps your image on the top and bottom. [4]
- Beginning at the top, move your water pen back and forth, while also slowly moving it down
- Repeat this blending effect, this time moving from the bottom up into the middle.
-
3Create an ombre effect. By rubbing the tips of your brush pens together, you can mix colors on the tip itself. Always make sure you apply the darker color to the lighter one because you will be able to see how much color you are transferring to the brush. Once your brush is loaded with a darker color, move it across the page in the design you desire.[5]
- This will provide a gradient in your artwork that moves from dark to light.
Advanced Techniques
-
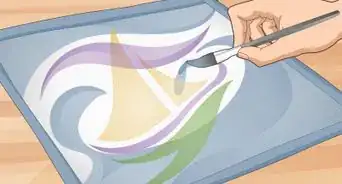
1Use a water-proof medium as a stamp. Select three or more complementary colors and apply the pens in a pattern of your choosing to the outside of a plastic sandwich bag or a piece of wax paper. [6]
- Use the bag as a stamp, flipping it onto a pre-moistened piece of paper.
- Use your fingers to spread the colors around, creating the effect you desire.
-
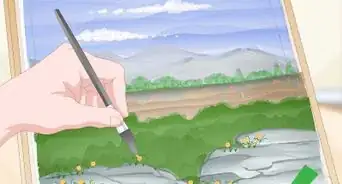
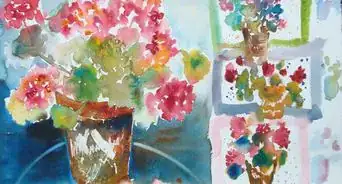
2Create floral designs using short, curved strokes. Choose a color and begin by making a small dot in the middle of your page. Surround this with three or four short, curved strokes of the same color. Apply your water pen to the colored strokes to create the effect of petals that are darkened towards the center and faded out as you move outwards. Continue this process, building your flower out until it has reached the size you desire.[7]
- Add flowers of a variety of colors to create a pattern or bouquet effect.
- Add leaves, vines or stems to complete your look.
- Experiment by using different colors for the inner and outer petals.
-
3Develop your hand-lettering skills. Watercolor brush pens can help you make beautiful hand-lettering and calligraphy projects. When practicing your letters, note that you will want to increase pressure on your brush on the downward strokes and decrease pressure, using only the tip, on your upward strokes. By going over the tops of your downward strokes a second time, you can easily create depth and shadow, further enhancing your lettering.[8]
- Experiment with your advanced shading and blending techniques to create even more lettering options.[9]
Community Q&A
Did you know you can get answers researched by wikiHow Staff?
Unlock staff-researched answers by supporting wikiHow
-
QuestionHow do you clean watercolor brush pens?
 wikiHow Staff EditorThis answer was written by one of our trained team of researchers who validated it for accuracy and comprehensiveness.
Staff AnswerwikiHow Staff EditorStaff AnswerA pre-filled watercolor brush pen doesn’t need any special cleaning, since it is essentially a marker with a brush tip. However, if you’re using a water brush, you can clean it by filling the tube with clean water and squeezing it out of the chamber, then wiping the bristles on a clean paper towel until the water comes out clear. Use the paper towel or your fingers to smooth the bristles into a neat point, then cap the brush to protect it.
Support wikiHow by unlocking this staff-researched answer.
-
QuestionHow do you store watercolor brush pens?wikiHow Staff EditorThis answer was written by one of our trained team of researchers who validated it for accuracy and comprehensiveness.
Staff AnswerwikiHow Staff EditorStaff AnswerWatercolor brush pens don’t really need special care. Simply place the caps on tightly when you’re done so that they don’t dry out. Also take care that the tips don’t get bent by using light pressure when you paint with them and being careful when you put on the cap.Support wikiHow by unlocking this staff-researched answer.
-
QuestionCan you refill a watercolor brush pen?wikiHow Staff EditorThis answer was written by one of our trained team of researchers who validated it for accuracy and comprehensiveness.
Staff AnswerwikiHow Staff EditorStaff AnswerSome types, such as the ColorIt watercolor brush pen, are designed to be refilled. You can also use water brushes as refillable brush pens by filling them with ink or a mixture of water and water-soluble paint.Support wikiHow by unlocking this staff-researched answer.
Things You'll Need
- Watercolor brush pens
- Paper or coloring book with thick and smooth pages
- A clear water pen
References
- ↑ https://www.youtube.com/watch?v=qrlqM7YBJTg&feature=youtu.be
- ↑ https://www.youtube.com/watch?v=tgHhRW9dlA4
- ↑ https://www.colorit.com/blogs/news/how-to-use-watercolor-brush-pens-tutorial
- ↑ https://www.youtube.com/watch?v=qrlqM7YBJTg&feature=youtu.be
- ↑ https://www.colorit.com/blogs/news/how-to-use-watercolor-brush-pens-tutorial
- ↑ https://www.youtube.com/watch?v=qrlqM7YBJTg&feature=youtu.be
- ↑ https://www.youtube.com/watch?v=RaDt2ObgBHU&feature=youtu.be
- ↑ https://www.youtube.com/watch?v=S02q2vnS3tQ
- ↑ https://www.youtube.com/watch?v=p3rC5c5lGns
About This Article