This article was co-authored by Andres Matheu. Andres Matheu is the Owner of Hömm Certified Painting Systems, an Interior and Exterior Residential painting business based in the Washington, DC Metro area. Andres specializes in interior and exterior residential painting, color consultations, cabinet refinishing, wallpaper removal, and epoxy flooring among other services. An EPA Lead-safe Certified Firm, Hömm Certified Painting Systems has been awarded the Best of Houzz 2019 Service, Angie's List Super Service Award 2019, and Northern Virginia Magazine's 2018 Best Home Experts (painters) award.
There are 9 references cited in this article, which can be found at the bottom of the page.
This article has been viewed 52,959 times.
After a while, painted houses start to reveal wear and tear, so once in a while, doing a refreshing exterior house-painting project can bring back your home’s vibrancy. There is a lot of preparation work required for repainting a house but it's important to not skip this part because it makes the painting work much easier and ensures that the paintwork endures and stays in great condition.[1]
Steps
Preparing the house for painting
-
1Start with an exterior house wash. It is important that you spend some time washing the dirt and grime off the exterior of your house before you start painting.[2] If the exterior surface of your house is free of paint-repelling soil, the primer and paint will adhere better, making the paint last longer. Most of the time, a simple wash with a hose, a pump sprayer and a scrub brush is sufficient, but if you decide that you would prefer a professional to help you, a power washer in the hands of a professional can provide a superior clean.[3]
- It is not recommended that you use a power washer on your own unless you are familiar with them because they can cause damage to house wood siding and house trim if used incorrectly.[4]
-
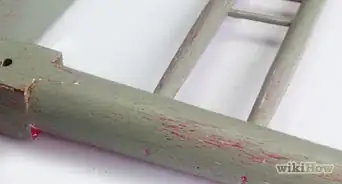
2Remove chipped and flaking paint from the exterior walls. Before you paint the exterior of your house, scrape off any bubbling, flaking or blistering paint. Painting over this could cause future problems for your new house painting project.[5] Strip these parts right back so that they no longer present a problem.[6]Advertisement
-
3Sand the area you are painting. The goal when painting the exterior of your house is to have the cleanest and most beautiful exterior you can. Sanding will help by smoothing out any bumps or lumps that can look strange under a fresh coat of paint.[7]
-
4Patch and fill holes in the house. The goal here is to repair any damage that could worsen over time, which may require a future painting of your home. Be sure that you repair any rotten wood, fix any dents and replace damaged pieces of your home that might get worse in the future.[8]
-
5Caulk and seal any windows or openings to prevent air and water from leaking in. This may be the most important part of the prepping process. It's important to have a well-maintained, beautified, non-rotting wood house, but it's just as important to make sure that the windows, cracks and openings aren't leaking air or letting in water, which can ruin the interior of your house. Depending on the severity of the deterioration, you can even resort to using a heavy duty, professional grade, industrial caulking.[9]


Painting the House
-
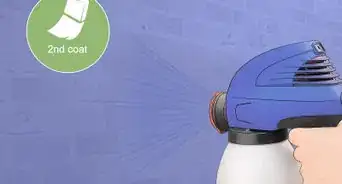
1Use a paintbrush for better control and better precision.[10] Paint sprayers can be messy in an unpracticed hand. Alternatively, you could use a mini-roller to go along your siding a little faster. Except for siding, brick and large doors, try to avoid using rollers as they don’t cover as well, and it is harder to be as precise as a paintbrush.[11]
- Take good care of your paintbrushes. Wash them out after every painting session, without fail. That way, they'll stay in great condition for much longer.
-
2Start at the top of your house and work your way down. This serves two purposes. First, it allows you go down the ladder instead of up as you work, preventing potentially life threatening falls. Also, when prepping/scraping the paint off, you will have debris falling on the bottom areas that you just painted. Second, painting from top to bottom prevents messy drips and missed spots. Ideally, you should also start painting from the left side and work your way right because you are more likely to see any missed spots.[12]
-
3Don’t start painting if it might rain. Whilst latex paint is fairly steadfast once it’s dried, a good rain while it’s still wet can wash the paint away. It's better to wait until the rain is no longer in the forecast than trying to paint on a rainy day and have to start all over again later.
-
4Follow the shade. When you are painting the exterior of your home, you would be wise to follow the shade from your house and avoid the sun. As the sun moves around your house, try to avoid the sun as much as possible because you may become overheated with the sun beating down on you, and painting in direct sunlight (depending on the heat of the day) is not good for the application process and can cause bubbling/adhesion issues. By moving with the shade, you minimize these potential problems.
- For example, if it is sunny in the morning on the east side of the house, rather paint on the west side of the house.


Expert Q&A
-
QuestionDo you have to pressure wash your house before you paint?
 Andres MatheuAndres Matheu is the Owner of Hömm Certified Painting Systems, an Interior and Exterior Residential painting business based in the Washington, DC Metro area. Andres specializes in interior and exterior residential painting, color consultations, cabinet refinishing, wallpaper removal, and epoxy flooring among other services. An EPA Lead-safe Certified Firm, Hömm Certified Painting Systems has been awarded the Best of Houzz 2019 Service, Angie's List Super Service Award 2019, and Northern Virginia Magazine's 2018 Best Home Experts (painters) award.
Commercial PainterIt's very important to clean and prep the surfaces of your home before you paint. The surfaces must be free of any grease, debris, and foreign objects such as vine roots in order for you to be able to start working on them. -
QuestionHow do you estimate the cost of a paint job?Andres MatheuAndres Matheu is the Owner of Hömm Certified Painting Systems, an Interior and Exterior Residential painting business based in the Washington, DC Metro area. Andres specializes in interior and exterior residential painting, color consultations, cabinet refinishing, wallpaper removal, and epoxy flooring among other services. An EPA Lead-safe Certified Firm, Hömm Certified Painting Systems has been awarded the Best of Houzz 2019 Service, Angie's List Super Service Award 2019, and Northern Virginia Magazine's 2018 Best Home Experts (painters) award.
Commercial PainterIt pretty much comes down to geometry. You'll need to know how long it will take and how much material you will require and the source of that is in the square footage of your home. It will also depend on the state of your drywall, as the cost will change whether it is brand new versus drywall that is peeling and has been painted many times already. -
QuestionHow do you paint straight lines?Andres MatheuAndres Matheu is the Owner of Hömm Certified Painting Systems, an Interior and Exterior Residential painting business based in the Washington, DC Metro area. Andres specializes in interior and exterior residential painting, color consultations, cabinet refinishing, wallpaper removal, and epoxy flooring among other services. An EPA Lead-safe Certified Firm, Hömm Certified Painting Systems has been awarded the Best of Houzz 2019 Service, Angie's List Super Service Award 2019, and Northern Virginia Magazine's 2018 Best Home Experts (painters) award.
Commercial PainterUse painter's tape to make sure there is a pattern set before painting. For example, you can use tape to make a straight line when painting around a doorframe.
Warnings
- Wear proper gloves.⧼thumbs_response⧽
- Beware of lead paint! Some houses that were built before 1978 have paint on them that may contain traces of lead. Exposure to lead paint can cause anaemia, learning disabilities in children and damage to the brain and nervous system. When working on the exterior of your historic home (older than 1960), be sure that you observe the proper safety measures including:⧼thumbs_response⧽
- Wear an inhalator.⧼thumbs_response⧽
- Don't use a putty knife to scrape off old paint, it takes longer and you will have to be closer to the harmful dust that comes off. Use a one foot long scraper because it works much much faster due to the metal being perpendicular to the paint.⧼thumbs_response⧽
- Protect your eyes with safety goggles.⧼thumbs_response⧽
- Wash off the walls with a pointed nozzle on a hose to get the majority of the loose paint off without having to scrape it. The water also reduces the dust that you might breathe.⧼thumbs_response⧽
Things You'll Need
- Hose, pump sprayer, scrubbing brush
- Power washer (optional, best done by a professional)
- Inhalator or mask
- Gloves
- Safety goggles
- Paint scrapers
- Sander/sandpaper and block
- Putty
- Primer for tough spots, such as worn windows
- Paintbrushes
- Paint
- Old clothing
- Ladders and/or scaffolding
- Covered shoes
- Paint stirrer
- Bowl or container for washing out paintbrushes


References
- ↑ Andres Matheu. Commercial Painter. Expert Interview. 28 July 2020.
- ↑ Andres Matheu. Commercial Painter. Expert Interview. 28 July 2020.
- ↑ https://www.angieslist.com/articles/6-steps-prepare-your-home-exterior-paint.htm
- ↑ https://www.dummies.com/home-garden/home-painting/how-to-power-wash-your-homes-exterior-for-painting/
- ↑ Andres Matheu. Commercial Painter. Expert Interview. 28 July 2020.
- ↑ https://todayshomeowner.com/video/how-to-prepare-the-outside-of-a-home-for-painting/
- ↑ https://www.thisoldhouse.com/how-to/how-to-prep-exterior-painting
- ↑ https://youtu.be/nwCVH8qkXXI?t=80
- ↑ https://www.youtube.com/watch?v=JUn9AJs6EfA
- ↑ Andres Matheu. Commercial Painter. Expert Interview. 28 July 2020.
- ↑ https://www.popularmechanics.com/home/outdoor-projects/how-to/g842/7-smart-tips-for-painting-your-house/
- ↑ https://www.thisoldhouse.com/how-to/how-to-paint-your-homes-exterior
About This Article