This article was co-authored by Mitchell Newman and by wikiHow staff writer, Kyle Hall. Mitchell Newman is the Principal at Habitar Design and its sister company Stratagem Construction in Chicago, Illinois. He has 20 years of experience in construction, interior design and real estate development.
This article has been viewed 102,845 times.
Paneling over walls with plywood is an easy way to update a room’s look. Before you can attach plywood panels to a wall, you should figure out how many panels you need and then cut them to the right size. You also have to account for any doors and windows on the walls you’ll be paneling. Once the panels and walls are ready, you can easily put the panels in place using adhesive and nails.
Steps
Getting the Panels Ready
-
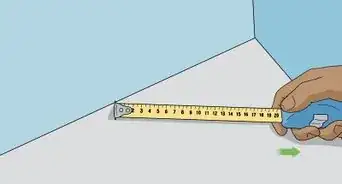
1Measure the perimeter of the room you’ll be paneling. Measure the length of each wall in the room with a tape measure and add the lengths together to find out the size of the perimeter. If you’re just paneling one wall with plywood, you'll only need the length of that wall. Divide the perimeter of the room by the length of the plywood panels you want to use to find out how many panels you'll need.
- For example, if the perimeter of the room is 24 feet (7.3 meters), and the plywood panels you want to use are 4 feet (1.2 meters) across, you would need six panels.
- If you’re paneling one wall that’s 15 feet (4.6 meters) long, and the plywood panels you want to use are 4 feet (1.2 meters) across, you would need four plywood panels. Four of the panels would equal 16 feet (4.9 meters), so you’d need to cut 1 foot (0.3 meters) off one of the panels.
-
2Acclimate the plywood panels to the room before you get started. This will prevent them from warping once they're up on the walls. Lean the panels along one of the walls in the room you’ll be paneling. Let the panels sit in the room for 24 hours. If you’re paneling a room that’s below ground level, like a basement, let the panels acclimate for 48 hours.[1]Advertisement
-
3Arrange the panels in your desired placement. Lean them up against the walls so you can get a sense of how they'll look when you're finished. Move them around and experiment with different looks. Play around with the different grains and colors until you find an arrangement you like.[2]
- Once you’ve found an arrangement you like, number the back of the panels with a pencil so you know what order they go in.
- For example, the panel in the corner of the room you’ll be starting the installation in would be numbered “1,” the next panel over would be “2,” the next “3,” and so on.
-
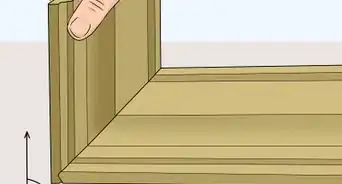
4Use a saw to cut the plywood panels to size. You want the height of the panels to be the distance between the floor and the ceiling in the room you’ll be paneling. If you’ll be installing ceiling molding, make the panels ¼ inch (0.6 cm) shorter.[3]
-
5Make the cutouts for any outlets. Take a piece of chalk and heavily outline the perimeter around the outlet cover on the wall. Take the piece of plywood that will go over that section of the wall and press it into place. Tap the section of the panel that’s over the outlet so the chalk outline transfers onto the back of the panel. Remove the panel and cut out the chalk perimeter on the plywood with a saw.
-
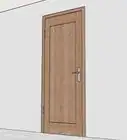
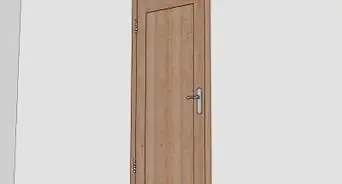
6Make the cutouts for any doors and windows. Mark where the panel that will cover the door or window will begin and end. Measure the distance between the marks and the edges of the door or window. If you’re covering a window, measure how high up the top and bottom of the window are from the floor. If you’re measuring a door, measure how high up the top of the door is from the floor.
- Use the measurements to draw the shape of the window or door onto the plywood panel. Use a saw to cut out the shape.


Prepping the Walls
-
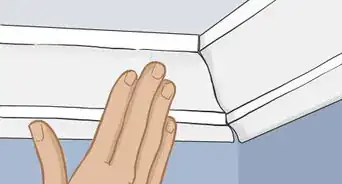
1Remove any trim from the walls. Slide a 3-inch (7.6 cm) putty knife between the wall and one end of the trim and pry the trim slightly from the wall. Take a pry bar and use it to pry the trim 1 inch (2.5 cm) from the wall. Work your way down the wall until you’ve pried the entire strip of trim from the wall. Repeat with all of the trim on the walls you’ll be paneling.[4]
-
2Take down any wallpaper on the walls. Soak the wallpaper with water using a sponge or floor mop. Let the water absorb into the wallpaper for 15 minutes. After 15 minutes, use a putty knife to scrape the wallpaper off the walls. Apply more water as needed.[5]
- Once you've got the wallpaper off, spray the walls with a gel stripper to help remove leftover paste.
-
3Take off any receptacle covers over electrical outlets. Turn the electricity off first by flipping the breaker switch for the room you're working in. The switch should be located in the electrical panel for the house. Use a screwdriver to unscrew the screws holding the receptacles in place. Set the receptacle and screw aside in a plastic bag so you don't lose them.[6]
-
4Make sure the walls are flat. Use a level to check. Place the edge of the level against the section of wall you're checking. If the bubble in the tube of liquid is between the two black lines, the section of wall is level. If it's off to the side of the lines, the wall isn't level.
- Use a fine-grit sandpaper to sand down raised sections on the walls. The plywood paneling will work best on a flat surface.


Attaching the Paneling
-
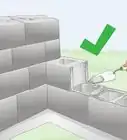
1Use a caulking gun to apply panel adhesive to the walls. Start with one section of wall in a corner of the room. Squeeze the handle on the caulking gun so panel adhesive comes out. Smear a quarter-size amount of the panel adhesive onto the wall. Repeat every 10 inches (25.4 cm) up, down, and across the section of the wall where the first plywood panel will go.[7]
- Only apply the panel adhesive to one section of the wall. Wait until you get the paneling up on that section before you move on to another one.
- You can find a caulking gun and panel adhesive at your local hardware store.
-
2Press the first plywood panel into the adhesive on the wall. The backside of the paneling you want hidden should be facing the wall. Use a rolling pin to firmly press the panel into the adhesive.[8]
-
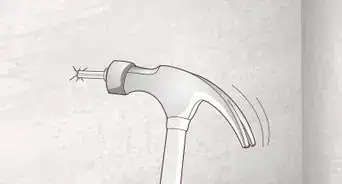
3Hammer 1 ¼ inch (3.2 cm) finishing nails into the top and bottom of the panel. The nails will ensure the panel stays in place. Space the nails so there’s a nail every 6-12 inches (15.2-30.5 cm) across the top and bottom of the panel.[9]
- You can find finishing nails at your local hardware store. Look for nails that match the color of the plywood paneling.
-
4Leave a small gap between each plywood panel. Make the gap around 0.05 inches (1.27 mm), or about the thickness of a dime. The gap will give the plywood paneling room to expand and contract during seasonal changes.[10]
-
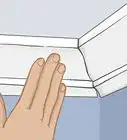
5Continue around the room until all the walls are paneled. Make sure you’re leaving a gap between each panel. Depending on the size of the walls you're paneling, you may need to replace the panel adhesive in the caulking gun. Once the plywood panels are attached to the walls, you can reattach any trim you removed by hammering it into the plywood panels with 1 ¼ inch (3.2 cm) finishing nails.


Expert Q&A
Did you know you can get expert answers for this article?
Unlock expert answers by supporting wikiHow
-
QuestionCan I use plywood to make panel molding along the bottom of my walls?
 Mitchell NewmanMitchell Newman is the Principal at Habitar Design and its sister company Stratagem Construction in Chicago, Illinois. He has 20 years of experience in construction, interior design and real estate development.
Construction ProfessionalYou would typically do that with MDF, not plywood. MDF gives you a much better painted surface since it's smoother. It's actually less expensive than plywood.
Support wikiHow by unlocking this expert answer.
Things You’ll Need
- Tape measure
- Plywood panels
- Pencil
- Saw
- Chalk
- 3-inch (7.6 cm) putty knife
- Pry bar
- Screwdriver
- Sandpaper
- Caulking gun
- Panel adhesive
- Rolling pin
- Hammer
- Finishing nails


References
- ↑ http://www.designthespace.com/how-to-install-wood-paneling-guide/
- ↑ http://www.designthespace.com/how-to-install-wood-paneling-guide/
- ↑ http://newenglandclassic.com/content/How-To-Install-Wood-Paneling.pdf
- ↑ https://www.familyhandyman.com/carpentry/trim-carpentry/how-to-remove-wood-trim/view-all/
- ↑ https://www.familyhandyman.com/walls/the-best-way-to-remove-wallpaper/view-all/
- ↑ http://www.designthespace.com/how-to-install-wood-paneling-guide/
- ↑ http://www.designthespace.com/how-to-install-wood-paneling-guide/
- ↑ http://www.designthespace.com/how-to-install-wood-paneling-guide/
- ↑ http://newenglandclassic.com/content/How-To-Install-Wood-Paneling.pdf
About This Article

Paneling your walls with plywood is an easy way to update your decor. Before you put up panels, you’ll need to use a saw to cut the wood to match the length of your walls. You’ll also need to make cutouts for doors, windows, and outlets. Once they’re trimmed, use a caulking gun to apply adhesive to the walls every 10 inches or so. Then, press a plywood panel on and nail the top and bottom to the wall to secure it in place. Repeat this process until all the panels are up. Make sure to leave about half an inch of space between each panel in case the wood expands or contracts during seasonal changes. To learn how to take off wallpaper, read on!