wikiHow is a “wiki,” similar to Wikipedia, which means that many of our articles are co-written by multiple authors. To create this article, 9 people, some anonymous, worked to edit and improve it over time.
This article has been viewed 30,415 times.
Learn more...
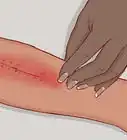
There are two ways to tie suture knots and several types of suture knots. This instruction set focuses on how to perform a surgeon’s knot using an instrument tie. Instrument ties are ties for knots in sutures made with instruments and are typically used to close superficial lacerations (wound). This instruction set is intended for right handed users that are familiar with using a needle holder and know the proper way to load the needle holder with the needle. Novice users should consult the "Tips for Novice Users" section before beginning the procedure.
Steps
Things to Be Aware Of
- How to hold a needle holder: Using the right hand, grasp the needle holder using the thumb and ring finger in the rings. The middle and little finger should rest on the outside of the ring that your ring finger is in. Extend the index finger and rest it on the hinge of the instrument.
- How to close a needle holder:, squeeze your thumb and ring finger until a loud click is heard (first degree of tightness). There are a total of three degrees of tightness. With each click, the grasp of the jaws tighten.
- How to open a needle holder: There are two ways to open the needle holder. Use the method that is most comfortable. Method 1: Use the middle of your thumb to push the ring away from your palm and use your middle, ring, and pinky finger to push the other ring towards your palm. Move the rings away from each other. Method 2: Place the left ring of the needle holder in palm. Hold down the left ring with your middle, ring, and little finger. Rest index finger of the shank of the needle holder. Use the palm area under your thumb to push the right ring away from your palm. Move the rings away from each other.
- How to grasp the needle: Grasp the needle two thirds away from the tip of the needle and at the end of the jaws of the needle holder. The needle and needle holder should be perpendicular to each other. If repositioning is necessary use the forceps to hold the needle, not your hand. Be careful; the tip of the needle is sharp.
- How to hold forceps: Hold the forceps with your thumb on one side and and your index and middle finger on the other side.
Tying the Surgeon's Knot
-
1Use the forceps to evert the right skin edge. Hold the forceps with your left hand and lift the right skin edge.
-
2Push the tip of the needle through the right skin edge to the center of the wound. Hold the needle so that the tip of the needle is perpendicular to the skin. Penetrate the skin and turn wrist inward, following the curvature of the needle, to push the needle through the tissue until the tip of needle is seen in the middle of the wound. *CAUTION: Do not push the needle to close to the opening of the wound or too far away.Advertisement
-
3Pull the needle out of the right skin edge. Release the needle and pick it up again at the tip of the needle. Pull until the entire needle is out on the right skin edge.[1]
-
4Reposition the needle in the needle holder. Use the forceps to hold the needle and then correctly reposition the needle in the needle holder.[2]
-
5Use the forceps the evert the left skin edge. Grasp the part of the left skin edge that is straight across the wound from where you first inserted the needle on the right side.
-
6Push the needle through the left skin edge. Place the tip of the needle perpendicular to the inside of the wound. Penetrate the skin and turn the wrist inward, following the curvature of the needle, to push the needle through the tissue until the tip of needle is seen on the outer left side of the wound. *CAUTION: Do not push the needle to close to the opening of the wound or too far away.
-
7Pull the needle out of the left skin edge. Release the needle and pick it up again at the tip of the needle. Pull until the entire needle is out on the left skin edge.
-
8Transfer the needle from needle holder to left hand. Grasp the needle farthest away from the tip and release the needle from the needle holder *WARNING: Be careful; the tip of the needle is sharp.
-
9Create a 5 cm short end on the right side of the wound by gently pulling the suture thread through the wound. The suture thread pulled through is the long end of the suture thread which is now on the left side.
-
10Put the needle down and out of the way. The needle will not be used for the remainder of the procedure.
-
11Place needle holder parallel to the wound in the middle of the two strands.[3] Do not make contact with the wound.
-
12Loop the long strand around the needle holder twice (clockwise). Lift the part of the long strand, that is closer to the wound, up and over the instrument.[4] Loop the thread twice around the needle holder.
-
13Grab the short side of the thread using the needle holder. Grab the short side of the thread as close to the end as possible.[5] More than one degree of tightness may be necessary, so that the suture material doesn't slip out of the jaws of the needle holder.
-
14Pull the short thread through the loops. When pulling the thread, cross your left hand over your right and pull so that the edges of the wound touch. Release the short end of the suture thread. Note that the short side of the thread is now on the left side and the long side of the thread is on the right side. *WARNING: Pulling too tight can cause tension in the skin or the suture could break. Not pulling tight enough will leave the wound open.
-
15Place needle holder parallel to the wound in the middle of the two strands. Do not make contact with the wound.
-
16Loop the long strand around the needle holder once (counterclockwise). Lift the long strand up and over the instrument.[6] Loop the thread once around the needle holder.
-
17Grab the short side of the thread using the needle holder. Grab the short side of the thread as close to the end as possible. More than one degree of tightness may be necessary, so that the suture material doesn't slip out of the jaws of the needle holder.
-
18Pull the short thread through the loop. When pulling the thread, cross your left hand over your right and pull so that the edges of the wound touch. Release the short end of the suture thread. Note that the short side of the thread is now on the right side and the long side of the thread is on the left side.
-
19For one last time, place needle holder parallel to the wound in the middle of the two strands. Do not make contact with the wound.[7]
-
20Loop the long strand around the needle holder once (clockwise). Lift the long strand up and over the instrument. Loop the thread once around the needle holder.
-
21Grab the short side of the thread using the needle holder. Grab the short side of the thread as close to the end as possible. More than one degree of tightness may be necessary, so that the suture material doesn't slip out of the jaws of the needle holder.
-
22Pull the short thread through the loop. When pulling the thread, cross your left hand over your right and pull so that the edges of the wound touch. Note that the short side of the thread is now on the left side and the long side of the thread is on the right side.
-
23Using the suture scissors, cut the suture thread. Pick up both the long and short ends of the thread in one hand. Cut the threads evenly and close to the knot. *Caution: Be careful not to cut too close to the knot or it might come undone.
-
24Dispose the needle in a sharps container. Grasp the needle with the needle holder and drop it in the sharps container.


Warnings
- The suture pad may slip during the procedure.The user my need to support it with the other hand.⧼thumbs_response⧽
- Inexperienced users might feel discomfort while using the needle holder.⧼thumbs_response⧽
- When clamping the needle with the needle holder, only clamp it to the first degree of tightness (until one click is heard). Any tighter will flatten the needle and may dent the jaws of the needle holder⧼thumbs_response⧽
- Do not dispose of the needle in a regular trash can. Dispose in a sharps container.⧼thumbs_response⧽
- In this procedure, you will be working with sharps (needle). Avoid contact with the sharp end of the needle.⧼thumbs_response⧽
Things You'll Need
- Needle holder
- Suture scissors
- Forceps
- Suture pad (the straight wound is used in this procedure)
- Suture material (needle and thread): silk, non-absorbable suture 2-0
- Access to a sharps container


References
- ↑ https://5minuteconsult.com/collectioncontent/30-156300/procedures/basic-instrument-suture-tie
- ↑ https://wcvm.usask.ca/vsac205/Lab2/how-to-tie-knots.php#InstrumentTies
- ↑ https://www.youtube.com/watch?v=eh74OqUwMz4
- ↑ https://www.youtube.com/watch?v=eh74OqUwMz4
- ↑ https://www.youtube.com/watch?v=eh74OqUwMz4
- ↑ https://www.youtube.com/watch?v=eh74OqUwMz4
- ↑ https://www.youtube.com/watch?v=eh74OqUwMz4


Medical Disclaimer
The content of this article is not intended to be a substitute for professional medical advice, examination, diagnosis, or treatment. You should always contact your doctor or other qualified healthcare professional before starting, changing, or stopping any kind of health treatment.
Read More...