X
wikiHow is a “wiki,” similar to Wikipedia, which means that many of our articles are co-written by multiple authors. To create this article, 33 people, some anonymous, worked to edit and improve it over time.
The wikiHow Video Team also followed the article's instructions and verified that they work.
This article has been viewed 237,241 times.
Learn more...
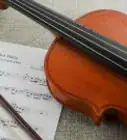
The violin is a beautiful instrument but it is not as easy to play as it looks. It takes hard work to become good violin player, but with practice, you can do it. It can play many types of music including classical, rock, jazz, and reels! Here are some things needed to play the violin:
Steps
-
1Study the violin. Pluck the strings at the fingerboard. The highest note is E. The lowest is G. The second lowest is D and the second highest is A.[1]
-
2Tighten the bow by twisting the scroll located just below the frog.
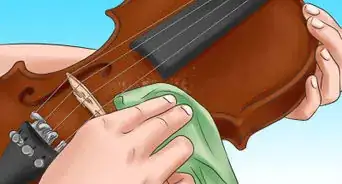
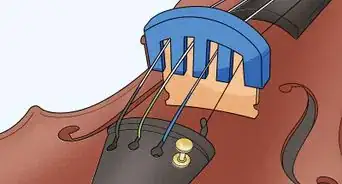
- Put rosin on it. Make sure to scratch newly bought rosin with sandpaper, a key, or a coin so it's no longer smooth. You will need to rosin your bow about every time you practice. After practicing, make sure to wipe your violin with a clean cloth to get rid of any sticking rosin. Also, make sure not to loosen your bow as much as shown above!
Advertisement -
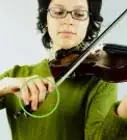
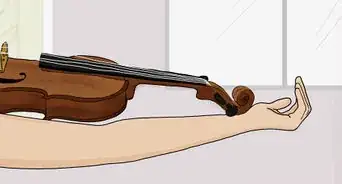
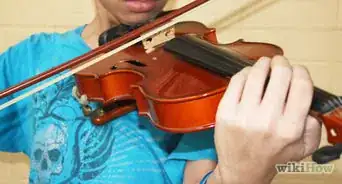
3Put your left thumb and four fingers on the neck at the top of the violin. Make sure your wrist is straight, not flat. Remember, "no pancake hands! Make your wrist straight as a carrot!" Flex your fingers and touch the strings. Put the chin rest under your jaw and align the violin with your arm. Don't put the violin right on your arm, a bit beside it.[2]
-
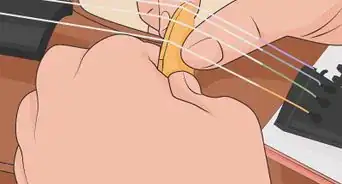
4Hold the bow correctly. Put your thumb just next to the frog. Place your middle and ring finger together on the frog(the end or the ‘thick part’). Make sure they don't go all the way around the frog. Your pointing finger should rest on its side at the second knuckle about four centimeters above your middle finger. Lastly, place your pinky finger next to the scroll. Always remember that your pinky should not go around the bow; it's the only finger that stays on top. Relax your fingers. Your fingers will hold it well. You can practice first using an expo marker.[3]
- It might also be beneficial to place your fingers near the balance point of the bow. To do this, lay out your middle finger (since it has the most balance) and place the bow on it. Move the bow to the right or left until it stays on your finger without falling off. Then put all of your fingers in place - your finger positioning stays the same, you are just placing your hand in a different place.
-
5Hold the bow gently but firmly. Be sure that your bow stick is parallel to the bridge. Start with E, the string closest to your right. E is the highest string. Rest the bow on the E string and start at the bottom of the bow. Put the hair on the string and slowly pull the bow down. Flex from your elbow.
- Remember not to put pressure on your hand; use the weight of your arm to pull the bow.
-
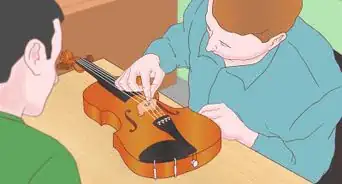
6Once you have reached the tip of the bow, put your first finger down. The key is to know where to put your fingers. Put your finger right at the edge of the fingerboard. It's an F. Move it down one fingertip. That should be where you put your first finger.
-
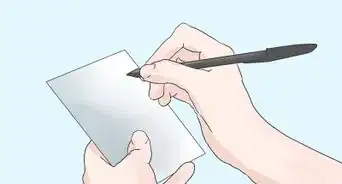
7It's your decision if you want to mark the spot or not. Many violin teachers mark the spot so that you always know where to put your finger, although you will get into the habit of looking at your fingers and not relying on your ears.[4]
-
8Do the same thing, but this time placing your second finger. Start right beside your first finger and move it down one finger tape. Mark this with tape as well. This note is a G. Play.[5]
-
9Place your third finger right beside the second finger. Move it down only half a fingertip. Mark this as well. It is an A. Play this note.[6]
-
10Now move to the next string on the left. It is the second highest. It is called the A string. Play this. Now. You should already have the tape marking where all the notes are. No fingers is A. First finger is B. Second finger is C. Third finger is D.
-
11The next string is the D string. Open string: D. First finger: E. Second Finger: F sharp. Third Finger: G.
-
12Do you see a pattern in the strings? Guess the next note. If you guessed G, then you're right. The notes on the G string in ascending order are: G, A, B and C.
-
13Good luck! Keep practicing and use the help of a teacher.


Advertisement
Community Q&A
-
QuestionHow do I know if a violin is the right size for me?
 Community AnswerUse a measuring tape or stick, and measure from the side of your neck, along your extended arm, to the middle of your palm (face up). You can look up a violin size chart to determine which size you need, based on your arm length.
 -
QuestionIs it possible to learn the violin in a year or two?
 Community AnswerIt certainly is. Practice regularly and push yourself to learn new, more challenging music each time you plateau at an easier level. Attend all of your lessons and ask the teacher for advice on improving, and be sure to act on that. The absolute key is practice, and plenty of it.
 -
QuestionAre colored violins good to play?Community AnswerColored violins are okay for practice or for personal time. Most orchestras will be reluctant to have your colors violin, however, because it will stand out among the others and cause a distraction.
Advertisement
Warnings
- Don't leave your instrument in the sun (whether it's in it's case or not)! The heat will make the strings loosen, or go flat.⧼thumbs_response⧽
- Do not get your instrument wet. Any kind of liquids will ruin your instrument! If you get a little water or something on the back part of the scroll (or very top of your instrument where the big tuning pegs are), don't worry about it too much. Just wipe it off and be more careful next time.⧼thumbs_response⧽
- Don't let younger children get to your instrument. If they're old enough to understand about how fragile the instrument is, fine, but if they don't, don't let them use it.⧼thumbs_response⧽
- Don't leave your instrument in a cold area (like a car or a cold basement/attic)! The cold will make the strings tighten, or go sharp, causing possible breakage if the area is extremely cold. The strings will need to be replaced if broken.⧼thumbs_response⧽
Advertisement
References
- ↑ https://www.aureusacademy.com/step-step-guide-play-violin-beginners/
- ↑ https://www.youtube.com/watch?v=88G0O5unNuQ
- ↑ https://www.youtube.com/watch?v=88G0O5unNuQ
- ↑ https://www.connollymusic.com/stringovation/dos-and-donts-of-violin-fingering
- ↑ https://takelessons.com/blog/violin-fingering-z08
- ↑ https://takelessons.com/blog/violin-fingering-z08
About This Article
Advertisement