This article was co-authored by wikiHow staff writer, Janice Tieperman. Janice is a professional and creative writer who has worked at wikiHow since 2019. With both a B.A. and M.A. in English from East Stroudsburg University, she has a passion for writing a wide variety of content for anyone and everyone. In her free time, you can find her working on a new crochet pattern, listening to true crime podcasts, or tackling a new creative writing project.
There are 9 references cited in this article, which can be found at the bottom of the page.
This article has been viewed 18,267 times.
Learn more...
The lute is a classical and historical musical instrument that is still being constructed and played today. Unlike a guitar, the lute has “courses,” or sets of two strings, which give it a more lyrical and expansive sound. Although this instrument can have up to 13 courses, beginners will have a much easier time with a 6-course lute. Once you’ve studied the basic components of the instrument, take a moment to practice holding and plucking a lute so you can produce a sound. Next, study the different frets with French tablature so you can successfully read lute music! Finally, set aside a few minutes to memorize the different notations on a typical piece of sheet music. With enough time, dedication, and practice, you can embark on your own lute-playing journey!
Steps
Learning Lute Anatomy and Tuning
-
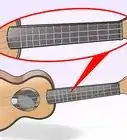
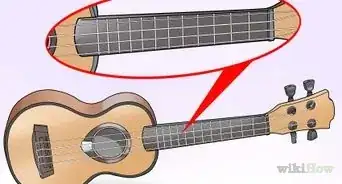
1Examine the neck to find the pegbox, pegs, and frets. Hold your lute carefully or lay it down on a flat surface to take a closer look at its parts. Look at the long, thin neck sticking out at the top of the instrument, with a large, diagonal wooden piece sticking out behind the lute. The front of the neck is known as the fretboard, and it’s covered with a sections of parallel lines, known as frets. The angular piece of wood is known as the pegbox, and has at least 6 pegs attached to each side.[1]
- The pegs are used to tune the different courses (sets of strings). Since there are more strings on a lute than on a guitar, there are also more pegs.
- The frets help you play specific chords and notes according to the sheet music.
-
2Check the bottom of the lute to find the course, chanterelle, and tie block. Examine the thick, rounded portion of the instrument, where the lute’s sound comes from. Find a series of at least 6 courses (12 strings), then look to the right to find a single string, otherwise known as a chanterelle. Next, find the long, rectangular block that the chanterelle and courses are attached to, which is known as the tie block.[2]
- The round portion of the lute is known as the bowl, while the flat section is known as the soundboard, table, or top.
- Most lutes have a beautiful wood carving in the center of the instrument, which is known as a rose or rosette.
- Excluding the chanterelle, a 6-course lute will have 12 total strings paired into groups of six. An 8-course lute will have 16 total strings paired into groups of 8. Count the individual strings to confirm what kind of lute you have.
Did you know? Each course has a different pitch assigned to it. As the name suggests, 6-course lutes will have 6 basic notes, while 8-course lutes will have 8 basic notes to tune.
From left to right, the base notes of the courses on a 6-course lute are: G, C, f, a, d, g.
The 8-course lute takes these courses one step further. From left to right, base notes of the courses are: D, F, G, C, f, a, d, g.
Uppercase letters indicate notes below middle C, while lowercase letters indicate notes above middle C.
Advertisement -
3Pluck each string and check the pitch with an electric tuner. Turn on an electric tuner and place it near the base of the lute. Pluck each string to create a sound, which will be evaluated by the tuner. If you don’t have an electronic tuner on hand, try downloading a tuning app to your smartphone instead.[3]
- Cleartune is a great mobile tuning option for iOS and Android phones.
-
4Rotate the corresponding pegs to adjust any out-of-tune strings. Check the tuner to see which note is registering with each string. If the pitch is too low, turn the string’s corresponding peg counter-clockwise to raise it. If the pitch is too high, turn the correct peg clockwise to properly tune the string. Continue adjusting all of the strings until they’re in tune.[4]


Holding the Lute and Plucking Strings
-
1Place the supporting strap around your back and beneath your bottom. Find a comfortable place to sit where you can separate your legs and lounge comfortably. Use a dark shoelace to tie the end of a 6 feet (1.8 m) by 2 to 3 inches (5.1 to 7.6 cm) strap, then knot that shoelace along the edge of the pegbox. Rise from your seat, and position the loose end of the strap squarely beneath your bottom. Sit back onto the strap to get a firmer grasp on your instrument.[5]
- You can purchase a strap online.
- You never have to attach the loose end of the strap to any part of the instrument, as it’s not designed to carry your lute.
- You don’t have to use a strap, but it might help you get the hang of holding your lute properly. For more detailed information on how professional lute players set up their instrumental strap, check page 9 of this resource: https://lutesocietyofamerica.org/wp-content/uploads/for-public/Beginners-Guide-Final.pdf
-
2Balance the base of the lute on your right thigh. Hold the instrument horizontally, with the neck angled toward your left shoulder. Find the bowl of the lute and place it firmly on your right thigh, letting the instrument angle from your shoulder to your lower torso.[6]
- Similar to the guitar, lute fingerings are typically designed to be done in a certain position, regardless of your dominant hand.
- Your left hand will be determining the notes and chords for the instrument, while your right hand will be producing the actual sound.
-
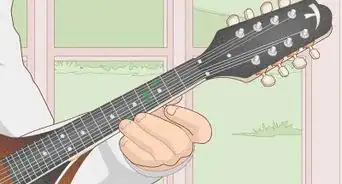
3Grip the neck with your left hand. Curve your left hand along the lower half of the neck, keeping your fingers bent so they can access the upper frets and strings. Try to keep your hand in a flexible, claw-like position, so you can better reach all of the courses.[7]
- Try to practice keeping your left hand in a curved position. Once this becomes a habit, you’ll have a much easier time maneuvering around the lute.
-
4Produce sound from the lute with your right hand. Start by shifting your right thumb downwards, dragging it over the upper string in a course. Move your thumb in a clean, fluid motion to create a vibrant sound. Continue moving your thumb in a downwards direction so the strings can vibrate.[8]
- If you pluck the upper string with enough force, you might cause the other course string to vibrate as well. This is perfectly fine!
-
5Use your index finger to pluck the lower string in the course. Using your right hand, move your index finger upwards over the lower string in the course to create a sound. Keep moving your index finger in an upward direction to let the sounds resonate.[9]
- Practice alternating with your right thumb and index finger to produce sound from your lute.
- While complex lute music will likely require you to use many more fingers, start off slow by practicing with just your thumb and index finger.[10]


Learning Notes and Chords with the French Tablature
-
1Assign different notes to each course. Review the basic notes that each course makes when plucked. Working from left to right, identify the note values on a 6-course lute as G, C, f, a, d, g. Continuing from left to right, label the note values on an 8-course lute as: D, F, G, C, f, a, d, g. Do your best to memorize these note values, as they won’t be listed on most sheet music.[11]
-
2Memorize the letters that go with each fret line. Use the alphabet to label each fret, working from the top of the lute neck to the bottom. Identify the topmost fret as “B,” then continue working your way down. Keep in mind that there’s no “C” label in lute sheet music—instead, the uppercase form of the Greek letter gamma is used (Γ), which also looks like a lowercase “r.” The frets continue as follows: D, E, F, G, H, I, K, L, M, N.[12]
- Original composers didn’t include the letter J because they didn’t want musicians mixing it up with the “I” fret.[13]
- If the letter “A” is specified in the sheet music, play an open chord without your left hand pressing down on the strings.
Did you know? Since the lute has such an extensive history, there are several different versions of the music and chords, otherwise known as tablatures, displayed in the sheet music.
Italian tablature uses numbers to tell you which notes to play.
German tablature presents the notes in a grid-like format.
French tablature is one of the most well-known styles used in lute sheet music, and uses the Latin and Greek alphabet to label the notes and frets.[14]
-
3Use the alphabet to label and identify your lute frets. Look at a piece of lute sheet music and identify which frets are being used in the first measure. Use the fingertip of your index finger, middle finger, and ring finger to form the correct notes and chords specified on the music. Work slowly and carefully, double-checking your finger positions to make sure that they match the sheet music.[15]
- For instance, if the first measure of a song has the letter “B” on the far left course, place your index finger on this course, centering it in the first fret from the top of the lute’s neck.
-
4Play a C-chord by placing your fingers on the second and third fret lines. Get the hang of different fingerings by playing a simple chord on the instrument. For a 6-course lute, place your index finger on the third course from the left, centering it on the C/Γ fret. Set your middle finger on the next course over, on the D fret. Finally, arrange your ring finger on the next course over, centered again on the C/Γ fret.[16]
- Strum all the strings with your right hand to get a resonating C-chord.
- Lutes don’t typically follow the same chord system as guitars. Instead, the notes in a chord will be specified using alphabetic notation on the French tablature.


Reading Basic Sheet Music
-
1Play a whole note when you see a straight line above the note. Examine the top of the sheet music to look for a series of straight lines, or straight lines with flags. Whenever you see a straight line above a specified fret letter, pluck the note and let it resonate for 4 beats, or however long the time signature indicates.[17]
- Since lute music is so lyrical and expressive, you don’t always have to worry about holding out notes for an exact amount of time. Instead, use these indicators to figure out the rhythm of the song.
- In lute music, whole notes are also known as semibreves.
- Remember: sheet music displays the notes and chords within a song. A tablature style simply helps you to decipher the exact notes and chords that you need to play.
Did you know? Many pieces of sheet music will display separated notes above each individual note to show how long the note is played for.
Some music, especially the pieces written by English composers, display the note values in a grid, or otherwise connected format.[18]
-
2Make a note last for 2 beats when you spot a line with 1 flag on the side. Pluck the specified fret letter for around 2 beats when you see a lowered diagonal line/flag coming off the top of the straight line. Hold this note out, but don’t hold it for the same length as a whole note.[19]
- On some lute music sheets, these notes might be referred to as minims.
-
3Aim to play a quarter note with you notice a line with 2 flags. Play a standard, singular beat in the song when you see a straight line with 2 diagonal lines sticking out of the top. Only allow this note to resonate slightly before moving on to the next part of the song.[20]
- Quarter notes are also known as crotchets.
- If you’re familiar with regular music notation, this note system might be confusing. In lute music, always remember that a note with 2 flags is a quarter note, not a sixteenth note.
-
4Play eighth and sixteenth notes when there are 3-4 flags visible. When you start playing more advanced music, you might come across faster notes, like the eighth and sixteenth notes. Search for any straight line that has at least 3 diagonal lines running from the top. Whenever you play these notes, let the sound play and transition directly into the next note.[21]
- These notes are known as quavers and semiquavers in traditional lute music.


References
- ↑ http://lutesocietyofamerica.org/resources/Documents/Beginners%20Guide%20Final.pdf
- ↑ http://lutesocietyofamerica.org/resources/Documents/Beginners%20Guide%20Final.pdf
- ↑ http://lutesocietyofamerica.org/resources/Documents/Beginners%20Guide%20Final.pdf
- ↑ https://www.lutesociety.org/pages/lute-tuning
- ↑ http://lutesocietyofamerica.org/resources/Documents/Beginners%20Guide%20Final.pdf
- ↑ http://lutesocietyofamerica.org/resources/Documents/Beginners%20Guide%20Final.pdf
- ↑ http://lutesocietyofamerica.org/resources/Documents/Beginners%20Guide%20Final.pdf
- ↑ https://m.youtube.com/watch?v=zh0X4U6h7DM&t=0m10s
- ↑ https://lutesocietyofamerica.wildapricot.org/resources/Pictures/Beginners%20Guide%20Final.pdf
- ↑ https://m.youtube.com/watch?v=zh0X4U6h7DM&t=0m10s
- ↑ http://lutesocietyofamerica.org/resources/Documents/Beginners%20Guide%20Final.pdf
- ↑ http://lutesocietyofamerica.org/resources/Documents/Beginners%20Guide%20Final.pdf
- ↑ https://m.youtube.com/watch?v=zuROUj10bmk&t=4m15s
- ↑ http://stdionysius.lochac.sca.org/collegeprojects/guitartolute.pdf
- ↑ http://lutesocietyofamerica.org/resources/Documents/Beginners%20Guide%20Final.pdf
- ↑ http://lutesocietyofamerica.org/resources/Documents/Beginners%20Guide%20Final.pdf
- ↑ http://lutesocietyofamerica.org/resources/Documents/Beginners%20Guide%20Final.pdf
- ↑ https://www.cs.dartmouth.edu/~wbc/lute/tab-intro.html
- ↑ http://lutesocietyofamerica.org/resources/Documents/Beginners%20Guide%20Final.pdf
- ↑ http://lutesocietyofamerica.org/resources/Documents/Beginners%20Guide%20Final.pdf
- ↑ http://lutesocietyofamerica.org/resources/Documents/Beginners%20Guide%20Final.pdf
- ↑ https://www.lutesociety.org/pages/teachers