wikiHow is a “wiki,” similar to Wikipedia, which means that many of our articles are co-written by multiple authors. To create this article, 9 people, some anonymous, worked to edit and improve it over time.
This article has been viewed 43,618 times.
Learn more...
Before guns were invented, the traditional bow and arrow was the primary tool used for hunting and warfare. From the jungles of the Congo, to medieval England, to the plains of North America, the bow played a key role in the development of mankind. The materials from which they were made are as diverse as the people who used them. First and foremost, a good bow must be functional. For this to be the case, it must come from a suitable piece of wood which has been properly prepared. This article does not describe how to build the bow itself; rather, it shows how pick and prepare a qualified piece of wood to fashion the historical weapon you have always dreamed of.
Steps
-
1Locate the right kind of tree, depending on what's available in your local area. It may be surprising to some, but good quality bow wood can be found around the world in a variety of climates. Depending on where you live, some varieties are:[1]
- North America- Osage Orange, Pacific Yew, Hickory, Maple, Juniper, Elm, Ash, Birch, and Locust.
- South America- Ipe, Lemonwood (Degame), and Guayabi.
- Europe- Yew (English, Spanish, or Italian), and Slippery or Red Elm.
- Africa- Cypress, African Mahogany, and Podocarpus latifolius.
- Asia- Maple
- Australia- Atlatls, instead of bows, were used on this continent.
-
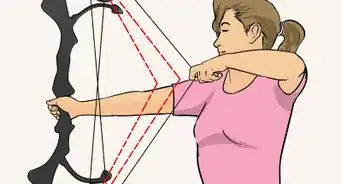
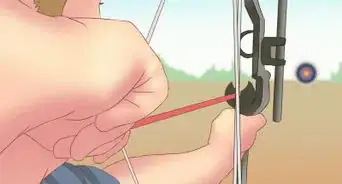
2Try to "visualize" a potential bow resting in the tree. For beginners, it is best to find one that is between 4" and 12" in diameter, is relatively free of knots, and has a straight, vertical grain.[2]Advertisement
-
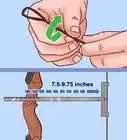
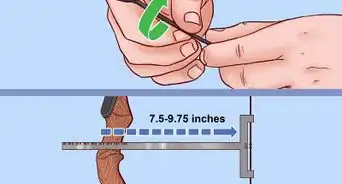
3Cut down the right tree at its base and remove the chosen section. Its length should be 1' to 2' longer than the envisioned bow's final length.
-
4Split the section, if needed. If the log you cut down is fairly small (less than 5"), it is not necessary to split it into staves at this point. If it is 6" to 8", split it down the middle into two symmetrical halves. If larger that 8", quarter it. This is accomplished by embedding a hatchet in the middle of one end of the log. From there, use wedges, splitting mauls, or whatever else is available to carefully split the log the rest of its length.[3]
-
5Seal the ends of your new bow staves. This keeps the wood from splitting and checking while it is seasoning, which could render it unsuitable for building a bow. This is best accomplished by smearing 2-3 coats of wood glue or thick paint on each end, and letting it dry.[4]
-
6Let the wood season. At this point the bow stave should be kept under cover and not exposed to extreme temperature or humidity changes until it is seasoned. Typical wood cures at a rate of 2" per year, so a 4" diameter log will take approximately a year to season, while a 12" diameter log could take three years.[5]
-
7Congratulations! You have yourself the very beginnings of a new bow. However, each piece of wood has character, and no matter how much care was taken in selecting the piece of wood, it may have invisible imperfections. For this reason, it is best to process several staves at once; then if one breaks while making a bow, you will have another one to begin on.


Warnings
- Be careful while felling any trees, accidents happen often in the woods. On this note, make sure you have permission to cut down the tree you have picked and go through the proper channels to do so.⧼thumbs_response⧽


References
- ↑ https://www.wildernessawareness.org/articles/how-make-bow-and-arrow-part-1
- ↑ https://www.wildernessawareness.org/articles/how-make-bow-and-arrow-part-1
- ↑ https://www.youtube.com/watch?v=cjyN5gCGVs0
- ↑ https://www.fieldandstream.com/How-Make-Homemade-Bow/
- ↑ https://www.popularmechanics.com/home/how-to-plans/how-to/a17108/make-a-bow-and-arrow-by-hand/