This article was co-authored by wikiHow Staff. Our trained team of editors and researchers validate articles for accuracy and comprehensiveness. wikiHow's Content Management Team carefully monitors the work from our editorial staff to ensure that each article is backed by trusted research and meets our high quality standards.
wikiHow marks an article as reader-approved once it receives enough positive feedback. In this case, 90% of readers who voted found the article helpful, earning it our reader-approved status.
This article has been viewed 146,698 times.
Learn more...
Archery is a practice that has been around for thousands of years, and humans have been trying to master the weapon for equally as long. These days, archery is much easier thanks to new equipment on the market, including sights, mechanical releases, peep sights, etc. Shooting a compound bow is easier than shooting an old-fashioned bow and arrow, but that doesn't mean it is a walk in the park. Luckily, the basics of the form are easy to learn and start practicing.
Note: This article is written from the perspective of a right-handed shooter. Simply flip the hands to shoot as a leftie.
Steps
Developing the Proper Stance and Grip
-
1Start with your feet shoulder-width apart, at a right angle to your target. Stand so that your left side faces the target. You'll want to straddle the shooting "line", an imaginary line from you to your target. So, if you shoot right-handed, have your right foot (back foot) slightly in front of this line. Your toes should face forward in a way that feels comfortable; they don't have to point at the target.
- If you're left-handed, your right foot will lead, and you'll face your right side at the target.[1]
-
2Grip the bow so the weight balances in the space between your thumb and fingers. You want the grip in the center of your palm, evenly distributing the weight across your whole arm. Don't rely on wrist strength (bow too far back) or finger strength (too far forwards) to hold onto the bow.
- Keep your grip calm and loose, not choking the bow to death. Gripping too tightly causes the bow to torque (twist when fired).
Advertisement -
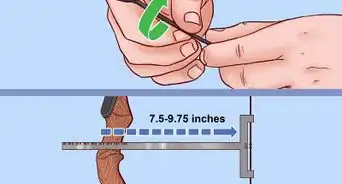
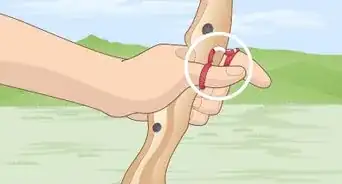
3Notch an arrow into the rest, then snap it into the notch. Pull the back of the arrow into the string until it clicks into place along the nocking point. The string will have a small area with an extra string looping on it, forming a small semi-circle (called the "D-loop). The arrow is locked into the straight part, and you use the curved line to pull the string back.
-
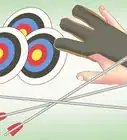
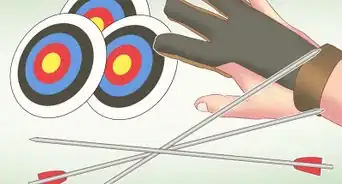
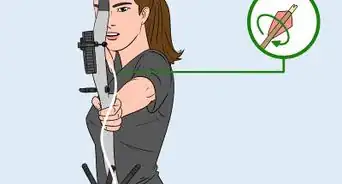
4Attach your mechanical release to the bowstring where the arrow attaches. If you prefer to pull and release the string with your fingers, skip this step. However, most compound hunters used the mechanical release. Attach the release to your wrist as instructed, then simply snap the jaws of the release around the D-loop.
- Keep your index finger behind the trigger to prevent it from releasing accidentally.
-
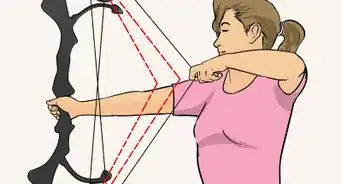
5Keep your eyes on the target and your chin parallel to the ground. Strong posture is key to accurate shooting. So is staying still. Once you've planted your feet, found your target, and notched the boy, keep yourself in this angle and keep your eyes on the target -- the less you move, the less likely the arrow is to move off-target.[2]
-
6Understand your aiming sight helps you determine arrow distance. The line of vertical dots on the sight seem intimidating at first, but they are there to help you determine shooting distance. The top dot is where you aim if the target is 20 yards away. This is true for every single compound bow. The rest of the dots are for other distances -- commonly 30, 40, and 50 yards -- but different bows will have different distances on each sight. Many of them are adjustable as well, so check out the manual for your compound bow if you're confused.


Firing Your Bow
-
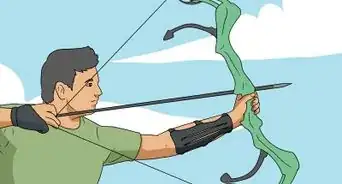
1Hold your bow at a right angle from the floor, pointing towards your target. Hold your bow up and keep your grip on it loose so you don't hurt your wrist. Keep a slight bend in your elbow. This is not only more comfortable, it keeps you from twanging your arm with the string as the arrow releases.
-
2Draw the bow straight back, using your extended arm as a guide. You want to pull the bow back in a solid, fluid motion, keeping your bow arm straight on target the whole time. Your arm, extended in front of you, is a naturally straight line that you can use to guide your motion smoothly. For added drawing power, think about rotating your shoulder backward as you pull back, keeping the rest of the body in place. This activates your back muscles for added control. If you need a little extra power, you can slightly push the bow forward as you draw as well, though this should be avoided if possible.[3]
- Your hips, bow arm, and feet should all be still while drawing.
- Avoid the temptation to move the bow around as you draw back. While moving forward slightly is common, don't point the bow up or down as you draw back.
- Once you have an arrow on the bow, treat it like a loaded gun. It only points at your target.
-
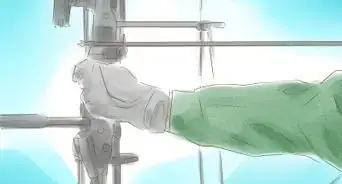
3With the bow pulled all the way back, find your personal anchor point -- the place where you have the bow drawn fully back against your cheek. The anchor point is a personal spot every archer draws the bow back to. It can be anywhere, such as your thumb touching your ear, or your knuckles touching your cheek. The point is that you have a regular, common spot that you hit every single time when drawing the bow back.
- Play with your anchor point to find what is comfortable at first. However, once you find one you want to pull back to this point every single time. Keeping your anchor point regular lets you find and fix issues if you start missing the target.
-
4Form a second anchor point with the tip of your nose on the string. Try to put your nose against the string, as this will act as a second anchor and increases accuracy. It is not essential but is quite useful. That said, do not bend your neck to force your nose onto the string, as this will affect accuracy and can be quite uncomfortable.
-
5Align the pin on your sight with the center of your target, then make any final aiming adjustments. If you've been keeping your body still and relaxed throughout the motion, this should require only brief adjustments. If you moved the bow around a lot, you'll likely have to re-aim completely. Remember that your first pin is set for a target 20 yards away, and every pin beneath this is for further distances.
- Any aiming should be done with small motions, rotating from the hips.
-
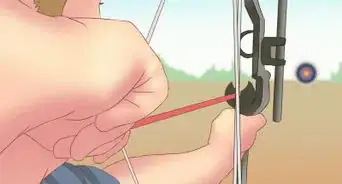
6Release the trigger by slowly laying your finger down, not pulling. Don't pull the release trigger as if you were a movie star with a gun. Pulling hard on the trigger naturally moves the bow slightly hurting accuracy. Instead, let your finger smoothly pull back the trigger. You should almost be surprised by the release. Many archers keep moving their hands back smoothly even after the trigger is released to ensure the motion remains smooth.[4]
- Be ready for a somewhat surprising release of force that can cause you to suddenly jerk. Prepare to keep your head down and body still.
- If you don't use a mechanical release, simply let go of your fingers while pulling back, getting them out of the way as you release.


Improving Your Archery Skills
-
1Focus on calm, fluid motions for all of your movements. Tense, tight muscles and jerky movements will greatly hurt your accuracy. So will trying to aim and shoot as quickly as you possibly can. Settle down, take a deep breath, and let your muscles relax. Try to think of gliding through every motion, working fluidly from one movement to the next.
- Your stabilizing elbow (left arm) should be slightly bent at the elbow.
- Keep your shoulders relaxed and chin up.
- Your knees should be slightly bent.
-
2Keep the bow aimed and even with the target throughout your draw. Moving the bow, such as pointing upwards while you aim, may feel like it is easier. But it is a bad habit that simply forces you to re-aim, and the constant movement is not only unhelpful, but it could also be dangerous if you don't have full control over the bow.
-
3Hold your bow in line with the target after the shot. A big mistake of beginners is immediately lowering the bow after firing the shot. Just like a golfer must keep their head down through the swing to keep their body aligned, you should keep your bow up through the entire shot to ensure you don't pull off target at the last moment. Focus on keeping the bow on target for 1-2 seconds after firing.[5]
-
4Lower the draw weight if you have trouble pulling the bow smoothly. The draw weight determines how hard you need to pull back on the string to fire the arrow. Too high and you'll ruin your form trying to get enough power -- too low and you'll have to pull the arrow back farther back to get the same shot. Many people start with 10lbs of draw weight. Typical draw weights by person include:
- Child -- 15-25 lbs
- Women & Teenagers-- 30-40 lbs
- Men -- 40-55 lbs
- Bowhunters-- 50-65 lbs
-
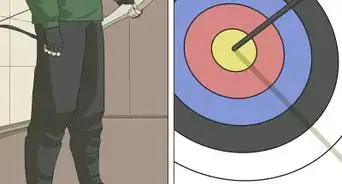
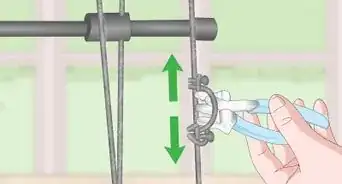
5Adjust your sight if your form feels good but your accuracy is still lacking. You'll see that over time your arrows will start coming together into a tight grouping. When all shot arrows stay close together, but not in the center of the target, then you will need to adjust your sight. This is easily done, usually with the aid of some Allen keys. To adjust the sight, move the pins with the arrow. If you shoot to the left of center, move your sight to the left. Re-tighten the screws and try again, re-adjusting as necessary.


Warnings
- Never dry fire a bow. This is drawing and releasing a bow without an arrow knocked. This is highly dangerous. It can cause a bow severe damage and they can even crack and explode open. This can cause severe injuries to the archer and bystanders, sometimes even death. When pulling back a bow without an arrow, make sure to not let go under any circumstances, when done, ease the bow back to the normal undrawn position.⧼thumbs_response⧽
- Understand that you're handling a weapon. And that weapons can kill.⧼thumbs_response⧽
- Make sure you have a proper arrow! Compound bows can be much stronger than traditional bows. What works for a traditional bow may not be heavy or strong enough for a compound bow, which can cause serious safety hazards. The accepted rule is that a carbon arrow should weigh 5 grains for every pound of draw weight. Have your local archery experts pick out an arrow for your bow.⧼thumbs_response⧽
Things You'll Need
- Finger guard or Mechanical Release
- Armguard
- Compound Bow
- Arrows
- Target


References
About This Article