This article was co-authored by wikiHow Staff. Our trained team of editors and researchers validate articles for accuracy and comprehensiveness. wikiHow's Content Management Team carefully monitors the work from our editorial staff to ensure that each article is backed by trusted research and meets our high quality standards.
There are 15 references cited in this article, which can be found at the bottom of the page.
The wikiHow Video Team also followed the article's instructions and verified that they work.
This article has been viewed 15,023 times.
Learn more...
Completing a jigsaw puzzle requires dedication, patience, and attention to detail. It’s a worthy achievement to preserve as a beautiful addition to your wall decor. Whether you’ve completed your first or simply the latest in a long line of puzzle projects, congratulations! And if you haven’t yet started, but you just know this one’s going on the wall, we commend you for planning ahead. There are two common methods to begin preserving your puzzles: using a liquid puzzle glue or peel and stick puzzle savers. We’ll take you through each step-by-step so you can decide which is right for you, as well as how to secure your puzzle further with a foam backing board before you hang it.
Steps
Puzzle Glue
-
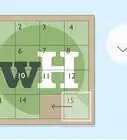
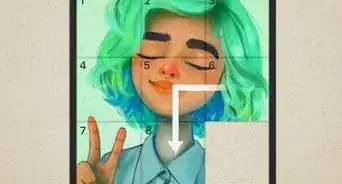
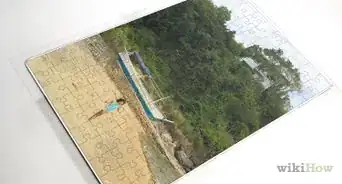
1Move your completed puzzle onto wax paper. Create a barrier between the puzzle and your puzzling surface to protect it from glue. If you can, start assembling your puzzle on wax paper to avoid any difficulty with this step. If you’ve already completed it though, that’s no problem. Slide the paper under your puzzle so that there is a paper border around your puzzle: at least 2 inches (5.1 cm) on all sides.[1]
- Carefully lift one corner of your puzzle and slide the paper under it. Continue to move the puzzle over the paper until the puzzle sits completely on wax paper. Depending on the size of your puzzle, you may need to use multiple sheets of wax paper. If you do, overlap them under your puzzle so no glue can leak through.[2]
-
2Flatten your puzzle with a rolling pin. Make sure that all your pieces fit together correctly so there are no issues when you glue them in place.[3]Advertisement
-
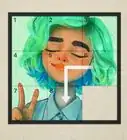
3Clean your puzzle. To help your puzzle look its best on display, clean it before you glue. Mix a small amount of rubbing alcohol with water. Dip a cloth into your mixture just enough to lightly dampen it, and gently clean the surface of the pieces.[4]
- Allow the water and alcohol a few minutes to fully evaporate.
-
4Apply puzzle glue. Start by pouring a small amount of puzzle glue onto the front of the puzzle and spreading it evenly. You can use a piece of cardboard, an expired payment card, or a foam brush[5] .
- Continue pouring and spreading until all pieces have glue between them. Don’t leave excess glue unspread on the surface of pieces. [6]
- Coat the edges of the puzzle as well.[7] It is okay if some glue goes onto the wax paper, but a large amount in this area may make the puzzle stick to the wax paper, so quickly wipe it away with a wet paper towel, doing your best to avoid touching the rest of the puzzle.[8]
-
5Allow the glue to dry. Depending on the product, drying times will vary. Err on the side of caution and wait overnight to ensure the puzzle dries fully.[9]
-
6Apply glue to the back if the edge curls. Sometimes after you glue the front, the edges will curl. Don’t worry! Carefully flip the puzzle and apply glue to the back side. Once again, wait several hours to allow the puzzle to dry before flipping it back.[10]

Peel and Stick Puzzle Savers
-
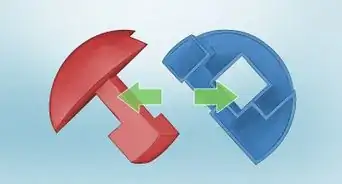
1Purchase specialized puzzle hanging sheets. If you want to avoid using glue, you can preserve your puzzle using a specialized puzzle hanging product, like Puzzle Presto Peel and Stick Puzzle Saver.
- Puzzle glues typically apply a finish to the puzzle, which is one reason why some puzzlers prefer alternative methods. It can also be messy and damage the puzzle if not applied carefully.[11]
-
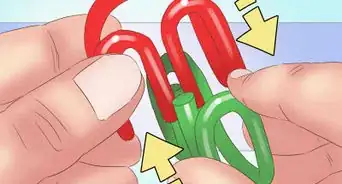
2Flip your puzzle. Apply your adhesive strips to the back of the puzzle. In order to access the back of the puzzle, place it between two flat objects like sheets of cardboard. You can slide the puzzle onto one sheet, then place the other on top. Securing the sheets and puzzle together, flip them over quickly.
- You can use clips to keep the sheets together tightly or ask for help holding it, which is an especially good idea with larger puzzles![12]
-
3Flatten the puzzle. Use your rolling pin to ensure that the puzzle is completely flat and all the pieces fit together correctly.[13]
-
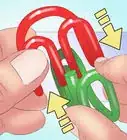
4Apply adhesive strips. Peel the back of the puzzle saver sheets to expose the adhesive, and then press them firmly onto the back of the puzzle, overlapping each sheet slightly, and using as many strips as necessary to cover the entire puzzle. Cut off any excess if necessary.[14] .
-
5Use a rolling pin again. Roll across the back of the puzzle to help the puzzle saver sheets adhere to the pieces. [15]

Adding Foam Backing
-
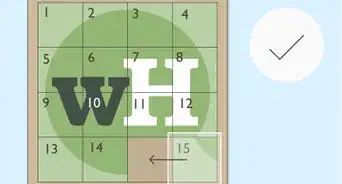
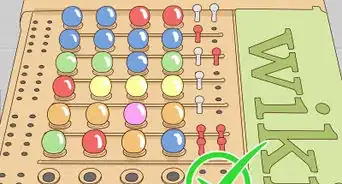
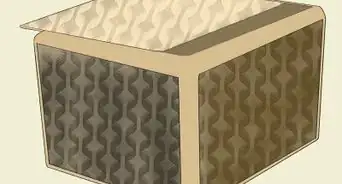
1Size the backing board to the puzzle. Once you have preserved your puzzle with glue or puzzle saver sheets, mounting it to a foam backing board provides more support to protect your beautiful puzzle. If you are going to hang the puzzle without a frame, cut the board so it is just slightly smaller than the puzzle[16] . There are two ways you can figure out how to cut the board to the right size:
-
2Cut the foam backing. Once you’ve outlined, cautiously cut the board using a hobby knife, using a ruler for clean lines.[19]
-
3Apply adhesive to the backing. Using a spray adhesive, spray either on the back of the puzzle or on the backing board and then quickly and firmly place the board onto the back of the puzzle.[20] [21]
- You can also use a puzzle glue if you prefer, spreading it across the entire surface.
- If you do use a spray adhesive, cover your work surface well beyond the edges of the board or puzzle.[22]
-
4Let the adhesive dry. Place heavy household items like books to distribute weight across the backing board. Once the adhesive has dried, your puzzle will be ready to hang![23]
Warnings
- When selecting a glue, look for a product that contains low moisture and is, if possible, acid-free—as this will help to protect the puzzle from damage. [25]⧼thumbs_response⧽
- Apply puzzle glue slowly and spread it gently or you risk damaging the puzzle.[26]⧼thumbs_response⧽
- Hanging a puzzle without additional support may not be as secure as a board or frame long-term. Be careful not to place it in a position that could encourage warping or other damage.⧼thumbs_response⧽
Things You’ll Need
Puzzle Glue
- Completed jigsaw puzzle
- Wax paper
- Rubbing alcohol
- Cloth
- Rolling pin
- Puzzle glue
- Foam brush or spreading item
Peel and Stick Puzzle Savers
- Completed jigsaw puzzle
- 2 flat, sturdy pieces of cardboard (larger than your puzzle)
- Rolling pin
- Puzzle Presto Peel and Stick Puzzle Saver or other puzzle saver sheets
Adding Foam Backing
- Foam backing board
- Spray adhesive
- Tape measure
- Writing utensil (pencil, pen, marker, etc.)
- Ruler
- Hobby knife
- Books

References
- ↑ https://myjigsawjournal.com/2019/10/12/how-to-glue-a-puzzle/
- ↑ https://myjigsawjournal.com/2019/10/12/how-to-glue-a-puzzle/
- ↑ https://www.frameiteasy.com/learn/puzzle-frames/
- ↑ https://craftknights.com/gluing-and-framing-a-puzzle-its-easy-with-the-right-glue/
- ↑ https://www.frameiteasy.com/learn/puzzle-frames/
- ↑ https://myjigsawjournal.com/2019/10/12/how-to-glue-a-puzzle/
- ↑ https://youtu.be/MVrJ4pAMrKg?t=551
- ↑ https://myjigsawjournal.com/2019/10/12/how-to-glue-a-puzzle/
- ↑ https://craftknights.com/gluing-and-framing-a-puzzle-its-easy-with-the-right-glue/
- ↑ https://www.frameiteasy.com/learn/puzzle-frames/
- ↑ https://www.frameiteasy.com/learn/puzzle-frames/
- ↑ https://www.frameiteasy.com/learn/puzzle-frames/
- ↑ https://www.frameiteasy.com/learn/puzzle-frames/
- ↑ https://youtu.be/GLgM_LFQvWI?t=264
- ↑ https://youtu.be/GLgM_LFQvWI?t=241
- ↑ https://youtu.be/LnyQgnciAWs?t=104
- ↑ https://youtu.be/wVGsTOZ38hA?t=27
- ↑ https://youtu.be/LnyQgnciAWs?t=129
- ↑ https://youtu.be/wVGsTOZ38hA?t=99
- ↑ https://youtu.be/wVGsTOZ38hA?t=239
- ↑ https://youtu.be/LnyQgnciAWs?t=160
- ↑ https://youtu.be/LnyQgnciAWs?t=180
- ↑ https://www.momalwaysfindsout.com/how-to-mount-a-finished-jigsaw-puzzle/
- ↑ https://youtu.be/MVrJ4pAMrKg?t=789
- ↑ https://www.frameiteasy.com/learn/puzzle-frames/
- ↑ https://www.frameiteasy.com/learn/puzzle-frames/
About This Article