This article was co-authored by Amy Harrison, a trusted member of wikiHow's volunteer community. Amy Harrison has over five years of experience working directly with poultry. She has worked on a rural chicken farm built around marketing free-range eggs, where she managed the care for the poultry year-round. She has experience breeding chickens and quail, caring for newborn poultry, handling their health issues, and managing their dietary needs.
This article has been viewed 12,939 times.
Learn more...
Free-Range is a term used for poultry that is not confined to a coop or run, and are allowed day-time access to the yard or garden with little restrictions. Allowing your flock to free-range is a proven benefit that assists in creating healthier eggs, improving the digestive system, and maintaining their feet/beaks. If you would like to know how to raise free range chickens, continue reading below.
Steps
Setting Up a Coop
-
1Check your laws and regulations. Rural towns are generally lenient towards the ownership of chickens. In the city, however, there are most likely laws put in place to prevent people from keeping chickens. To find out whether keeping chickens is fully legal, contact your town councillor, or perform a quick Google search.
- Laws do not exclusively apply to the state you are in, they generally apply to your region or town.
- Roosters are hard to keep in many areas as they fall under noise restrictions.
- Even if chickens are legal to keep, there may be rules that declare how you raise your chickens, eg, the coop cannot be a certain distance away from the neighbouring fence, or your chickens must be confined to a run.
- Communicate to your neighbours to avoid problems with the ownership of chickens. Remember, even if you promise to not keep any roosters; hens still make a fair deal of noise, and free-ranging chickens hold the risk of jumping over the fence or escaping your property. Do not look into raising chickens if your neighbours may make a complaint about your animals to the councillor or ranger, otherwise you may risk having them taken off you.
-
2Be wary of predators such as foxes, raccoons, snakes, and wild cats. If these animals are a notorious problem in your property or region, you may want to reconsider allowing your hens to free-range. Of course, safety comes first. If you cannot secure your chickens outdoors, then it's best they keep to the coop. Chickens can still have access to the lawn by attaching a run to the coop.Advertisement
-
3Research hardy breeds. Isa Browns, Australorp and Jersey Giants are all robust breeds that are capable of enduring difficult conditions. They also adapt well to weather and housing changes. If it suddenly rains or becomes stormy outside, you can trust these breeds to conform to the climate change.
- These breeds are also much larger and capable of surviving a predator attack.
- All breeds can free-range, including the smallest of bantams. It's recommended to test out a couple of stronger breeds to free-range before you expand the flock with miniature chickens.
-
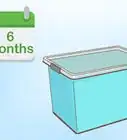
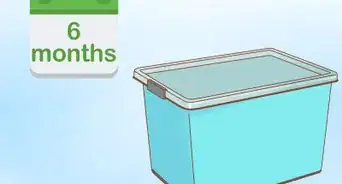
4Look into the age of the bird you'd like to buy. Young chicks are generally cheaper, especially when bought in bulk. However, chicks cannot be sexed easily, therefore you may have a 50/50 chance of buying either a hen or a rooster. If you purchase pullets, however, you know you're 100% buying young female chickens.
- Pullets are young hens that are just about to start laying. Generally they are 6 months old.
- Most online hatcheries sex chicks, and are cheaper purchase in bulk. Otherwise you can look for nearby farm stores or even pet shops.
-
5Purchase a coop with the correct measurements. A minimum of 3 square feet is required per chicken in the coop. For bantam breeds this would be even less. Cut down on costs by avoiding coops with attached runs considering your chickens will be free-ranged. Only the minimum measurements are required for the coop, as your chickens will most likely be spending most of their time outdoors.[1]
- Keep in mind seasonal change and the climate in your region. Chickens are prone to heat stress and frostbite. If your winters are quite cold where you are likely to get frost, consider purchasing a detachable run. This is to keep your chickens indoors during extreme weather events. However, chickens can still free-range in the heat and snow, just be mindful. Purchase a coop with high insulation and ventilation.
- Ensure the coop has attached roosts. Most coops come with a roosting pole, but depending on your flock size you may need more than one. Roosts are just a long pole that attach to the sides of the coop as a place for your chickens to sleep at night.
- Attach a nesting box. These can generally be bought online. You will need one nesting box per three to four hens.[2] There are multiple nesting box designs, but the best would be ones with an attached lip at the base to prevent the eggs from falling out.
- The coop will have to have an easy-use door attached to allow you to let the chickens out each morning, and close them up each night. Try investing in coops that have a sliding door with an attached pole to make it easier for you to open.
-
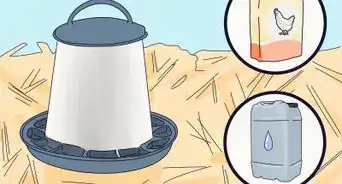
6Add a feeding station. It's highly recommended to avoid the general feeding dishes and water bowls that are designed for dogs or rabbits and opt for a feeder and/or drinker instead. These designs are specially made for poultry, and allow the trough to auto-refill and store more food and water, meaning you won't have to replenish it as often. The small lip on the outside of the feeder/drinker means that the food and water are less likely to get dirty.
-
7Re-enforce the yard. Chickens are intelligent birds that predominately stay close to home, but that does not discredit the fact that they can easily run off onto a road or walk outside your property. To prevent such instances from happening, install a stable fence around your garden or invest in some chicken wire.
-
8Clean out the chicken coop at least once a week. Ammonia can easily build up inside a coop, especially one that isn't well ventilated. It's important to eliminate dangerous bacteria and dirt inside of the coop on a frequent basis. Swiftly clean the coop at least once a week, or give it a full clean at least every two to three weeks.
- Using a pet-friendly disinfectant, scrub down the base of the floor, perches, nesting boxes and wall of the coop. Make sure to remove all of the bedding and nesting material first. You can make a home-made vinegar and water solution to get rid of difficult substances or smells. Ensure to thoroughly hose down the coop after applying the disinfectant/vinegar solution and replace it with clean, fresh bedding.


Raising Young Chicks
-
1Find a reputable breeder. Week-old chicks are often available during spring, but you may be able to find them year-round depending on where you are stationed. It's encouraged that you find a renowned breeder in your area with positive reviews. Avoid sourcing your chicks from backyard breeders or impulse buyers, where the chicks are more likely to have health issues. A breeder that has a fair working history with raising chickens and knows what they're doing will be able to deliver healthier chicks with a clean blood-line. You will also likely get the breed that you are purchasing, instead of buying a chick that grows into a mix-breed.
- You can also source your chicks from hatcheries online via mail-order, however, the chicks have a chance of becoming weak and passing away whilst being shipped to your location. You will be asked to buy a minimum of four chicks, with the more you buy the less you pay. Some hatcheries guarantee to sex the chicks for an extra payment.
- Some farm stops and pet stores also start selling chicks during spring, however, they mainly sell popular breeds such as Isa Browns.
-
2Set up a brooder. A brooder is a heated environment specially designed to house baby chicks until they reach 6 to 8 weeks old. Baby chicks are fairly straight-forward, and only require the basics; space, heat, food and water. They don't need a lot of space as young chicks spend most of their times eating and sleeping. A large cardboard box or a plastic storage rub will suffice. Keep in mind that the general rule of thumb for spacing is half a square foot per chicks up to 2 weeks, 1 square foot per chick up to 4 weeks, and 2 square foot per chicks up to 8 weeks.
- Line the base of the brooder with an absorbent layer such as newspaper or puppy pads, and then top it with your main bedding source such as wood shavings or paper bedding. Avoid cedar and pine shavings that risk URI's. Aspen is a safe and suggested wood to use as it does not contain any harmful hydrocarbons.
- Place the brooder in a suitable room in your house. Avoid placing your chicks inside a shed or garage, as these places in the home aren't well ventilated and can easily overheat or become too cold for your chicks to sustain themselves.
-
3Purchase a chick feeder and water dish. Some farm supply stores may sell specially adapted poultry feeders for young chicks. These feeders are designed to auto-refill their chick feed and prevent chicks from stepping or sleeping inside their food. Avoid adult feeders and drinkers as your chick might be too small to reach the food and water.
- A simple water tray will suffice for young chicks. Add shiny pebbles or marbles to encourage your chicks to drink, or dip each chick's beak inside of the water to accustom them to the liquid.
-
4Provide a heat source for young chicks. Baby chickens that are under 2 months old will not be able to regulate their body temperature. If they are provided without warmth they are at a dangerous risk of becoming weak, ill, or even passing away overnight. It's essential that your chicks are provided with artificial warmth, such as a heat lamp or thermal light bulb.
- You can purchase a heat lamp from a farm supply store, pet shop, or a warehouse store. Heat lamps are the safest option as they give you the option to change the temperature and adjust the position of the lamp. Otherwise you can purchase a bulb with a suitable wattage to keep your chicks warm. If your chicks have a tendency to fight and peck each other, switch to a red bulb.
- The heat should be set at 95 degrees for the first week, and gradually lowered by 5 degrees each week until the temperature reaches room temperature, or the chicks are old enough to produce their own body warmth. Depending on the weather conditions, chicks are no longer dependent on artificial warmth by 2 months of age.
-
5Find a high-quality starter feed. Starter feed, or chick crumble, is a specially formulated feed for baby chicks. The starter feed contains a high percentage of protein (usually that of 20%-24%) and can be fed to chicks until they reach 2 months old. By 8 weeks of age they should advance to a grower feed, which lessens the amount of protein your chicks are in taking to prevent liver damage.[3]
- Starter feed should be available all day and night, as chicks are consistently eating to keep up with their rapid growth rate.
-
6Progressively provide more space for your chicks as they grow. As a rule of thumb, chicks should have half a square foot each up to 2 weeks, 1 square foot each up to 4 weeks, and 2 square feet up to 8 weeks. If young chicks are not given enough space as they grow, they will conform to attacking each other and drawing blood.
- By 2 months of age (8 weeks), your chicks can be congregated to their coop. If it is too cold outside, you can wait until they reach 12 weeks of age, otherwise if it is quite warm or hot, your chicks can be moved to the coop by as young as 6 weeks of age.
-
7Communicate to your chicks each day. Get your chicks use to your voice and movement. This is essential for when you need to train your chickens to return to their coop, or if you need to catch them. Chickens are easily tamed when they are younger, as they will see you as the parenting role. Incorporate food into your taming and socialization sessions to allow your chicks to associate you with positive factors.
- Hold your hand out with food at your chicks eye level. Avoid grabbing them from above, as this may resemble a swooping hawk.


Raising Free-Range Hens
-
1Clip your chickens flight feathers. It's true that chickens cannot take full flight, but they can still successfully manage to fly as high as the roof of a medium shed or one-story house. Generally they do not fly such heights unless they are frightened or in distress. If your chickens are high-strung, clip their primary flight feathers (the longest feathers on the end of their wings) with a pair of sharp scissors.
- It's also recommended to clip their feathers to prevent them from perching on the outside fence of your property. Otherwise they may manage to escape.
-
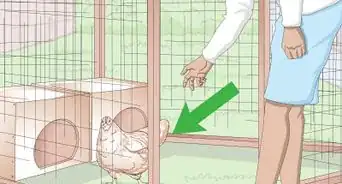
2Let your chickens out each morning. A chickens sleep routine works at the same time as the sun; they wake up when the sun rises and sleep when the sun sets. Though you do not have to let them out as soon as the sun comes up, you shouldn't leave them waiting for too long before they are allowed outside. Anything past 10:00 am will disturb their body clock and may cause the flock to become agitated in a confined space. Set an alarm each morning and night to remind you when you need to let them in and out.
-
3Train your chickens to return to the coop. Chickens that have established the coop as their home will instinctively return to it each evening. However, this may take a little coaxing for chickens that are not natural inclined to free-ranging during the day. This is generally because they may be confused on where to go once the sun starts to set, and may begin to settle down for the night under a bush or perched in a tree. You can encourage your chickens to return home each evening by starting a training schedule as follows;
- Chickens start to settle into the coop once the sun begins to set. This is the time of the evening where you should begin to train your chickens to return to their coop for the night.
- Use treats such as small cubes of bread or cracked corn to encourage your chickens into the coop. Throw a handful of these treats into the coop or beside the entrance.
- Take advantage of certain noises to persuade your chickens to come when called. Shake a can of pellet feed or tap the side of a plate with a fork. Any noise that familiarizes your chickens with food should work well into persuading them to return to their coop.
- If it is dark and your chickens have settled down to sleep in the garden, don't worry as this is actually the easiest time to catch them. Since chickens don't see well in the dark, they are much easier to catch. Pick up any stray hens that are in the garden and relocate them to their coop. By making this a continuous pattern they will eventually become accustomed to sleeping in the coop.
-
4Encourage your chickens to forage. Foraging is your chickens natural behaviour to search for nutrients and naturally keep their nails trimmed. For chickens that have never free-ranged before, or have been confined to a shed or barn, they may not understand the concept of foraging. If you see a lack of activity in your garden between your flock, you can encourage them to forage by shaking grit or cracked corn on the ground.
-
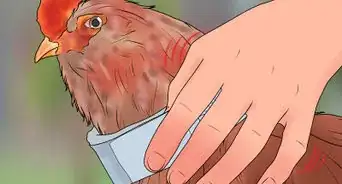
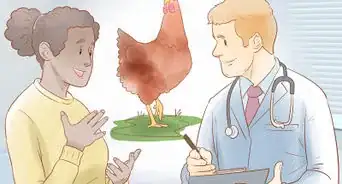
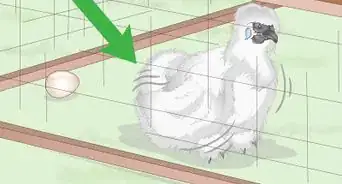
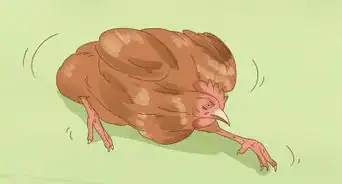
5Monitor your flocks health. As much as free-ranging is safe, natural and beneficial for your birds, they can also be susceptible to problematic issues such as bumble-foot, mites, lice, cuts and skin conditions. As much as this isn't as common as thought, it's best to keep an eye on your chickens health by examining each bird weekly.
- Check around your chickens feet in search of bumble-foot, which is a bacterial infection that causes redness, inflammation, a black or brown scab, and/or a pus abscess. Bumble-foot is caused by bacteria entering the skin due to a scrape, cut, injury or even over-exposure to damp or dirty bedding.[4]
- Look for mites. Poultry mites are a common problem often spread by new chickens that have not been quarantined efficiently, or by wild birds and rodents. However, they are easy to kill if given an effective treatment. Chickens can develop mites in the scales of their legs, or on their skin. To look for mites, examine their legs. If scaly leg mites are present, the scales on their legs will raise. If mites are present on the skin of your birds, white eggs may be present on the shaft of your chickens feathers.
- Examine your chickens skin and feathering. The first symptoms of an illness will show up on your chickens skin and feathering. Especially check the colour of your chickens wattles and comb, and the way their feathers lie.
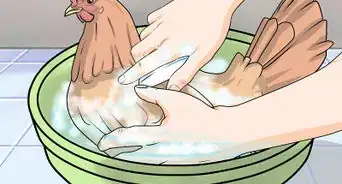
- Look for any cuts, scrapes or injury. A wound or an opening will easily attract bacteria and cause an infection. Any cuts that are found should be cleaned up and healed as soon as possible.
-
6Feed your chickens a high-quality feed or pellet mix. Look for a feed that is made of compact pellets instead of corn or scratch. Scratch is too high in protein for Chickens, and is fundamentally designed to give to chickens during Winter months. The amount of food you feed your chicken per day depends on environmental aspects and the breed of your bird. Generally, it is advised you provide constant access to pellets as chickens do not over-eat but instead eat until they have gathered enough nutrients to fulfil them for the day ahead.
- If you have baby chicks that are under six to eight weeks old, it's important to provide them with a chick crumble that is specially formulated with a high protein content of 20-24%.[5]
- Switch to a grower feed once your chickens have reached 12 weeks old.
- Optionally, you can choose to feed your pullets a layers feed which contains a higher percentage of calcium than any regular chicken feed. Layers feed is formulated to help produce healthy eggs, but should not be given to your chickens until they have started to lay or are at least 20 weeks old.
-
7Feed your chickens table scraps. Chickens can begin to eat a range of kitchen scraps once they reach 10 weeks old. Leftover dinners or waste can be scraped into a large bowl and given to your chickens by the following morning or afternoon. Chickens can digest different types of food from bread, toast, cereal, pasta, noodles, meat, dairy, vegetables, fruit, wheat, grains, cooked eggs, and yogurt.
- Avoid foods such as confectionery, avocado, tomato stems, raw potato, raw eggs, salty foods such as crisps, and/or raw beans.[6]
-
8Collect their eggs each day. Chickens generally lay an egg every two days, or five eggs a week. It's important that you collect these eggs each morning or afternoon to prevent them from spoiling. In warmer months, collect them twice a day.
- Avoid washing the eggs, as they have a natural protective lining that prevents bacteria from infecting them.


Warnings
- Be wary of predators such as foxes, raccoons, snakes, and wild cats. If these animals are a notorious problem in your property or region, you may want to reconsider allowing your hens to free-range.⧼thumbs_response⧽
- Chicks with little space are more inclined to fight each other and draw blood. Conditions may also become less hygienic due to built-up ammonia.⧼thumbs_response⧽
- Do not use cedar or pine shavings. They risk giving your chicks upper respiratory infections due to the harmful aromatic hydrocarbons.⧼thumbs_response⧽


References
- ↑ https://www.dummies.com/home-garden/hobby-farming/raising-chickens/how-to-determine-your-flock-size-and-space-requirements/
- ↑ https://countrysidenetwork.com/daily/poultry/chicken-coops-housing/10_chicken-nesting_boxes_ideas_around_the_farm/
- ↑ https://www.backyardchickencoops.com.au/blogs/learning-centre/all-the-different-types-of-chicken-feed-explained
- ↑ https://www.hobbyfarms.com/how-to-treat-bumblefoot-in-chickens-3/
- ↑ https://www.backyardchickencoops.com.au/blogs/learning-centre/all-the-different-types-of-chicken-feed-explained
- ↑ https://www.outpostbuildings.co.nz/about-us/News-Learning/x_post/What-not-to-feed-your-chickens-00018.html