This article was co-authored by David Julien. David Julien is a DIY Specialist and the Principal Owner at Nice DIY based in Quebec, Canada. David specializes in creating plans to make unique, affordable, and modern home furnishings. He holds a BA in Graphic Design from the University of Quebec Outaouais. Nice DIY uses sustainable and high-quality materials to create products that are simple to make for everyone.
This article has been viewed 107,637 times.
Refinishing furniture is a great way restore life to pieces that would otherwise be too worn out or old-fashioned for your home's décor. The same basic refinishing process is used to rescue a piece you picked up at a garage sale or to give a hand-me-down a brand new look. Read on to learn how it's done.
Steps
Choosing and Prepping the Furniture
-
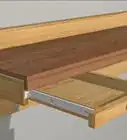
1Select the right piece. Not all furniture is a good candidate for refinishing. Valuable antiques, for instance, should be refinished by a professional, since the refinishing process could devalue the piece if you aren't careful. To choose a piece to refinish, look for these qualities:
- Furniture made from sturdy wood. Furniture made with fine wood that could be easily damaged, particle board, or other non-sturdy wood won't do well during the refinishing process.
- Furniture without too many coats of paint. Taking off layer after layer of paint may not be worth the time it takes.
- Furniture with smooth, flat faces. If this is your first time, avoid furniture with intricate carvings or turned legs.
-
2Make a refinishing plan. Take a look at the furniture you have chosen to refinish and craft a plan for turning it into the perfect piece for your dining room, front porch or kitchen. You'll need to consider the following questions:[1]
- What will it take to refinish the piece? If it's painted, you need paint stripper; if it has an old varnish or finish, you need a thinner finish stripper.
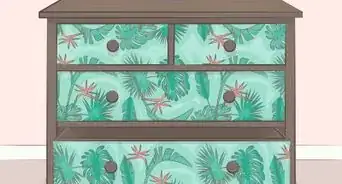
- How do you want your new piece to look? Will it be painted a new color, or do you want the natural wood to be exposed? You may not know the answer to this question until you see what the wood looks like underneath the old paint or finish.
- Consider going to furniture stores, browsing online, and talking to experts for ideas on how to create the look you want.
Advertisement -
3Buy refinishing supplies. Now that you have a plan, you'll need the following supplies to get the job done:[2]
- Protective equipment.[3] You'll need a ventilator (especially if you're working indoors), goggles, chemical-resistant gloves and an apron. To protect your floor or yard, get a chemical-resistant drop cloth as well.
- Paint stripper and/or finish stripper. If the furniture has paint, you need thick paint stripper to remove it. Otherwise, you just need a thinner finish stripper.[4]
- Brushes for applying the stripper and scraping tools for removing it.
- 100 grit sandpaper and/or a power sanding machine, plus a finishing sander.[5]
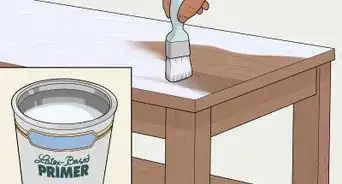
- Wood stain in the color of your choice.[6]
- A protective polyurethane topcoat to seal the stain.
-
4Remove the furniture's hardware.[7] Take off the knobs, pulls, hinges, and other metal hardware to prepare the furniture to be refinished. These items could be ruined by the chemicals used to strip the furniture.
- Place the hardware in labeled bags so you remember where everything goes when it's time to place it back on the furniture.
- Plan to polish the hardware so that it matches your newly refinished piece. Alternatively, you could buy new hardware to spruce up your furniture.


Stripping the Old Paint and Finish
-
1Set up a work area. Paint and finish stripping chemicals are highly toxic, so it's essential to set up a well-ventilated work area. Choose your garage, a work shed, or a spot outdoors.[8]
- Avoid setting up your work area in one of the main rooms of your house. Basements are not well-ventilated enough, either.
- Unfold the drop cloth over a large surface area and lay out the paint stripper, brushes for applying the stripper, and the scraping tools you need to remove it.
- Put on your ventilator (if indoors), gloves, apron and goggles.
-
2Apply the paint stripper. Dip the brush into the paint stripper or acetone and begin applying it to the furniture.[9] If the piece you are refinishing is large, plan to strip the paint in sections, rather than all at once. The stripper bonds with the paint as you apply it, separating it from the wood.
-
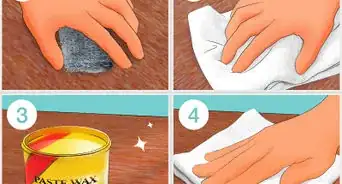
3Scrub away the paint. Use the steel wool and rough sandpaper to scrape off the paint with the stripper. It should come off in large sheets.[10]
- Give the same amount of care to each part of the furniture. The stripping process affects the look of the wood underneath, so you want to make sure each part gets the same treatment to avoid an uneven finish.
- If the furniture has multiple coats of paint, you may need to repeat the paint-stripping process more than once.
-
4Strip the old finish. Once the paint is gone, the finish underneath also needs to be removed. Use a paintbrush to apply the thinner finish-stripping solution, then sand it away using a clean piece of steel wool. All the furniture to dry completely.
- Now that the wood has been revealed, be sure to scrub along the grain, rather than against it, so the wood doesn't get damaged.
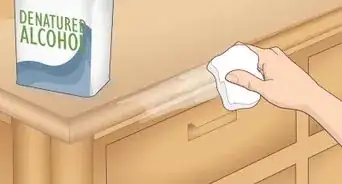
- If most of the old finish seems to have come off with the paint stripper, you still need to give the furniture a stripper rinse to make sure all traces of the old finish are gone. Rinse the furniture with denatured alcohol or mineral spirits, then let it dry.
-
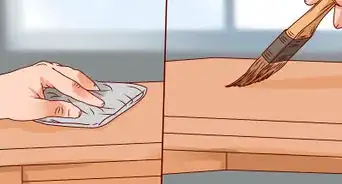
5Sand the piece. Use a sanding machine or 100-grit sandpaper to thoroughly sand the furniture.[11] Work in even strokes and spend the same amount of time on each part of the furniture to ensure an even finish. Use a finishing sander to go over the surface again and create a completely smooth surface. Wipe the piece with a cloth to remove the dust, and your piece is now ready for its new finish.


Applying the Stain and Sealant
-
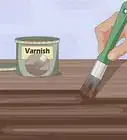
1Stain the furniture.[12] Use a brush to apply an even coat of the wood stain you have chosen. Avoid overlapping brush strokes, since each brush of stain creates a darker hue.[13]
- You may want to test the stain on the underside of the furniture to practice using the right stroke and pressure to create the color you want.
- Work with the grain so that stain doesn't build up in the crevices and make them look darker than the rest of the furniture.
- Follow the directions for wiping off the stain with a soft cloth once it has soaked into the wood for a certain amount of time. Letting the stain stay on the wood for more time will create a darker stain.
-
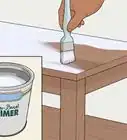
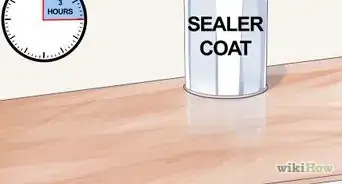
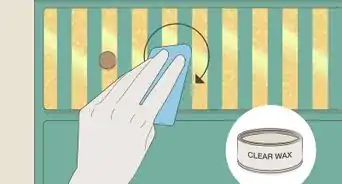
2Apply the topcoat. Use a brush to apply your chosen topcoat to the furniture, taking care to spread it evenly. When you're finished, let it dry completely.[14]
- Use an old cloth or t-shirt free of lint to further spread the topcoat and rub it evenly into the furniture.
- Make sure you apply a very thin coat; a thicker coat could look murky, rather than shiny.
-
3Sand the furniture. Use a fine-grit sandpaper to sand the furniture evenly after the topcoat has dried. Spend the same amount of time sanding each section with the grain, so that all parts of the furniture look even. If desired, add another layer of topcoat, let it dry, and sand again. Repeat until your furniture's finish looks complete.
-
4Replace the hardware. Screw the knobs, hinges, pulls and other hardware back onto the completely dry and finished piece of furniture.


Expert Q&A
-
QuestionHow do you refinish a table step by step?
 David JulienDavid Julien is a DIY Specialist and the Principal Owner at Nice DIY based in Quebec, Canada. David specializes in creating plans to make unique, affordable, and modern home furnishings. He holds a BA in Graphic Design from the University of Quebec Outaouais. Nice DIY uses sustainable and high-quality materials to create products that are simple to make for everyone.
DIY SpecialistStep 1: Start by preparing the surface. Remove existing paint or varnish using acetone, or any other product for this purpose. Then, sand the surfaces with rough sandpaper until the previous color disappears completely. In order to finish the preparation of your surface, sand with a fine-grit sandpaper. Step 2: Apply your new stain or paint color. Step 3: To facilitate the weekly cleaning of the furniture, apply a water-based satin varnish. -
QuestionWhat kind of varnish should I use on furniture?
 William & Shannon LatilWilliam & Shannon Latil are Furniture Refinishing & Home Remodeling Specialists and the Founders of Furniture Refinishing Services based in Houston, Texas. With over 30 years of experience, William and Shannon specialize in repairing and restoring wood furniture, refinishing kitchen cabinets, remodeling kitchens, and building live-edge wooden tables. William and Shannon have won Awards for Excellence from the Better Business Bureau and the Houston Chronicle Best Small Business Award. Their work has also been featured in Houston Press Magazine - Kitchen Design. Additionally, the Furniture Refinishing Services team has conducted major refinishing work on venues such as NRG Stadium and Minute Maid Park.
Furniture Refinishing & Home Remodeling SpecialistsClear-coat catalyzed lacquers are usually the best option for an interior finish, and they're available in gallons for industrial sprayers or in aerosol cans for smaller jobs. -
QuestionHow do I match a stain?
 Community AnswerTrial and error on test pieces or areas. Work you way up to it (since sanding is the only way to work down). You may have to mix stains to get the right color - sometimes you might need more red or brown to get that right shade.
Things You'll Need
- Protective ventilator
- Goggles
- Chemical-resistant gloves
- Apron
- Drop cloth
- Paint stripper
- Finish stripper
- Paint brushes
- Scraping tools
- Fine steel wool
- Sanding machine
- 100 grit sandpaper
- Finishing sander
- Wood stain
- Polyurethane topcoat


References
- ↑ https://www.remodelaholic.com/step-by-step-refinish-wood-furniture/
- ↑ https://www.thisoldhouse.com/woodworking/21016456/how-to-refinish-woodwork
- ↑ William & Shannon Latil. Furniture Refinishing & Home Remodeling Specialists. Expert Interview. 29 October 2021.
- ↑ William & Shannon Latil. Furniture Refinishing & Home Remodeling Specialists. Expert Interview. 29 October 2021.
- ↑ William & Shannon Latil. Furniture Refinishing & Home Remodeling Specialists. Expert Interview. 29 October 2021.
- ↑ William & Shannon Latil. Furniture Refinishing & Home Remodeling Specialists. Expert Interview. 29 October 2021.
- ↑ David Julien. DIY Specialist. Expert Interview. 27 January 2021.
- ↑ https://www.thisoldhouse.com/painting/21015504/stripping-painted-furniture
- ↑ David Julien. DIY Specialist. Expert Interview. 27 January 2021.
- ↑ David Julien. DIY Specialist. Expert Interview. 27 January 2021.
- ↑ David Julien. DIY Specialist. Expert Interview. 27 January 2021.
- ↑ David Julien. DIY Specialist. Expert Interview. 27 January 2021.
- ↑ https://www.thisoldhouse.com/woodworking/21016456/how-to-refinish-woodwork
- ↑ https://www.remodelaholic.com/step-by-step-refinish-wood-furniture/
- http://www.diynetwork.com/painting/8-essential-wood-refinishing-tools-and-supplies/index.html
About This Article

To refinish furniture, start by stripping off the old paint using a chemical paint stripper. Then, use a finish stripper to remove the finish that's on the furniture underneath the paint. Next, sand the surface of the furniture with 100-grit sandpaper until the surface is completely smooth. Finally, stain and seal the furniture, or apply a new coat of paint. For tips on how to set up a work area to do your refinishing job in, keep reading!