This article was co-authored by Mark Spelman. Mark Spelman is a General Contractor based in Austin, Texas. With over 30 years of construction experience, Mark specializes in constructing interiors, project management, and project estimation. He has been a construction professional since 1987.
wikiHow marks an article as reader-approved once it receives enough positive feedback. In this case, 98% of readers who voted found the article helpful, earning it our reader-approved status.
This article has been viewed 409,374 times.
If you want to change the look and texture of a wall but don't want to paint it, you can render it instead. Wall rendering is the process of adhering a mixture of wet cement and sand to a wall with a trowel. Rendering gives the wall a solid cement look and can be used to cover up the existing wall material. If you follow the right procedures and use the right materials, you can render a wall yourself.
Steps
Preparing the Wall
-
1Chip away any old render and paint. Use a cold chisel that is just sharp enough to scrape, chip away any bumps, dripping render, paint, or mortar that's stuck to the wall. Sometimes the old render may flake off and you'll want to scrape it all away before applying the new render. Continue to chip away at the wall until the stone or brickwork is free of bumps.[1]
-
2Scrub down the wall with a stiff bristled broom. Work the broom over the surface of the wall, making sure to displace any dirt or debris that may be on it. Work away any organic material, like moss or mold, that may be growing on the wall. Continue to work the broom back and forth against the wall until it's clean.[2] You can also add some soap to help break up the material.Advertisement
-
3Spray the wall down with a hose. Use a garden hose and spray down the surface of your wall. This will prevent the water in your rendering mortar from drying out. This is especially important when rendering highly porous materials like sandstone.[3]
-
4Lay down drop cloths around the wall. Drop cloths will prevent dripping render from falling and hardening onto the ground near the wall. Tape the drop cloths to the ground with tape so that it doesn't move around as you work. Laying down drop cloths will prevent you from having to chip away dripping render later.[4]
- If you don't have drop cloths you can use tarps, cardboard, or garbage bags.


Mixing the Render Mortar
-
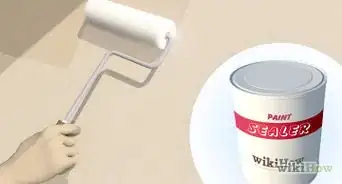
1Purchase the render mortar. You can purchase render mortar online or at a hardware store. Select a render mortar with a color that you want to apply to the wall. The instructions on the back of the packaging will tell you exactly how much water you should mix with the water.[5]
- Render colors include gray, off-white, green, blue, and yellow. You can also customize your render by mixing the colors.
-
2Pour water into a bucket or wheelbarrow. Pour the appropriate amount of water into a bucket or wheelbarrow. For 20kg (44 lbs) of render mortar, you'll typically need somewhere around 8 liters (2 gallons) of water.[6]
-
3Pour the mortar into the bucket and mix it together. Put the bucket or wheelbarrow on a flat surface before carefully pouring the render mortar into the water. Use a hoe or shovel to mix the render mortar and water together at first, and then switch to a paddle mixer attached to a power drill. Continue to mix until the render is lump-free and stiff enough to stick to a trowel. When the render is completely mixed, it should have a thick, paste-like consistency.
- Rent a mixing drill or mechanical concrete mixer from a hardware store to quickly and more efficiently mix the render mortar.
- Remember to wash off your tools after mixing the mortar so that the render doesn't harden on them.


Applying the Render to the Wall
-
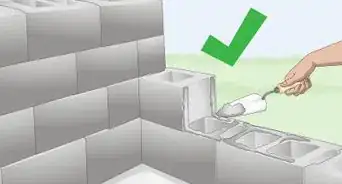
1Smear the render onto the wall with a trowel. Put the render mortar onto a trowel and press it firmly into the wall. Spread the render up, towards the top of the wall, and try to spread it in one solid motion. Continue to apply the first coat of render to the wall while keeping the coats of render as even as possible.[7]
- The first coat of render should around 5mm thick.
- Keep the bucket of render as close to the wall as you can so that if the render drips, it will go on the drop cloths.
-
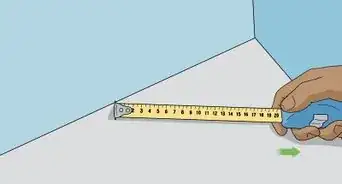
2Use a straight edge to level out the render. Use a straight edge from a plank of wood and scrape it over the surface of the render to even it out. Go from the bottom to the top of the wall until the render lies level with the wall's surface.[8]
- Use an aluminum bar or a 2x4 foot (60.96x121.92 cm) plank of wood as your flat edge.
-
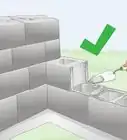
3Scratch the surface of the render with a scratching comb. A scratching comb is a comb-like tool with spikes on the end of a handle. You can purchase a scratching comb from a hardware store or online. Go from the left to the right on your wall and create even depressions into the wall. Continue to do this until the entire wall is scratched with the comb.[9]
- The scratching comb will create depressions in the wall that will help the second coat of render adhere.
-
4Let the first layer of render dry for two hours. The first layer or render should start to harden and adhere to the wall within 30 minutes. Check the dryness after this time, but expect it to take about two hours to dry completely. This layer must adhere to the wall before you can begin to lay the second coat.[10]
-
5Apply the second coat of render to the wall. The second layer of render should be 10mm thick. Lay down the second layer of render in the same way that you applied the first layer, by spreading it from bottom to top with a trowel.[11]
-
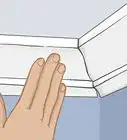
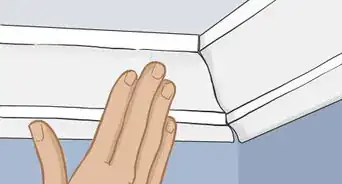
6Let the render dry for 30 minutes and even it out again. Let the render stiffen up and use a flat edge or a float to level out the second layer of render. This step is called floating and will help you flatten any raised areas and fill in any depressions that may have been left in the second layer of render.[12]
-
7Sponge down the render for a smooth finish. If you want to give your render a smooth finish, wipe down the surface of the render with a damp sponge. Clean and squeeze out the sponge as it gets dirty to avoid leaving scratches in your wall. Go over the entirety of the wall until the render has an even finish.[13]
- Use a soft bristled brush instead of a sponge to give the render a brushed finish.
- You can do this while the render is still wet.
-
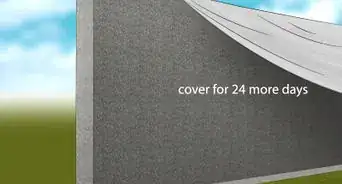
8Let the wall dry for 24 hours and then moisten it with water. Let the wall dry for a 24 hour period, then mist it down with room temperature water from a spray bottle once a day. Adding moisture to the render will prevent it from drying out and cracking. After five days, your rendered wall should be completely cured and complete.[14]


Expert Q&A
Did you know you can get expert answers for this article?
Unlock expert answers by supporting wikiHow
-
QuestionCan I render a wall that's been painted without removing it?
 Mark SpelmanMark Spelman is a General Contractor based in Austin, Texas. With over 30 years of construction experience, Mark specializes in constructing interiors, project management, and project estimation. He has been a construction professional since 1987.
Construction ProfessionalYes, as long as the paint is not peeling and has adhered well. You will want to lightly scratch out the wall.
Support wikiHow by unlocking this expert answer.
Things You'll Need
- Pick
- Stiff bristled broom
- Hose
- Water
- Drop cloths
- Render mortar
- Trowel
- Bucket
- Shovel or hoe
- Mixing drill or concrete mixer (optional)
- Scratching comb
- Sponge


References
- ↑ https://www.homebuilding.co.uk/repairing-walls-brickwork-and-render/
- ↑ http://www.diydoctor.org.uk/projects/rendering-exterior-walls.htm
- ↑ https://www.bhg.com.au/article/diy/how-to-render-a-wall
- ↑ https://www.bhg.com.au/article/diy/how-to-render-a-wall
- ↑ https://www.bhg.com.au/article/diy/how-to-render-a-wall
- ↑ http://www.homebase.co.uk/en/static/How-to-render-an-outdoor-wall
- ↑ http://www.homebase.co.uk/en/static/How-to-render-an-outdoor-wall
- ↑ http://www.diydoctor.org.uk/projects/rendering-exterior-walls.htm
- ↑ http://www.diydoctor.org.uk/projects/rendering-exterior-walls.htm
- ↑ http://www.diydoctor.org.uk/projects/rendering-exterior-walls.htm
- ↑ http://www.diydoctor.org.uk/projects/rendering-exterior-walls.htm
- ↑ http://www.homebase.co.uk/en/static/How-to-render-an-outdoor-wall
- ↑ http://www.goldtrowel.co.uk/rendering_tutorial_part_3.html
- ↑ https://www.homebuilding.co.uk/repairing-walls-brickwork-and-render/
About This Article

Before rendering a wall, chip away the old render using a cold chisel, and spray the wall with a garden hose to prevent the rendering mortar from drying out as you apply it. Next, mix the mortar and water in a bucket or wheelbarrow and smear it onto the wall using a trowel. Then, scratch the wall with a scratching comb to create depressions that will help the second coat of render adhere. After 2 hours, apply the second coat and let it dry for 24 hours. Finally, spray the wall with room temperature water to prevent the render from drying out and cracking. For more advice from our General Contracting reviewer, including how to tell when the render is completely mixed, keep reading.