This article was co-authored by wikiHow staff writer, Jack Lloyd. Jack Lloyd is a Technology Writer and Editor for wikiHow. He has over two years of experience writing and editing technology-related articles. He is technology enthusiast and an English teacher.
There are 8 references cited in this article, which can be found at the bottom of the page.
wikiHow marks an article as reader-approved once it receives enough positive feedback. In this case, several readers have written to tell us that this article was helpful to them, earning it our reader-approved status.
This article has been viewed 3,459,416 times.
Learn more...
This wikiHow teaches you how to fix a set of malfunctioning in-ear headphones. Keep in mind that headphones which flat-out no longer work will either need to have their plug replaced or be replaced entirely, while headphones which have a damaged cable may be repairable by using another set of cables and splicing them together. In many cases, repairing cheap, wired headphones is often more expensive than purchasing a new pair, especially if you don't already have the proper tools.
Steps
Finding the Problem
-
1Know which tools you'll need. Depending on the repair you end up needing to perform, you'll need to have (and know how to use) most of the following tools:
- Soldering iron and solder
- Knife or scissors
- Shrink tubing
- Wire strippers
- Multimeter
-
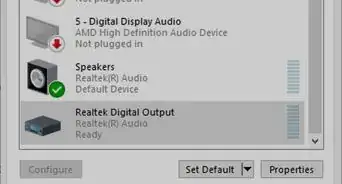
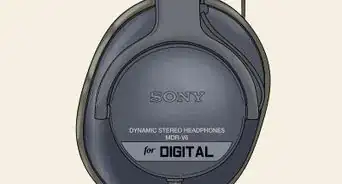
2Make sure that the problem resides with the headphones. Plug a different set of working headphones into your preferred audio item (e.g., your computer's headphone jack) and listen for feedback; if you notice that you're not receiving any sound via the other set of headphones either, your audio item's headphone input may be the problem.
- You can verify this by plugging your headphones into a different input and listening for audio there.
Advertisement -
3Listen for cable issues. Plug the headphones into an audio input, then bend the cable while you listen. If you can hear some audio through your headphones, move on to fixing the cable below.
-
4Try pushing the plug. If you can only hear audio when you push or manipulate the plug end of the headphones, skip down to fixing a broken plug below.
-
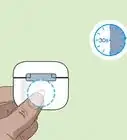
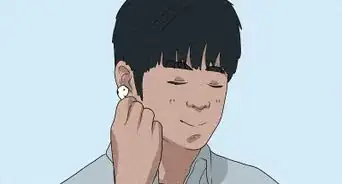
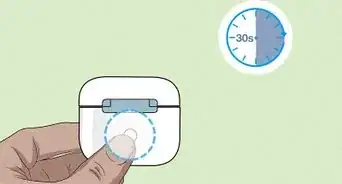
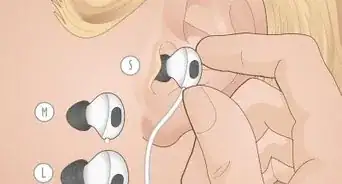
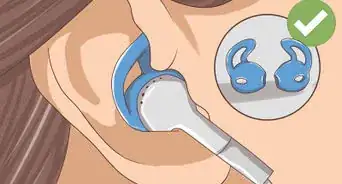
5Consider attempting to repair an over-the-ear earpiece. If your headphones have a detachable cable which can connect the earpieces (as with most Bluetooth headphones), try using your detachable cable with a different set of over-the-ear headphones. If you find that the other set works, your main set's earpieces are most likely to blame; you can try to fix them by using your headphones' documentation and recommended repair strategies.
-
6Set up a multimeter. If you haven't found the problem yet, use a multimeter. You can find one at a hardware store. Set up the multimeter as follows:
- Set the multimeter to test continuity, marked by ))) or a similar symbol.
- Plug the black lead into the hole marked COM.
- Plug the red lead into the hole marked with an Ω, mA, or ))).
-
7Test your wires with the multimeter. The multimeter will beep if there are no breaks in the wire; to test the wire, follow the below instructions:
- Make one slit next to the plug, and one slit next to the earpiece.
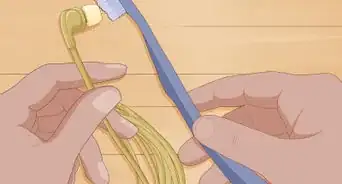
- The bare copper wire usually has a clear protective coat, so gently scrape the coat away with a knife.[1]
- Touch the wire in one slit with the black multimeter lead, then touch the other slit with the red lead.
- Wait for a response from the multimeter; if it beeps, the problem is in the plug or earpiece. If it does not beep, make a slit halfway along the cable and test each half of the cable.
- Make another cut in the half that does not beep. Repeat until you've found two points a few inches (several centimeters) apart that do not cause the multimeter to beep.
- Continue on to fixing the cable, skipping the test step.

Problem Cables
-
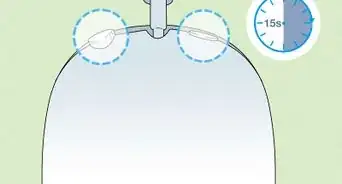
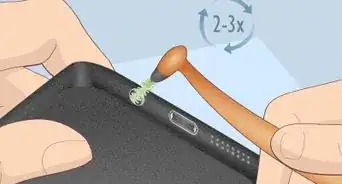
1Test the cable. To figure out where the break in the wires is, wear the headphones and turn on audio, then bend the cable to a right angle across the tip of your thumb. Slide your thumb along the length of the cable. When the sound crackles or cuts in and out, you have found the problem. If the problem is near the plug, see the next part for repair instructions. Otherwise, continue to the next step.[2]
- Use a piece of tape or a Sharpie to mark the site of the break.
- If you already found the problem with a multimeter, skip this step.
-
2Strip off the insulation. Use wire strippers, or carefully run a knife around the outside of the cable, to remove ½ inch (1.25 cm) of the outer shielding, then extend the cut in either direction until you see a broken wire. This is the area you'll need to repair.
- If your cable looks like two cables glued together then each one will contain an insulated wire (the signal) and a bare wire (the ground).
- Apple headphones and other headphones with single cables have two insulated wires (the left and right signal) and a single bare ground wire.
-
3Cut the cord. Cut the cord in half. If the wire inside is shredded, cut on either side of it to remove the problem. If you do this, remove the same amount from the left and right cords. Uneven lengths of cord can cause electrical damage to your headphones.[3]
- If only one of your wires is broken, you might want to skip to soldering the wire, without cutting or splicing. This will save time, but the repair will be less sturdy.[4]
-
4Slide on a shrink tube. This is a rubber tubing that looks just like the rest of your headphone cable. Slide it onto the cable for later. After your repair, you'll slide this back over the open area to protect it.
- If you had to cut the wire several times to find the problem, slip on a tube over each cut.
-
5Splice the wires. This means you'll be joining the wires together. Make sure to connect wires with the same color insulation (or no insulation). You have two options: a pigtail splice and an in-line splice.[5]
- For a pigtail splice, pick up the two exposed areas of wire that you want to connect. Place them parallel to each other and twist them together to join them. This is quick and easy, but the repair will be bulkier.
- For an in-line splice, overlap the wires end to end, then twist them in opposite directions. This is more difficult but the repair is easier to hide.
-
6Solder the connections. Use a soldering iron to melt a small dab of solder over the wires. Repeat for each splice, then let the solder cool.
- Bare wires without insulation usually have a thin enamel coat. Sand this off or burn it off with the soldering iron before you solder. Avoid breathing in the fumes.[6]
- Once cooled, keep the red and white ends separate from the ground wire by wrapping the 2 pairs of joins in electrical tape.
-
7Slide your shrink tube over the repair. After the shrink tube is properly fitted over the repair site, you can use a heat gun to constrict it.
- The tube will shrink down to about a quarter of its original size, which will allow it to fit snugly around your newly-repaired cable, keeping it strong and protected.

Broken Plugs
-
1Purchase a new jack plug. You can find these for cheap online or at an electronics store. Select a metal plug with stereo connection and a spring. Make sure it's the same size as your old plug, typically 3.5mm (1/8 inch).[7]
-
2Cut the old plug off. Place your knife or scissors about an inch above the point where the cable connects to the plug, then slice through the cable.[8]
- While some cables will have a plug which can screw off, the bulk of plug issues you'll experience result from frayed wires inside of the cable.
-
3Remove the shielding from an inch of the cable. With a pair of wire strippers, strip about an inch of the cable's cover from the end. You should see a wire for both the right and left earpieces, as well as at least one ground wire.
- If there are two ground wires, you'll need to solder them together later.
-
4Sort the wires by color. Typically, you'll find a red wire for the right earpiece, a white (or green) wire for the left earpiece, and one or two black or bare copper wires for the "ground" wire(s).
-
5Strip the ends of the wires. Remove the rubber coating from the bottom 1/3 of an inch from each wire if possible.
- If your wires are enamel-tipped, you may be able to skip this step.
-
6Twist like-colored wires together. If you have two ground wires, you'll need to twist together their ends before you can solder them.
- If all of the like-colored wires are distinct, just make sure that any frayed ends of the wires are twisted together.
-
7Remove enamel from the end of the wires. If your wires are tipped in an enamel cap, you'll need to burn it off by touching the soldering iron to the end of each wire in order to expose the copper ends of the wires.[9]
- Skip this step if you can see the copper ends of the wires already.
-
8Slip the headphone jack's sleeve onto the wire. It should fit with the portion which will screw into the plug facing the bottom of the wire.
- The plug base should have two pins sticking out of the end. If it only has one, then you have got a mono, not stereo, plug.
-
9Add a drop of solder to each wire. This is called "tinning" the wires, and it will ensure that your wires can connect to the headphone jack itself.
- You should allow the solder to cool fully before proceeding.
-
10Attach the soldered wires to the headphone jack. Use sandpaper to roughen the edges to make it easier to solder to metal, apply solder to a pin in the jack's housing, and heat the pin to melt the solder. You'll repeat this process for the other two wire connections.
-
11Reassemble the headphone jack. Rotate the jack's sleeve to screw it into the jack plug, making sure to tighten the sleeve as much as possible. You can test your headphones at this point.
- If you still have problems, most likely the wires are touching. Unscrew the cap and tug the wires apart.

Malfunctioning Earpieces
-
1Understand that this is unlikely to work. Unlike wire or jack issues in standard in-ear headphones, earpiece problems tend to be fairly complicated. Unless you can't afford a proper repair, it's almost always better to take your headphones into a repair service to have a professional diagnose and fix them.
-
2Take apart the earpieces. This process is different for each model. Look online for specific directions, or try the following:[10]
- Look for screws on the earpiece. You may need a size 0 crosshead screwdriver.
- Tug the padding gently. If it comes off, look for screws underneath it.
- Insert a spudger or other flat tool into the crack at the base of the earpiece dome. Lever it apart. This may cause damage to some models, so finding directions first is recommended.
- Earbuds can be tugged apart, but you may need a new rubber seal afterwards. The problem is usually in the cable for earbuds.[11]
-
3Look for loose wires. If you're lucky, the problem will be obvious. Any wires loose inside the earpiece need to be reattached to the headphone driver. Look for small metal pins, hopefully with other wires attached to some of them, and then solder the wire back into position over the bare pin.
- If more than one wire is loose, you may need to find a manual to see which wire goes where.
- Make sure none of the wires touch each other.
-
4Replace the driver. You can buy a new headphone driver online, but this may be quite expensive. If you decide replacement is worth the cost, take your headphones and a new driver to a repair shop. You can try it yourself, but there's a high risk of damage:[12]
- Cut the rubber seal around the central cone with a sharp knife.
- Remove the conical driver.
- Place the new driver back in the same slot. Be very careful not to touch the thin diaphragm.
- If it doesn't feel secure, add a small amount of glue around the edge.

Community Q&A
-
QuestionWhat's the problem if only one earpiece plays the audio and other one doesn't work?
 Community AnswerIt could be the earpiece itself, but it's more likely that the single cable leading to it is damaged.
 -
QuestionI just got my earphones on Saturday and on the following week, it was starting to cut off on the left side. Is it my phone or my earphones?
 Community AnswerMost likely it is your earphones. Your earphone is more prone to malfunction. Folding the earphones and shoving them in your pocket will decrease the life of your earphones. Try using a friend's headphones to check the link. In future, try buying more expensive earphones. The difference between $5 earphones and $30 earphones are significant but the difference becomes hard to detect at price ranges higher than that.
 -
QuestionWhat if my earphones are working from both the sides, but quieter than before? They aren't old though and I don't think there's a problem in the volume of the device.Community AnswerIt could be the speaker inside the earpiece wearing, and it depends on how loud you listen to music. If you listen loudly, or with a lot of strong bass, the speaker could be wearing and dimming the sound.
Warnings
- Be careful not to burn yourself; a soldering iron gets very hot.⧼thumbs_response⧽
- Do not breathe the fumes from the solder.⧼thumbs_response⧽
- Never attempt repairs of this caliber unless you know your way around the necessary tools. If you're hesitant, consider asking a friend or a professional repair service to fix your headphones instead.⧼thumbs_response⧽


References
- ↑ http://www.winstonmoy.com/2013/01/headphone-repair-finding-and-fixing-a-wire-break/
- ↑ http://www.tested.com/tech/accessories/2212-how-to-repair-a-headphone-cable-and-replace-a-jack-plug/
- ↑ http://www.explainthatstuff.com/howtorepairheadphones.html
- ↑ http://www.winstonmoy.com/2013/01/headphone-repair-finding-and-fixing-a-wire-break/
- ↑ http://www.tested.com/tech/accessories/2212-how-to-repair-a-headphone-cable-and-replace-a-jack-plug/
- ↑ http://www.theguardian.com/lifeandstyle/2014/may/23/how-to-mend-broken-headphones
- ↑ http://www.explainthatstuff.com/howtorepairheadphones.html
- ↑ https://www.wired.com/2016/01/how-to-fix-your-own-headphones/
- ↑ https://www.wired.com/2016/01/how-to-fix-your-own-headphones/
About This Article
To repair dodgy or broken headphones, start by plugging your headphones into an audio input and bending the cable while you listen. If you hear some audio while bending the cable, the issue is with the cable and you'll need to cut the wires, splice them, and solder them together. If you don't hear audio when you bend the cable, try bending and pushing down on the plug. If you hear audio when you're moving the plug, the issue is with the plug and you'll need to cut it off and replace it. To learn how to fix a broken cable or plug on your headphones, keep reading!