This article was co-authored by Mark Spelman. Mark Spelman is a General Contractor based in Austin, Texas. With over 30 years of construction experience, Mark specializes in constructing interiors, project management, and project estimation. He has been a construction professional since 1987.
This article has been viewed 220,839 times.
Functioning smoke detectors are extremely important in maintaining the safety of your home. Smoke detectors need to be replaced every 10 years, and smoke detector batteries should be replaced every 6 months.[1] You may need to replace your smoke detector The process takes just a few minutes and only requires a screwdriver and some electric tape.
Steps
Identifying Smoke Detectors for Replacement
-
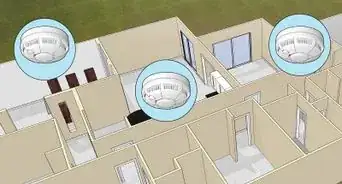
1Locate all of your smoke detectors. There should be at least one detector on every floor of the house, including finished attics or basements. You may even have multiple smoke detectors on each floor, so make sure to check every room.
-
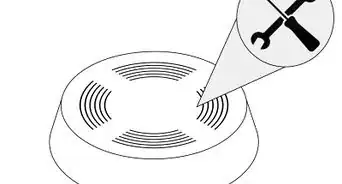
2Check the manufacture date. The location of the manufacture date should be easy to find but varies by model. If you find a smoke detector that is over 10 years old, you should replace it immediately. If you can't find a manufacture date on the smoke detector, the detector is probably over 10 years old and should be replaced.[2]Advertisement
-
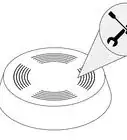
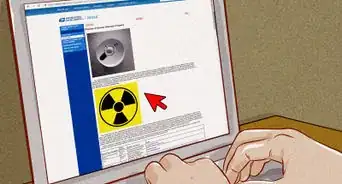
3Test your smoke detectors. Find the button on the face of the detector and hold it for at least 5 seconds. If the smoke detector beeps, it is functioning properly. If the detector does not beep, something is wrong.[3]
- You may hear all of your smoke alarms beep while only testing one of them; this is normal, and indicates the smoke detector in question is functioning properly.
- You can buy an aerosol can of smoke to test your detector if you wish.
-
4Check the batteries on malfunctioning units. Some smoke detectors have batteries, which should be replaced twice a year. If a unit is making a chirping sound, the batteries need replacing. Replace the batteries in the units you’ve identified as malfunctioning and re-test them. Remember that smoke detectors should be replaced every 10 years, even if replacing the batteries fixes them temporarily.[4] To replace the batteries:
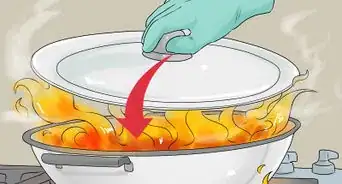
- Remove the detector from the mounting. Most smoke detectors simply require a quarter turn counterclockwise. The detector should now only be attached to a few wires coming out of the ceiling or wall.
- Replace the batteries. Most smoke detectors use 9V batteries. The battery compartment should be visible on the back side of the detector, remove the cover and replace the battery.
- Reattach the detector. Replace the battery cover and hold the smoke detector up against the mounting. Turning the detector clockwise should reattach it to the mount.
- Re-test your detector. Hold the test button for at least 5 seconds. If you hear a beep, your smoke detector is functioning properly.
-
5Purchase new smoke detectors. You can purchase smoke detectors online and at most department stores and hardware stores. Deciding on a smoke detector is mostly personal preference, but there are some features to know about.[5]
- Some newer smoke detectors also function as a carbon monoxide detector. If you don’t have a CO detector in your house, this is a good option. It is only necessary if you use gas in the house.
- Wireless smoke detectors are convenient, but they can only connect to other wireless alarms of the same model. If you’re replacing all of the smoke detectors in your house and choose the wireless option, make sure to purchase the same make and model.
- Check the manufacture date. Since smoke alarms have a fairly static 10-year lifetime, buying one that has been on the shelf for two years will only give you 8 years of use.


Removing the Malfunctioning unit
-
1Shut off electricity to the detector. To do this, you’ll need to find your circuit breaker and switch off power to the smoke detector in question. This will remove the danger of electric shock resulting from touching open wires.[6]
-
2Remove the old detector from the mounting. Usually this will just involve a quarter turn counterclockwise. The unit will now be suspended from the ceiling by three wires, all connected to the detector via one plug called the wiring harness. These wires are:
- Black - 120 volts
- White - Neutral
- Red or Yellow - Interconnect: This is the wire that connects the alarm with the remaining alarms in your residence.
-
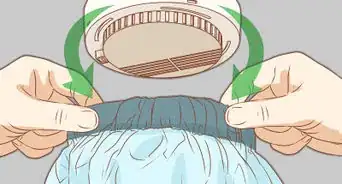
3Unhook the wires from the detector. Squeeze both sides of the plastic plug while pulling the plug away from the detector. The old detector should now be completely detached.
-
4Remove the mounting plate. Take a screwdriver and remove the two screws that hold the mounting plate to the electrical box in your ceiling. Be careful not to accidentally pull the wires out of the ceiling while removing the mounting plate.
- It’s always worth checking to see if the existing mounting plate will work with your new unit before you replace it.
-
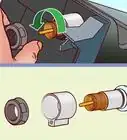
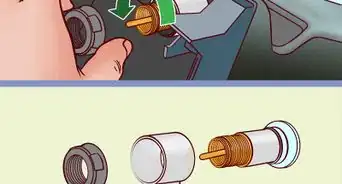
5Remove the wiring harness. Start by removing any electric tape or wire caps that are attached to the wiring harness. Untwist the wires and remove the wiring harness. The three wires in the ceiling should now just be exposed metal ends.[7]


Installing the New Detector
-
1Ensure the power is off. If you haven't done so already, make sure to turn the appropriate circuit breaker to the “off” position.
-
2Attach the new wiring harness. The new smoke detector should also come with a wiring harness very similar to the one you removed. Match the wires and attach them by twisting the metal ends around each other. Wrap the newly attached metal ends in electric tape or attach a wire cap. Attach the wires in the following manner: black to black, white to white, and red or yellow to the color of the third wire in your ceiling (this color can vary).[8]
- After attaching the wires, pull down slightly on the wire harness to make sure you have a good connection that can support the weight of the alarm. If the wire harness comes undone you will need to reattach the wires, making sure to wrap them tightly around each other.
- If there are only two wires, you may only need to attach black to black and white to white.
-
3Attach the new mounting plate. Take the new mounting plate that came with the new alarm and pass the wiring harness through the large hole in the center of the plate. Then screw the plate into the ceiling/wall with the two screws that you removed earlier.
-
4Connect the new smoke detector. Plug the wiring harness into the new detector, and then attach the smoke detector to the mounting plate. This can most likely be done by holding the detector up on the mounting plate and turning the detector clockwise.
- If your smoke detector is battery powered, don’t forget to install new batteries before you attach it to the mounting plate.
-
5Turn on the electricity. When you switch the circuit breaker back on, you may hear a beep from your newly installed smoke detector.
-
6Test your new smoke detector. All smoke detectors have a “test” button, sometimes it is the only button on the face of the detector. Press and hold the button for at least 5 seconds, and you should hear a beep.
- If you have other working smoke alarms in the house, they may all beep. This is a sign that you connected your new smoke alarm properly.
- If the smoke detector does not beep when tested, check that you matched the wires properly and that they are sufficiently attached at the metal ends. Check the circuit breaker to make sure the power is on.
- You can use an aerosol can of smoke to perform a real test of the detector, if desired.


Expert Q&A
Did you know you can get expert answers for this article?
Unlock expert answers by supporting wikiHow
-
QuestionCan I use the existing wire harness to connect the new smoke detector?
 Mark SpelmanMark Spelman is a General Contractor based in Austin, Texas. With over 30 years of construction experience, Mark specializes in constructing interiors, project management, and project estimation. He has been a construction professional since 1987.
Construction ProfessionalYes, you can, as long as it has 2 wires with a ground.
Support wikiHow by unlocking this expert answer.
-
QuestionCan I keep and reuse the old harness with my new smoke detecter?Mark SpelmanMark Spelman is a General Contractor based in Austin, Texas. With over 30 years of construction experience, Mark specializes in constructing interiors, project management, and project estimation. He has been a construction professional since 1987.
Construction ProfessionalYes, you do not have to replace the house wiring.Support wikiHow by unlocking this expert answer.


References
- ↑ http://www.nfpa.org/safety-information/for-consumers/fire-and-safety-equipment/smoke-alarms
- ↑ http://www.nfpa.org/safety-information/for-consumers/fire-and-safety-equipment/smoke-alarms/installing-and-maintaining-smoke-alarms
- ↑ http://www.nfpa.org/safety-information/for-consumers/fire-and-safety-equipment/smoke-alarms/installing-and-maintaining-smoke-alarms
- ↑ http://www.nfpa.org/safety-information/for-consumers/fire-and-safety-equipment/smoke-alarms/installing-and-maintaining-smoke-alarms
- ↑ http://www.consumerreports.org/cro/co-and-smoke-alarms/buying-guide.htm
- ↑ http://www.familyhandyman.com/electrical/install-new-hard-wired-or-battery-powered-smoke-alarms/view-all
- ↑ http://www.familyhandyman.com/electrical/install-new-hard-wired-or-battery-powered-smoke-alarms/view-all
- ↑ http://www.familyhandyman.com/electrical/install-new-hard-wired-or-battery-powered-smoke-alarms/view-all
- Videos provided by Sparky Channel
About This Article

Before you replace a smoke detector, you should switch off the circuit breaker for the smoke detectors to avoid electrocuting yourself. To remove your old smoke detector, twist it counterclockwise and disconnect its wires by squeezing the plastic plug. Then, you’ll need to unscrew the mounting plate and disconnect the wires from it. Screw your new mounting plate in its place and attach the new smoke detector. Give your smoke detector a quick test and you’re good to go! For more tips from our Electrical co-author, including how to work out if your smoke detectors need replacing, read on!