This article was co-authored by David Balkan and by wikiHow staff writer, Christopher M. Osborne, PhD. David Balkan is a Professional Plumber, CEO of Balkan Sewer and Water Main Service, and President of Balkan Sewer and Drain Cleaning. As a hands-on owner of these companies for over 40 years, David is knowledgeable about water service lines, sewers, and drain line issues. David is a Committee Chairman of the Master Plumbers Council and has sat on the Executive Committee of the Sub Surface Plumbers Association of New York for over 30 years. His knowledge and solution-oriented approach contributed to Balkan Sewer and Water Main Service being the largest and most trusted service in New York City and the recipient of the 2017 Angie’s List Super Service Award.
A sump pump is a hidden home workhorse that’s easy to ignore—until, that is, it stops pumping and you end up with a wet basement. Fortunately, switching out a bad sump pump for a new one is a fairly straightforward DIY job. We’re here to walk you through the entire process of replacing a sump pump, so that your new pump can get to work doing its hidden but important job for years to come.
Things You Should Know
- Unplug the old pump, disconnect the discharge pipe at the check valve, remove the pit lid, and lift out the faulty sump pump.
- Attach a discharge pipe stub to the new pump, lower it into the pit, and make adjustments as needed to get it level and at the right height.
- Complete the connections, plug in the new pump, and add water to the pit to test for leaks and proper water removal.
Steps
Removing the Old Pump
-
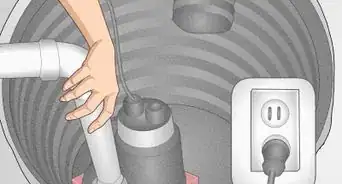
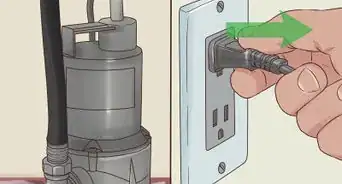
1Unplug the pump to cut the power supply. While a sump pump is designed to operate safely in water, it’s not safe for you to handle the pump while it’s plugged in. Eliminate any risk of electrocution by unplugging the sump pump as your first order or business.[1]
- Most sump pumps simply plug into an outlet. But, if you have a hard-wired sump pump, go to your home’s breaker box and shut off the correct circuit breaker. To be extra sure the power is out, use a circuit tester on the power cable.
- How can you tell when your sump pump needs replaced? Signs of a bad sump pump include constant running or not running at all, strange sounds or vibrations, erratic pumping cycle lengths, an empty or overflowing sump pit, and pump age (most pumps last 5-10 years).[2]
-
2Disconnect the discharge pipe at the check valve. The discharge pipe, which is nearly always made of white PVC, should have a check valve somewhere near the bottom of its vertical run up and out of your basement, crawl space, etc. This one-way check valve, which keeps water from running back down into the pit, will likely be attached to the PVC with rubber sleeves secured with clamps. Use a screwdriver to loosen the lower clamp(s), then pull the section of PVC between the pump and the check valve down and out of the sleeve.[3]
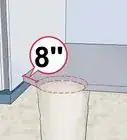
- If your discharge pipe doesn’t have a check valve, cut through the pipe about 1–2 ft (30–61 cm) up from the floor. When it’s time to install the new pump, go ahead and install a check valve as well.
- The check valve limits the amount of water that drains back down the discharge pipe and back into the pit, which in turn limits how many times your pump has to do its job (thereby lengthening its lifespan).
Advertisement -
3Lift off the lid covering the sump pit. Your sump pit should be covered by a round plastic lid that has cutouts for things like the discharge pipe and the power cord. The cover may have 3 or 4 bolts around the perimeter holding it down—if so, unscrew these first. Then lift the cover up and over the disconnected discharge pipe and set it aside.[4]
- If your sump pit doesn’t have a lid, buy one right away and keep the pit covered at all times. A sump pit lid is an important safety feature that also keeps potential pump-clogging debris from falling into the pit.
-
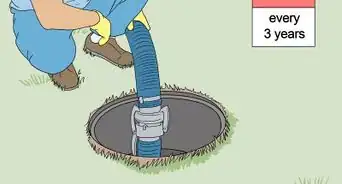
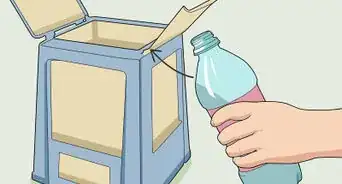
4Lift the old pump out of the sump pit. Sump pumps aren’t particularly heavy, so yours should be pretty easy to lift straight up and out of the pit. That said, expect it to be a wet and dirty job. Put on rubber gloves to keep your hands out of the gunk, and have a cardboard box (with an old towel inside) ready to deposit the old pump into.[5]
- Now’s a great time to clean out your sump pit!


Prepping the New Pump
-
1Replace the old pump with a match if you’ve had good results. While it’s not that much more difficult to swap out a sump pump with a new model, the easiest option is to use a matching model (since the connections should all still fit just right). But only go this route if your old pump did a good job of keeping the area dry—if, for instance, your pump often had to run constantly and could barely keep up with the seeping water, opt for a more powerful model.[6]
- Home sump pumps are typically rated at 1/3 horsepower (HP), but you can downgrade to 1/4 HP if you only have occasional and limited water issues, or upgrade to 1/2 HP or above if you need more pumping power.
-
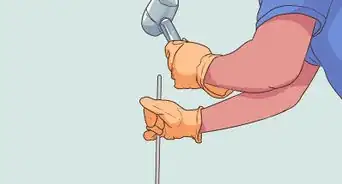
2Cut a length of PVC discharge pipe to suit the new pump. If you’re using a matching model for your new pump, cut the new pipe to the same length as the old one (with a hacksaw or pipe cutter). Or, you might choose to re-use the old discharge pipe stub that connects the pump to the bottom of the check valve. Otherwise, stand the old and new pump side-by-side and measure any difference in the height of the connection point for the discharge pipe. Add or subtract from the previous pipe stub length as needed.[7]
- Make sure to use the same diameter of PVC as before. Most sump pumps use 1⁄2 in (1.3 cm) PVC.
-
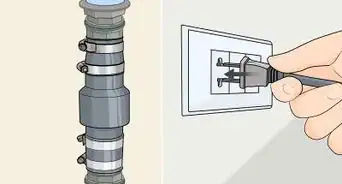
3Connect the discharge pipe stub to the new pump. The PVC discharge pipe typically connects to the pump in one of two ways. It may be a threaded connection (with threading visible in the pump’s discharge opening), in which case you’ll just have to screw in the pipe stub until it’s hand-tight. Or you might need to glue the PVC connection. If so, apply PVC cement to the outside of the pipe stub and the inside of the pump’s discharge opening, then press the pipe in firmly and give it a slight twist to spread the glue.[8]


Completing the Install
-
1Lower the new pump into the sump pit. Your old sump pump rested (or at least should have rested) on a concrete paver or a couple of bricks. Simply lower the new pump down into the pit and set it on the paver or bricks. Make sure that the pump is centered in the pit and not pressed up against the wall.[9]
- If there’s only gravel at the bottom of the pit, add a concrete paver for the new pump to rest on. This prevents gravel from getting sucked up against the pump filter (or even worse, up into the pump).
-
2Confirm the pump is level and at the proper height. The pump should be straight upright, not leaning to one side or the other, and the top of the pump needs to be lower than the lip of the sump pit so you can put the lid back on. You can fix either issue by adjusting the gravel at the bottom of the pit:[10]
- If the pump is uneven, level out the paver it’s sitting on by lifting it up and smoothing out the gravel underneath.
- If the pump is too high, scoop out some of the gravel under the paver and level out the remainder. (If the pump is too low so that it will come on too frequently, add some more gravel to the bottom of the pit.)
-
3Cover the sump pit with the lid. Slip the lid over the discharge pipe stub, feed the power cord through one of the other openings in the lid, and set the lid down in place. If the lid secures in place with bolts, wait to screw these in until after you’ve tested the pump.[11]
-
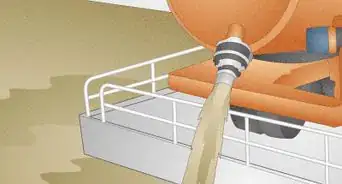
4Reconnect the discharge pipe at the check valve. Slide the sleeve at the bottom of the check valve all the way over the end of the discharge pipe stub. Securely hand-tighten the clamp or clamps on the outside of the sleeve with a screwdriver—make sure they’re completely snug, but don’t crack the PVC pipe underneath.[12]
-
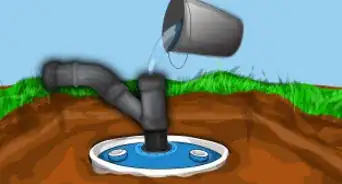
5Plug in the new pump and add water to test it. Good news—your repair is almost complete! Plug in the power cord, then pour water into one of the holes in the pit’s lid until the new pump kicks on. Watch for any leaks at the check valve, then lift up the lid and confirm that the pump has emptied the pit of all water above the base of the pump.[13]
- If you spot any leaks, tighten those connections and try again. If the pump isn’t functioning properly, consult the product manual for troubleshooting advice.


References
- ↑ https://hampshirecountyrentals.com/blog/2149/-five-steps-to-replace-a-sump-pump
- ↑ https://www.sedonawaterproofing.com/8-signs-that-you-need-a-sump-pump-replacement/
- ↑ https://www.basementsumpandpump.co.uk/2021/12/how-to-replace-a-sump-pump/
- ↑ https://www.basementsumpandpump.co.uk/2021/12/how-to-replace-a-sump-pump/
- ↑ https://hampshirecountyrentals.com/blog/2149/-five-steps-to-replace-a-sump-pump
- ↑ https://hampshirecountyrentals.com/blog/2149/-five-steps-to-replace-a-sump-pump
- ↑ https://www.thisoldhouse.com/basements/21097137/how-to-install-a-sump-pump
- ↑ https://www.thisoldhouse.com/basements/21097137/how-to-install-a-sump-pump
- ↑ https://www.basementsumpandpump.co.uk/2021/12/how-to-replace-a-sump-pump/
- ↑ https://www.basementsumpandpump.co.uk/2021/12/how-to-replace-a-sump-pump/
- ↑ https://www.basementsumpandpump.co.uk/2021/12/how-to-replace-a-sump-pump/
- ↑ https://www.thisoldhouse.com/basements/21097137/how-to-install-a-sump-pump
- ↑ https://www.thisoldhouse.com/basements/21097137/how-to-install-a-sump-pump
About This Article