This article was co-authored by wikiHow Staff. Our trained team of editors and researchers validate articles for accuracy and comprehensiveness. wikiHow's Content Management Team carefully monitors the work from our editorial staff to ensure that each article is backed by trusted research and meets our high quality standards.
There are 9 references cited in this article, which can be found at the bottom of the page.
This article has been viewed 95,108 times.
Learn more...
After you use your vape or electric cigarette for a bit, you’ll have to change the coil. Do this if your juice has a funky or burnt taste, for instance. To easily replace your vape coil, take off the tank and twist off the coil. Be sure to pre-saturate the cotton of your coil so it doesn’t burn. With proper maintenance, you can get full-flavored rips while keeping your vape in great condition.
Steps
Disassembling the Vape
-
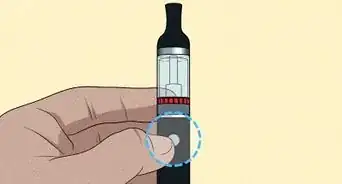
1Unscrew the tank from the body of the vape to expose your coil. Every vape setup is slightly different, but in general, you can easily unscrew the tank from the bottom section. Hold the tank upside down and twist the tank off using your hands.[1]
- If there is juice in your tank already, you can use a paper towel to avoid getting your hands greasy.
-
2
-
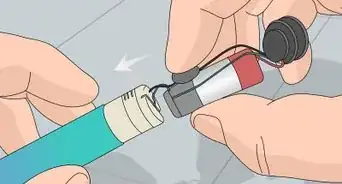
3Unscrew your current coil from the base of the vape. The coil is also called an “atomizer head” or “replacement head.” You can use your hands or a paper towel to take off the coil. Twist the coil counterclockwise until it comes off of the bottom of your vape.[3]
- A paper towel will help keep your hands clean.


Adding a New Coil
-
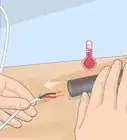
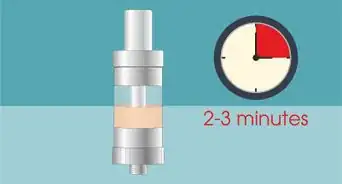
1Pre-saturate your coil with 5-8 drops of vape juice. The cotton in your coil is brand new when you take it out of the package. If you place it directly onto your vape, it will start to burn. To avoid this, drip about 5 or so drops across the cotton from the vape juice bottle. Wait 30-60 seconds for the vape juice to absorb into the cotton.[4]
- Use more or less juice, depending on the size of your coil.
- Make sure the coil you purchase is the right coil for your vape. Read your instructions to determine the type of coil or bring your tank to a local vape store.
-
2Screw your new coil into place. Insert the coil into the bottom of your vape, and twist it clockwise until it is secure. The white cotton should face upwards toward your tank.[5]
- You want the coil to be tightly in place but not overly rigid.
-
3Replace the tank after you put on the new coil. Once your new coil is in place, screw your tank onto the vape clockwise. You can now refill your tank with fresh vape juice.[6]


Knowing When to Replace the Coil
-
1Replace the coil every 1-2 weeks on average. When you should replace your coil largely depends on how often you use it. Typically 1 coil lasts about 2 weeks.[7]
- If you use your vape very frequently, you’ll have to change the coil more often, potentially every week.
- If you occasionally use your vape, you can go 2-3 weeks without changing the coil.
-
2Change the coil if the vape juice tastes burnt or less flavorful. Take a hit from your vape and pay attention to the flavor. If it has a burnt aftertaste or if the flavor seems sour, it is time to change your coil. Over time the juice starts to clog up the coil.[8]
- If you use sweet, sugary juices, they may clog up your coil more easily. The sweetener essentially caramelizes on the coil as it heats up.
- Additionally, if your coil looks brown or black, this is a sign that it is burnt and you should replace it.
-
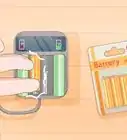
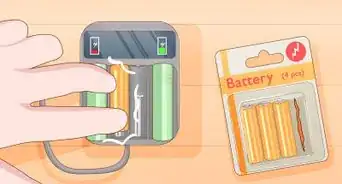
3Get a new coil if your vape produces very little vapor. Check the batteries on your vape to ensure they are fully charged. If the battery is not the issue, then small clouds of vapor are likely from the old coil. If this is the case for you, it is time to change your coil.[9]
- To check the battery, plug your vape into the charger. Then, look at the battery indicator to determine if it needs charging.


Warnings
- Avoid leaving your vape in the car. The high heat can cause the liquid to leak.⧼thumbs_response⧽


-Step-11.webp)
References
- ↑ https://youtu.be/svgxndCjT80?t=1m40s
- ↑ https://youtu.be/svgxndCjT80?t=1m33s
- ↑ https://youtu.be/sestNKXbm64?t=1m27s
- ↑ https://youtu.be/sestNKXbm64?t=2m9s
- ↑ https://youtu.be/sestNKXbm64?t=2m29s
- ↑ https://youtu.be/sestNKXbm64?t=2m42s
- ↑ https://metro.co.uk/2017/08/14/vaping-101-why-do-i-get-a-burnt-taste-from-my-e-cig-when-and-how-to-change-your-coil-6851542/
- ↑ https://youtu.be/sestNKXbm64?t=33s
- ↑ https://youtu.be/1Jp_bwmwPwo?t=2m10s
About This Article

To replace your vape coil, start by unscrewing the tank from the body of the vape to expose the coil. If there’s any vape juice still in your tank, dump it out. Next, unscrew the coil from the base of the vape by twisting it counterclockwise. Pre-saturate your new coil with 5 to 8 drops of vape juice so it won’t burn, then screw your new coil into place. After you put on the new coil, replace the tank and refill it with fresh vape juice. To learn how often you'll need to replace your coil, keep reading!