This article was co-authored by Gerber Ortiz-Vega. Gerber Ortiz-Vega is a Masonry Specialist and the Founder of GO Masonry LLC, a masonry company based in Northern Virginia. Gerber specializes in providing brick and stone laying services, concrete installations, and masonry repairs. Gerber has over four years of experience running GO Masonry and over ten years of general masonry work experience. He earned a BA in Marketing from the University of Mary Washington in 2017.
There are 15 references cited in this article, which can be found at the bottom of the page.
wikiHow marks an article as reader-approved once it receives enough positive feedback. In this case, 100% of readers who voted found the article helpful, earning it our reader-approved status.
This article has been viewed 334,696 times.
If you look out at your driveway or sidewalk the next time it rains, you’ll notice that it eventually absorbs the water. Why? Because concrete is porous. That’s fine for outdoor concrete, but if you accidentally spill something on your indoor concrete floors, you'll wind up with a stain that’s not very fun to get out. Fortunately, sealing your concrete floors will prevent stains like this from happening, and the process is easier than you might think.[1] You just need the right kind of sealer and some basic tools to apply it with.
Steps
Cleaning the Floor
-
1Move everything out of the area. Take all the furniture and miscellaneous items out of the room and stack them somewhere else. Find a temporary home for them, as the process of sealing the concrete can take up to a week.[2]
- You don't want to be moving things around once you get started sealing. Plus, you want to be able to clean the whole floor at once. If you're sealing a garage, you may even want to do it before you move into a new home.
-
2Blow or sweep the dirt away. Pick up the major dirt and debris first so you can work on cleaning up any spills on the floor. Use a leaf blower to blow out the rest of the dirt, or simply sweep the area thoroughly.[3]Advertisement
-
3Scrub away oil spills and other dirty areas. Pour mineral spirits on grease spills and rub them down with a scrubbing brush. Use paper towels to wipe up the excess grease and cleaner.[4] Alternatively, try a cleaner like trisodium phosphate or any pre-paint cleaner to scrub down the grease spills with a scrubbing brush.[5]
- If you don't get the grease and dirt up, the sealer won't adhere properly.
- With some grease cleaners, you'll pour the cleaner on the grease stain and use a trowel to spread it over the whole stain. Then, let it dry. It will become a powder you can sweep up.[6]
- Make sure to wipe up any grease and cleaner residue with towels.
-
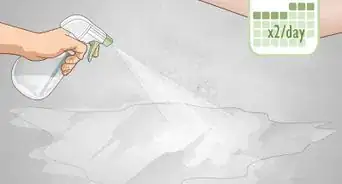
4Use a concrete cleaner to prepare the concrete for the sealer. Purchase a phosphoric acid masonry cleaner or another type of concrete cleaner.[7] Spray or pour the cleaner onto the floor, and then use a scrubbing broom with a long handle to rub it into the floor. Scrub the floor down thoroughly with the cleaner, working in batches across the room.
- You can purchase a kit for redoing your floors, and often it will come with a concrete cleaner.
-
5
-
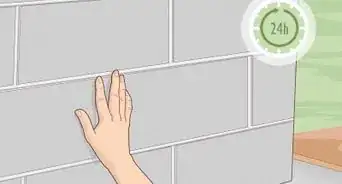
6Make sure the floor has dried completely before moving on. You can squeegee the water off the floor to help speed up the process, but you still may want to wait up to 24 hours to let it dry.[10]
-
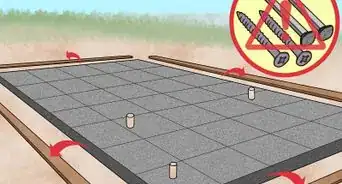
7Use concrete repair caulk on any cracks. If you have cracks on your floor, now is a good time to fill them in. Use the tube to squeeze the caulk into the crack. Use enough caulk to fill the crack. Run a trowel over the top to smooth it out.[11]
- Let the caulk dry completely before moving on. Check the package to see how long it takes to cure; some take as long as a week to fully cure.


Picking a Sealer
-
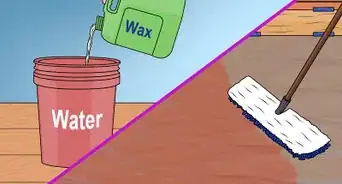
1Pick an acrylic sealer to easily seal interior floors. This type of sealer sits on top of the concrete, and it is easy to apply. However, it doesn't protect the floor as well as other sealers against oil and grease stains, so if you're sealing a garage, pick a different sealer. You'll often need to apply 2 coats for this sealer to be effective.[12]
-
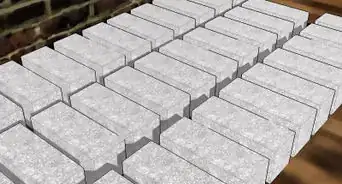
2Choose epoxy sealers for a colorful, durable finish. These seals are very durable, more so than acrylic, though they also sit on top of the concrete. They do protect against grease stains. However, they're difficult to apply because you have to mix 2 parts together and get it down before the epoxy dries out. You can also get these in different colors so you can change the look of your floor while you're at it.[13]
-
3Try polyurethane sealers for a durable finish you can use over other seals. These are more durable than epoxy and have UV protection, as well, which means they won't turn yellow over time like acrylic or epoxy might. They do sit on top of the concrete like acrylic and epoxy, but because this seal tends to be thin, it's often used as a top coat over epoxy.[14]
- Polyurethane also comes in matte, semi-gloss, and glossy finishes.
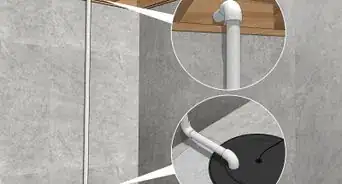
- To check the concrete to see if it has a seal already, pour a little water on it. If it beads up, it already has a seal on it.[15] Polyurethane sealers will go over most other sealers, but if you're not sure what to pick, ask at your local hardware store.
-
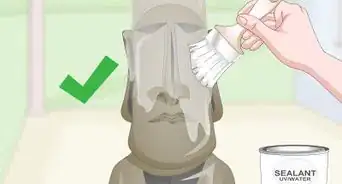
4Opt for silane or siloxane sealers if you don't want the look to change. Because these sealers penetrate the concrete, they don't make it darker or glossy. It stays the same matte gray. It protects the concrete against liquids and deterioration.[16]
- It can last 20 years or more.


Applying the Sealer
-
1Read the manufacturer's instructions first. Every sealer is going to be a little bit different, so follow the instructions carefully. Take a moment to read all the way through them before you begin.[17]
- Check the preferred temperatures for application on the back of the product. Some sealers may not set well if you apply them in weather that is too hot or too cold. Too much humidity may also be an issue, as it can keep the sealer from curing properly.
-
2Ventilate the area well. If you're working in the garage, ventilation is easy. Just open the garage door. If you're working inside, make sure to open as many windows as you can. It also helps to have a fan facing outside to draw any fumes outward.
-
3Mix the 2 parts together if you're using an epoxy. Some sealers come in 2 parts. Pour the smaller can into the bigger can, and then use a stir stick to combine them. Don't take this step until you are ready to start painting![18]
- If you're using epoxy, you may only have an hour or so to get it down, so work quickly.
-
4Divide the room into quarters visually. It's best to work on 1 quarter at a time. Finish the whole quarter before moving on the next, and always leave yourself a way out so you don't have to walk across the wet sealer.[19]
-
5Use a hand brush to apply the sealer along the edge. Pick a paintbrush that's 2 to 3 inches (5.1 to 7.6 cm) wide and meant for applying paint or sealer. Dip the paintbrush into the sealer. Run it along the edges of the first quarter you're painting, where your rolling brush or paint pad may not be able to reach. Use nice, even strokes to apply the sealer.[20]
-
6Paint the sealer on the concrete with a paint pad or rolling brush. Pour the sealer into a painting tray. Dip the paint pad or rolling brush with an extension into the sealer, rolling it on evenly. Slide the paint pad or rolling brush along the edge you just painted. Keep going across the floor, adding more sealer as needed.[21]
- Always keep a wet edge as you move across the area. If you let the edge dry, it won't blend into the next area of sealer you apply.
- Any roller or paint pad meant for painting should be fine.
-
7Apply a single, even layer across the floor. As you work, move across the room, completing one quarter at a time. Make sure the sealer doesn't puddle in any place by going over any low areas a few times to spread it out. Be careful to cover the whole floor so you don't have patches without sealer.[22]
-
8Wait for the sealer to dry before walking or driving on it. Read the instructions about how you need to let the sealer dry. You may need to wait as long as a day before walking on it and as long as 3-4 days before driving on it.[23]
-
9Add a second coat as needed. Some sealers may require a second coat. Some acrylics and epoxies, for instance, won't be as durable without a second coat. Plus, adding another layer will help ensure you have even coverage. Wait until the first layer dries completely before adding the second layer.[24]
- Always read the manufacturer's instructions. The sealer may need as long as 5-7 days to cure before you can use a second coat.


Expert Q&A
Did you know you can get expert answers for this article?
Unlock expert answers by supporting wikiHow
-
QuestionDo you need to seal a concrete floor?
 Gerber Ortiz-VegaGerber Ortiz-Vega is a Masonry Specialist and the Founder of GO Masonry LLC, a masonry company based in Northern Virginia. Gerber specializes in providing brick and stone laying services, concrete installations, and masonry repairs. Gerber has over four years of experience running GO Masonry and over ten years of general masonry work experience. He earned a BA in Marketing from the University of Mary Washington in 2017.
Masonry SpecialistSealing is needed mainly for preserving the color and preventing stains. It doesn't let water penetrate into the concrete and makes it just slide off the concrete, so it is protected from stains this way.
Support wikiHow by unlocking this expert answer.
-
QuestionCan the water based sealer be used for an outdoor slab?
 Community AnswerWater based sealers will work fine as long the the surface is dry when applied.
 -
QuestionDo I have to sand my concrete floors before sealing it?
 Community AnswerNo, you do not have to.
Warnings
- Wear rubber gloves, long pants, a long shirt, and eye protection to seal concrete floors, as the degreaser and sealer can irritate your skin and eyes.⧼thumbs_response⧽
Things You'll Need
- Broom
- Dustpan
- Degreaser
- Concrete cleaner
- Hose
- Bucket
- Long-handled scrub brush
- Quick-dry concrete filler
- Trowel or putty knife
- Concrete sealer
- Painting tray
- Paintbrush
- Roller with extension pole


References
- ↑ Gerber Ortiz-Vega. Masonry Specialist & Founder, GO Masonry LLC. Expert Interview. 10 March 2020.
- ↑ https://www.todayshomeowner.com/video/sealing-a-garage-floor/
- ↑ https://www.todayshomeowner.com/video/sealing-a-garage-floor/
- ↑ https://www.todayshomeowner.com/video/sealing-a-garage-floor/
- ↑ https://www.houselogic.com/remodel/painting-lighting/concrete-painting/
- ↑ https://www.familyhandyman.com/garage/clean-garage-floors-remove-oil-stains-from-concrete/view-all/
- ↑ https://www.houselogic.com/remodel/painting-lighting/concrete-painting/
- ↑ https://www.todayshomeowner.com/video/sealing-a-garage-floor/
- ↑ https://www.familyhandyman.com/garage/make-your-garage-floor-last-with-concrete-sealer/view-all/
- ↑ https://www.todayshomeowner.com/video/sealing-a-garage-floor/
- ↑ https://www.todayshomeowner.com/video/sealing-a-garage-floor/
- ↑ https://allgaragefloors.com/concrete-floor-sealers/
- ↑ https://allgaragefloors.com/concrete-floor-sealers/
- ↑ https://allgaragefloors.com/concrete-floor-sealers/
- ↑ https://www.todayshomeowner.com/video/sealing-a-garage-floor/
- ↑ https://allgaragefloors.com/concrete-floor-sealers/
- ↑ https://www.houselogic.com/remodel/painting-lighting/concrete-painting/
- ↑ https://www.todayshomeowner.com/video/sealing-a-garage-floor/
- ↑ https://www.todayshomeowner.com/video/sealing-a-garage-floor/
- ↑ https://www.todayshomeowner.com/video/sealing-a-garage-floor/
- ↑ https://www.familyhandyman.com/garage/make-your-garage-floor-last-with-concrete-sealer/view-all/
- ↑ https://www.familyhandyman.com/garage/make-your-garage-floor-last-with-concrete-sealer/view-all/
- ↑ https://www.todayshomeowner.com/video/sealing-a-garage-floor/
- ↑ https://www.houselogic.com/remodel/painting-lighting/concrete-painting/
- ↑ https://www.houselogic.com/remodel/painting-lighting/concrete-painting/
- ↑ Gerber Ortiz-Vega. Masonry Specialist & Founder, GO Masonry LLC. Expert Interview. 10 March 2020.
About This Article

To seal concrete floors, use an epoxy sealer if you want something durable that comes in a variety of colors. For indoor concrete floors that won't be exposed to oil or grease, use an acrylic sealer, which is easy to apply. If you want to seal over concrete floors that already have a seal, try a polyurethane sealer. To seal concrete floors without changing their appearance, you can use a silane or siloxane sealer, which won't alter the color or finish of the floors. To learn how to apply concrete sealer, scroll down!