This article was co-authored by Benjamin Hansen. Benjamin Hansen is a Landscape Contractor and the Owner of Artscape Gardens, a boutique landscaping company in Los Angeles, California. With over 12 years of experience, Benjamin specializes in transforming properties into aesthetic, functional, and drought-tolerant oases. Benjamin uses color scheme, dimension, and water conscious spaces to inspire the design and installation of soft scape, hardscape, patios, pathways, irrigation, drainage, fencing, concrete, lighting, and electrical work. Artscape Gardens covers all areas of the C-27 landscape contractor classification.
There are 14 references cited in this article, which can be found at the bottom of the page.
wikiHow marks an article as reader-approved once it receives enough positive feedback. This article received 14 testimonials and 83% of readers who voted found it helpful, earning it our reader-approved status.
This article has been viewed 1,017,984 times.
Concrete driveways are permanent, low maintenance additions to your home that can improve its appearance, give kids a safe place to ride scooters, decrease erosion, and make keeping your car clean easier. Building one can be labor-intensive and costly, but for folks that aren’t afraid to tackle big jobs, building your own driveway can be a rewarding project, just as long as you keep some safety rules in mind.
Steps
Making a Plan
-
1Check local ordinances to know if you need a permit. Depending on where you live, you may need to get a permit before you can get started building your new concrete driveway. In some states, the height of the driveway above even ground and the width of the driveway you plan to make it may each determine whether or not you need to pull a permit.[1]
- If your neighborhood has a homeowner’s association, they may also have rules about how and where you install your driveway.
- You can usually find permit applications on your city’s website.
-
2Plan your driveway’s size, shape and route. Draw out the basic outline of your driveway. You will want to consider the overall length and width, as well as where you’ll park your vehicles and whether or not you’ll need space to turn around. In general, it’s recommended that you allow at least 18 feet (5.5 m) to 20 feet (6.1 m) for a car and 22 feet (6.7 m) to 24 feet (7.3 m) for vans or trucks.[2]
- A single vehicle needs a width of 10 feet (3.0 m) to 12 feet (3.7 m).
- Remember, every foot you add to the length of width of the driveway increases the expense significantly.
- You’ll be able to use the drawing to determine how much material you need to purchase.
Advertisement -
3Determine how much concrete you’ll need. Concrete is sold in cubic yards, so you’ll need to convert your measurements to feet for this calculation if they’re not already. To determine how many cubic yards of concrete you’ll need, multiply the length of your driveway by the width, then multiply that number by .35 (which is 4 inches (10 cm) in terms of feet). Take that final figure and divide it by 27, which is the number of cubic feet in one cubic yard.[3]
- Multiply the length by the width and depth, then divide that figure by 27. Your answer will be how much concrete to order (in cubic yards).
- You may want to increase your order by about 10% to allow for spillages and mistakes.
-
4Decide on your forms and reinforcement materials. You will need wood to build your forms and stakes to reinforce them, all of which needs to be accounted for in your budget. Pine board that measures 1 inch (2.5 cm) by 4 inches (10 cm) is usually sufficient for laying a driveway, as well as a number of 4 inches (10 cm) stakes.[4]
- Your pine board will need to be long enough to enclose the entire driveway as you pour the concrete.
-
5Do a cost estimate using your concrete order and other supplies. Be sure to include the cost of any equipment you will rent for grading or finishing, and the cost of labor if you intend to hire workers to help with the project.[5]
- Other materials to account for in your estimate include gravel for the base, fabric underlayment, installation labor, delivery charges, sleeving materials, rebar or mesh wire, and any equipment fees.
- You may also need to account for the cost of the permit.
-
6Add sand or clay to firm up the soil. You’ll need a firm, solid base to support the weight of your concrete. If the base soil is sandy and loose, you can add clay to firm it up. If the soil is too loamy, add sand or gravel to make it level. Whether you add material or not, you should compact the soil to make it firm and even.[6]
- You can create a base using gravel or crushed rock, filling soft spots with extra material.
- Vibratory plate compactors and rammers can be used to compact and flatten the soil and gravel you lay down.


Preparing the Driveway for Concrete
-
1Lay out the shape of your driveway with stakes. You can do this by driving small wooden or metal stakes at points where the drive will egress the street, then at the top of the driveway, then tying builder's line on them, to help you visualize the path of the driveway.[7]
- Check frequently to ensure your layout matches the driveway plan you developed.
- Be sure the length and width are correct, otherwise you may end up over or under ordering the concrete.
-
2Install the forms for your driveway. Typically, these will be 1 inch (2.5 cm) by 4 inches (10 cm) pieces of nominal lumber, anchored with wooden stakes sufficiently to support the form boards. These stakes are driven into the soil with a sledgehammer at a spacing to keep the form boards 'on grade and straightly aligned. For curving drives, Masonite or plywood that is strong enough to support the concrete load, but flexible enough to bend.[8]
- Using screws and a power drill will make it easy to assemble and then disassemble your forms when you’re done.
- Place your stakes every 3 feet (0.91 m) or so to make sure the form holds.
-
3Excavate the soil away and backfill with roadbase beneath.[9] Roadbase is a nonspecific compound made of mixed crushed granite and gravel. It stabilizes the ground before you pour concrete. It's not always necessary, but does stabilize your driveway.
- The layer should be about five inches thick when compacted before your pour the concrete.[10]
-
4Use fill material to make sure your base is thick enough. Usually driveways are at least 4 inches (10 cm) thick; for heavier vehicles or difficult to stabilize soil conditions, thicker concrete is suggested. Grading is done by placing a straightedge or tying a string across the top of your forms and measuring down to the soil, to the correct depth. When you spot areas that aren’t even with the rest, add material or remove it to make the grade even.[11]
- Add gravel or crushed rock to places that aren’t as high as the rest.
-
5Compact the fill material and soil with a plate compactor. Compactor tools can be rented from a local tool rental establishment, or if there is none available, you can use a hand tamp, from your local hardware store. The important thing is that the compaction of the soil is what will support the weight of the concrete, as well as the subsequent load of vehicles using the drive, so it’s important to have compacted, stable fill material.[12]
- Adding a little water as you compact the material can make the process more effective.
- You may need to use more fill material on looser soil to keep it even.
-
6Add reinforcing steel to the concrete if you choose. This can be a mat of steel reinforcing bars tied in place, typically number 4 rebar on 12 inch (30.5 cm) centers, or 6X6 welded wire reinforcing wire fabric, available at building supply stores. Another option is to have polypropylene fiber reinforcing added to the concrete mixture at the concrete plant.[13]
- Adding a steel reinforcement will significantly increase the strength of your driveway and is highly recommended.
- The steel will help the concrete support and distribute the weight of your vehicles.
- Rebar or heavy-duty mesh ensures the concrete will remain structurally intact.[14]


Pouring and Curing the Concrete
-
1Pour the concrete from the truck or wheelbarrow. You’ll need to be able to pour the concrete fairly quickly, and wheel barrowing the concrete the length of a substantial driveway is labor-intensive. If you cannot get the concrete trucks in a position to pour their payload directly into your forms, consider hiring a concrete pumping contractor to place the material for you.[15]
- You can also rent a piece of equipment with a front bucket, such as a skid steer, tractor, or a mechanical-engine powered wheelbarrow to make the job easier.
- For smaller driveways, a wheelbarrow will likely suffice.
-
2Flatten and level the slab as desired. You will want to get the surface as flat (note, this does not mean level) as possible to avoid bird baths, or standing water, on it. The driveway may slope, but should still be flat.[16]
- Not all driveways are level, but the surface should be fairly flat.
- You can use a hand trowel to make the surface evenly flat.
-
3Put in contraction joints about 1 inch (2.5 cm) deep. Concrete will contract as it dries, which can result in cracking. Avoid this by using wood or plastic “zip strips” to add 1 inch (2.5 cm) deep “cracks” or cuts in the concrete every 4 feet (1.2 m) or so.[17]
- If you let the concrete dry too much, you may need to use a specialized saw to cut contraction joints in, so it’s best to do it early.
- Make sure you separate the contraction joints by the same distance to keep the driveway looking uniform.
-
4Use a brook or sack to add texture to the concrete. Perfectly smooth concrete may make it difficult for your vehicle to get traction, especially in wet conditions. Drag a broom or a burlap sack along the concrete as its drying to create a textured surface your tires can grip.[18]
- This step must be done while the concrete is still damp enough to accept the texture.
- Broom the concrete in the direction you want your driveway to drain if there is a slope.
-
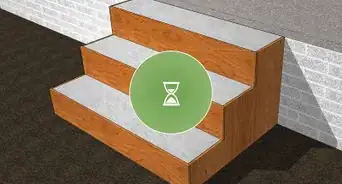
5Cure the concrete. This is done by creating a moisture retaining barrier on the concrete's surface, either with a layer of plastic sheeting or by applying a chemical curing compound to prevent the concrete from drying out too quickly.[19]
- You should protect your concrete drive from extreme weather conditions for at least 3-7 days.
- Do not park your vehicle on the driveway until it has cured.
-
6Park your car on your new driveway. The first time you park your vehicle on the driveway, lookout for signs of cracking or crumbling. If some cracks do appear, you may be able to repair them. You can then remove the wooden framing you built for the pour.[20]
- Be sure the concrete is completely cured before parking a vehicle on it, otherwise you may damage the concrete.
- To be safe, wait a minimum of three days for the concrete to cure.


Expert Q&A
Did you know you can get premium answers for this article?
Unlock premium answers by supporting wikiHow
-
QuestionCan you pour concrete directly on dirt?
 Benjamin HansenBenjamin Hansen is a Landscape Contractor and the Owner of Artscape Gardens, a boutique landscaping company in Los Angeles, California. With over 12 years of experience, Benjamin specializes in transforming properties into aesthetic, functional, and drought-tolerant oases. Benjamin uses color scheme, dimension, and water conscious spaces to inspire the design and installation of soft scape, hardscape, patios, pathways, irrigation, drainage, fencing, concrete, lighting, and electrical work. Artscape Gardens covers all areas of the C-27 landscape contractor classification.
Licensed Landscape ContractorIn most cases, I recommend excavating the soil away and backfilling it with roadbase underneath. This stabilizes the driveway. You'll also want to use either rebar or heavy-duty mesh to make sure the driveway will remain structurally intact no matter the amount of traffic it has to take.
Support wikiHow by unlocking this expert answer.
-
QuestionIs rebar necessary for a concrete driveway?Benjamin HansenBenjamin Hansen is a Landscape Contractor and the Owner of Artscape Gardens, a boutique landscaping company in Los Angeles, California. With over 12 years of experience, Benjamin specializes in transforming properties into aesthetic, functional, and drought-tolerant oases. Benjamin uses color scheme, dimension, and water conscious spaces to inspire the design and installation of soft scape, hardscape, patios, pathways, irrigation, drainage, fencing, concrete, lighting, and electrical work. Artscape Gardens covers all areas of the C-27 landscape contractor classification.
Licensed Landscape ContractorYou don't have to use rebar. However, putting down rebar or heavy-duty mesh will help your concrete driveway remain structurally intact.Support wikiHow by unlocking this expert answer.
-
QuestionHow thick does the roadbase for a concrete driveway have to be?Benjamin HansenBenjamin Hansen is a Landscape Contractor and the Owner of Artscape Gardens, a boutique landscaping company in Los Angeles, California. With over 12 years of experience, Benjamin specializes in transforming properties into aesthetic, functional, and drought-tolerant oases. Benjamin uses color scheme, dimension, and water conscious spaces to inspire the design and installation of soft scape, hardscape, patios, pathways, irrigation, drainage, fencing, concrete, lighting, and electrical work. Artscape Gardens covers all areas of the C-27 landscape contractor classification.
Licensed Landscape ContractorThe roadbase should be about 5 inches thick after it's compacted. Then, you can pour the concrete.Support wikiHow by unlocking this expert answer.
Warnings
- Concrete can be difficult to grade, level, and finish. Failure to complete the finishing work will result in less than desirable results.⧼thumbs_response⧽
- Wear and use proper personal protective equipment during all phases of work. Concrete can cause severe burns and contact dermatitis. Avoid contact with the skin, especially kneeling in the concrete, or getting it into boots. Thoroughly wash any affected area immediately. In case of contact with eyes, irrigate thoroughly and seek medical attention immediately. Burns can appear after several hours and may not appear straightaway.⧼thumbs_response⧽
- Concrete is an extremely heavy material which can weigh more than 140 lbs per cubic foot. Shoveling, lifting, raking, or carrying concrete in buckets may cause severe muscle strain in your back, arms, or legs.⧼thumbs_response⧽


References
- ↑ https://www.networx.com/article/do-you-need-a-building-permit-for-outdoo
- ↑ https://www.concretenetwork.com/concrete/concrete_driveways/planning-tips.html
- ↑ https://www.familyhandyman.com/masonry/pouring-concrete/how-to-estimate-a-concrete-order/view-all/
- ↑ https://www.familyhandyman.com/masonry/pouring-concrete/concrete-forms-and-pour-a-concrete-slab/view-all/
- ↑ https://www.concretenetwork.com/concrete/concrete_driveways/cost.html
- ↑ https://www.concretenetwork.com/concrete/concrete_driveways/basics.html
- ↑ https://www.constructionprotips.com/jobsite-tips/prep-crack-free-concrete/
- ↑ https://www.constructionprotips.com/jobsite-tips/prep-crack-free-concrete/
- ↑ Benjamin Hansen. Licensed Landscape Contractor. Expert Interview. 6 October 2020.
- ↑ Benjamin Hansen. Licensed Landscape Contractor. Expert Interview. 6 October 2020.
- ↑ https://www.concretenetwork.com/concrete/concrete_driveways/basics.html
- ↑ https://www.concretenetwork.com/concrete-subgrades-subbases/
- ↑ https://www.constructionprotips.com/jobsite-tips/prep-crack-free-concrete/
- ↑ Benjamin Hansen. Licensed Landscape Contractor. Expert Interview. 6 October 2020.
- ↑ https://www.todayshomeowner.com/video/pouring-a-concrete-driveway/
- ↑ https://www.familyhandyman.com/masonry/pouring-concrete/how-to-pour-concrete/view-all/
- ↑ https://www.concretenetwork.com/concrete-joints/contraction-joints.html
- ↑ https://www.concretenetwork.com/slip-resistant-coatings/broom-finish.html
- ↑ https://www.concretenetwork.com/curing-concrete/
- ↑ https://www.concretenetwork.com/concrete/concrete_driveways/basics.html
About This Article

Start your driveway deciding on the driveway's shape, width, length, and route, and use these measurements to calculate how much concrete and the amount of reinforcements you'll need. When it's time to build the driveway, lay sand or clay on the ground, and use stakes to lay out the shape of the driveway. Then, install the forms and level the base of the driveway before installing the metal reinforcements if needed. Pour and level the concrete, leaving contraction joints to prevent cracks, and let it cure. For tips on applying for building permits and adding texture to your driveway, read on!