This article was co-authored by Anthony "TC" Williams and by wikiHow staff writer, Hannah Madden. Anthony "TC" Williams is a Professional Landscaper in Idaho. He is the President and Founder of Aqua Conservation Landscape & Irrigation, an Idaho Registered Landscape Business Entity. With over 21 years of landscaping experience, TC has worked on projects such as the Idaho Botanical Garden in Boise, Idaho. He is a Idaho Registered Contractor and a previously Licensed Irrigator in the State of Texas.
There are 13 references cited in this article, which can be found at the bottom of the page.
wikiHow marks an article as reader-approved once it receives enough positive feedback. This article received 12 testimonials and 80% of readers who voted found it helpful, earning it our reader-approved status.
This article has been viewed 1,050,946 times.
Want to add rocks to your landscaping, but don’t want to break the bank buying real rocks? Creating DIY fake boulders is the perfect way to add some pizzazz to your yard or garden without spending a ton of money. Plus, by making the rocks yourself, you can control the shape, look, and color of the stones (and they're much less heavy, too!). In this article, we’ll teach you how to make artificial rocks that blend in seamlessly with their surroundings.
Things You Should Know
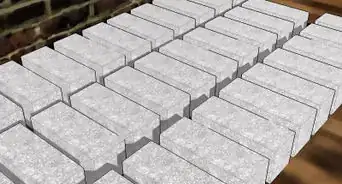
- Create a base for the rock out of styrofoam, cardboard, or plywood. Cut the base down to the size and shape of your rock, then cover it in a mortar mix.
- Give your rock texture with a sponge or a trowel. Add gray or brown acrylic paint to make your rock look realistic.
- Use your fake rocks in your landscaping outside. Dig a small hole for the rocks to sit in to make them look more natural.
Steps
Building a Form
-
1Choose a material as a base for your rock's shape. You can use a variety of materials to create the shape of your rock. There are several common items you can choose from:
- Styrofoam
- Cardboard
- Crumpled newspaper
- Plywood
- Expanding foam
-
2Cut the base into the rough shape of your rock. Use a handsaw or a jigsaw to cut your material into the rough shape of your rock. Remember, most rocks are not completely smooth, so give your shape textures and dimples as you cut.[1]
- A hot wire foam cutter works well to shape styrofoam.
- If you’re using plywood or cardboard, cut small squares and then stack them on top of each other to create a rock shape. Then, use a saw to cut off the hard edges and smooth them out.
- To make a rock out of expanding foam, spray the foam into a circular pile, then wait for it to harden. Use a saw to shave down the sides and smooth the foam into a rock shape.
Advertisement -
3Cover your rock shape in chicken wire or hardware cloth. Use a metal mesh to wrap the rock shape. The metal gives strength to your artificial rock and provides a structure for the cement mortar mix to adhere to.[2]
- Use wire twist ties to secure the wire frame to your rock base.
-
4Refine the curves of your rock. To make the most natural looking rock, bend and shape the wire form around your rock shape. Natural rocks have dips and creases; simulate these shapes by pushing your wire form in various places to create uneven surfaces.[3]


Mixing the Mortar
-
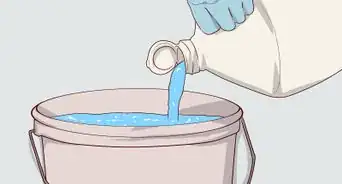
1Combine dry ingredients for mortar mix. Mix 3 parts sand with 1 part portland cement. Add all the ingredients to a wheelbarrow or concrete mixer, depending on the size of rock you are creating and amount of mortar you are mixing.[4]
- You can reduce the sand, and add 1 part peat moss to create a more porous artificial rock.[5]
- If you want to use the fake rocks in an area exposed to water, use a hydraulic cement mix instead.
-
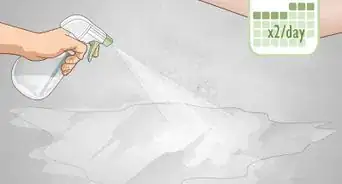
2Mix the dry mortar and sand mixture into 1 part of cold water. The exact amount of water depends on humidity and temperature conditions, so you may need to adjust with more or less dry mixture. Slowly add the dry mixture to the water while mixing with a trowel until both form into a thick paste.[6]
- Stir the mortar mix into the water as you add it.
- Watch closely as you add mortar so your mixture does not get too thick. Aim for a cookie dough-like consistency.
-
3Stir the mortar mix for several minutes. For small amounts, turn the mixture over in the wheelbarrow repeatedly, or stir with a paddle attached to an electric drill. For larger amounts, use a concrete mixer. Mix the mortar to the consistency of cookie dough.[7]
- Ensure the mixture is fully mixed and uniformly wet.
- Add more water if necessary to get the consistency of a thick paste. You do not want the mixture to be runny.
- Unmixed blobs of sand will cause weak spots in the finished rock; be sure to mix everything completely.


Sculpting the Rock
-
1Apply the mortar mix to the wire form with a trowel. Use a flat pointed trowel to apply a 2 to 3 in (5.1 to 7.6 cm) layer of mortar to the wire frame. Start from the top of the rock and slowly push the mortar mix down the sides.[8]
- You can also use your hands to push and spread the mortar mix around. Just be sure to wear rubber gloves to protect your skin.
- You can cover the bottom of the rock with mortar mix, or you can leave it as-is. If your rock is going to be sitting on the ground, don’t worry about spreading the mixture to the very bottom.
-
2Add texture to the mortar with a sponge or brush. Create a realistic looking rock by adding contours and patterns to the surface of the mortar. Gently stipple a sponge or a paint brush into the mortar mix while it’s still wet to give it a more realistic look.[9]
- Use your trowel to create dips and creases in the surface of the mortar.
- Press a real rock into the mortar to make imprints of the rock's texture.
- Press a sea sponge or scouring pad into the rock to create a pock marked look.
- Wrap a plastic bag around your hand and press it into the mortar to give a wrinkled look.
-
3Cure the rock for 3 to 5 days in a dry location. Keep your “rock” in a clean, dry spot out of direct sunlight, and leave it for a couple of days. The concrete will cure and harden until your rock looks dry.[10]
- Although 75% of the curing is completed after 1 week, it may take up to a month for cement to cure completely. However, the outside of the rock will be dry after 3 to 5 days.


Finishing the Rock and Landscaping
-
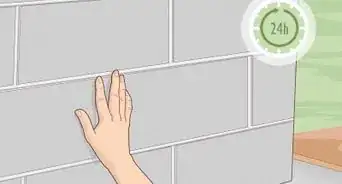
1Scrape the rock to smooth the edges. Once the rock has cured, you can add any finishing touches you’d like. Smooth out rough edges with a wire brush or a sanding sponge to make your rock look more realistic.[11]
- Make sure the outside of the rock is fully dry before you try brushing it. Otherwise, it could crumble.
-
2Paint the rock shades of gray and brown. When you look at your rock, you might notice that it looks a little too gray to be believable. Use some gray acrylic paint and brown acrylic paint in the crevices of the rock if you’d like to.[12]
- Painting is totally optional, but many people find that it makes large rocks look more realistic.
-
3Dig a small indention where the rock will be placed. Place the rock in place and trace the edge of the rock with a stick or shovel. Dig a 1 to 2 in (2.5 to 5.1 cm) pit in the shape of the rock. Placing the edges of the rock underground will provide a more natural look of a rock outcropping.[13]
- Use small rocks to create a pathway or line a firepit. Use bigger rocks to cover up septic tank hatches or electrical boxes.
-
4Place the rock in the hole. Push dirt and other small rocks against the edge of the rock to integrate it with the landscape. Build multiple rocks to create elaborate rock landscapes. Have fun landscaping with your DIY rocks![14]


Expert Q&A
-
QuestionI have a rock that juts out of my fireplace. How can I cut the rock to fit the mantel without removing the whole rock?
 Anthony "TC" WilliamsAnthony "TC" Williams is a Professional Landscaper in Idaho. He is the President and Founder of Aqua Conservation Landscape & Irrigation, an Idaho Registered Landscape Business Entity. With over 21 years of landscaping experience, TC has worked on projects such as the Idaho Botanical Garden in Boise, Idaho. He is a Idaho Registered Contractor and a previously Licensed Irrigator in the State of Texas.
Experienced LandscaperYou could use a hand held grinder with a masonry blade and cut the rock or 'score' it and then use a heavy hammer and break it. -
QuestionWhat can I use as an alternative to mortar?Anthony "TC" WilliamsAnthony "TC" Williams is a Professional Landscaper in Idaho. He is the President and Founder of Aqua Conservation Landscape & Irrigation, an Idaho Registered Landscape Business Entity. With over 21 years of landscaping experience, TC has worked on projects such as the Idaho Botanical Garden in Boise, Idaho. He is a Idaho Registered Contractor and a previously Licensed Irrigator in the State of Texas.
Experienced LandscaperPlaster may work well as an alternative to mortar. However, plaster should not get wet after drying. -
QuestionIs it ok to leave the cardboard inside the concrete form after the rock has cured?
 wikiHow Staff EditorThis answer was written by one of our trained team of researchers who validated it for accuracy and comprehensiveness.
Staff AnswerwikiHow Staff EditorStaff AnswerYes, you can leave the cardboard base inside of the concrete. The cardboard will likely break down over time, but it won't cause any issues with your fake rock.
Warnings
- Do not attempt to use artificial landscaping rocks as weight bearing installations for swimming pools or hot tubs.⧼thumbs_response⧽
- Use caution when working with cement. Lime can cause chemical burns if it gets on your skin or in your lungs. Wear gloves and a mask when mixing cement, as well as proper protective clothing.[15]⧼thumbs_response⧽
Things You’ll Need
- Styrofoam, cardboard, crumpled newspaper, plywood, or expanding foam
- Handsaw or jigsaw
- Chicken wire or hardware cloth
- Wire twist ties
- Sand
- Portland cement
- Trowel
- Sponge or brush
- Wire brush or sanding sponge
- Gray paint and brown paint


References
- ↑ https://www.youtube.com/watch?v=3k1qPpEkEZ0&t=230s
- ↑ https://www.youtube.com/watch?v=sEFL7kxXfM8&t=402s
- ↑ https://www.youtube.com/watch?v=sEFL7kxXfM8&t=402s
- ↑ https://www.youtube.com/watch?v=sEFL7kxXfM8&t=146s
- ↑ http://extension.oregonstate.edu/lincoln/sites/default/files/hypertufa_container.pdf
- ↑ https://www.youtube.com/watch?v=sEFL7kxXfM8&t=146s
- ↑ https://www.youtube.com/watch?v=kr6xLJBf8HM&t=63s
- ↑ https://www.youtube.com/watch?v=kr6xLJBf8HM&t=76s
- ↑ https://www.youtube.com/watch?v=kr6xLJBf8HM&t=229s
- ↑ https://extension.oregonstate.edu/news/use-hypertufa-make-containers-look-stone
- ↑ https://www.youtube.com/watch?v=sEFL7kxXfM8&t=566s
- ↑ https://www.youtube.com/watch?v=kr6xLJBf8HM&t=384s
- ↑ https://www.youtube.com/watch?v=kr6xLJBf8HM&t=499s
- ↑ https://www.youtube.com/watch?v=3G4gH4ncFcU&t=526s
- ↑ https://elcosh.org/document/1563/d000513/cement-hazards-and-controls-health-risks-and-precautions-in-using-portland-cement.html
About This Article

To make fake rocks with concrete, start by creating a wire form base with styrofoam or cardboard, then wrap the base in chicken wire. Next, use a flat pointed trowel to apply a layer of mortar to the wire frame, working from the bottom up. You can add realistic looking texture to the wet mortar using a trowel, sponge, or scouring pad, then let your rock cure for 30 days in a dry location! For more tips on sculpting your rocks, read on!