This article was co-authored by wikiHow staff writer, Jessica Gibson. Jessica Gibson is a Writer and Editor who's been with wikiHow since 2014. After completing a year of art studies at the Emily Carr University in Vancouver, she graduated from Columbia College with a BA in History. Jessica also completed an MA in History from The University of Oregon in 2013.
There are 11 references cited in this article, which can be found at the bottom of the page.
The wikiHow Video Team also followed the article's instructions and verified that they work.
This article has been viewed 21,659 times.
Learn more...
When you're nursing a baby, the last thing you have time for is leaking through your shirt. Instead of going through disposable breast pads, sew a stockpile of your own! You'll need a few different fabrics to ensure that the pads are soft and can wick away moisture. These inexpensive pads are easy to customize with fun fabric prints and they only take a few minutes to stitch together.
Steps
Choosing Fabric Layers
-
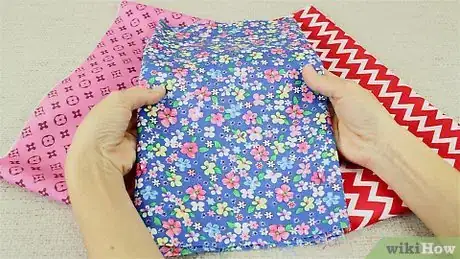
1Buy 1 yard (0.91 m) of PUL fabric to make the waterproof side of the pads. You can purchase polyurethane laminate (PUL) fabric in a variety of prints from your local craft shop. Since no one will see the breast pads, choose a bright, fun, or bold print if you want to give the pads a little style.[1]
- 1 yard (0.91 m) of fabric is enough to make 14 pads or 7 pairs.
- For a more natural option, use a layer of wool fabric instead of PUL. Keep in mind that wool is thicker than PUL so the pads will be bulkier.
-
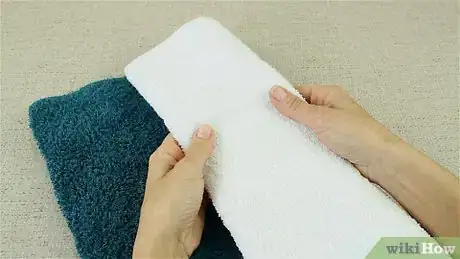
2Purchase 1 yard (0.91 m) of absorbent fabric for every layer in the middle of the pad. The absorbent layer holds the breastmilk that you leak, so it's important to choose a material that holds moisture. You can use 1 to 3 layers in each pad depending on how absorbent you want them to be. Then, buy 1 yard (0.91 m) of fabric for each absorbent layer. These are some great absorbent fabric choices:[2]
- Terry: This cotton fabric made of loops is soft, inexpensive, and highly absorbent.
- Microfiber: It's a polyester fabric that's lightweight and inexpensive, but it can compress over time.
- Flannel or jersey: Both of these cotton fabrics are soft, and durable although they don't absorb as quickly as terry or microfiber.
- Hemp: Although it's more expensive than other absorbent fabrics, it's durable and the most absorbent option.
Tip: Avoid using cotton or fleece batting since it's not as absorbent and will degrade quickly after washing. The batting also traps heat and makes the pads bulky.
Advertisement -
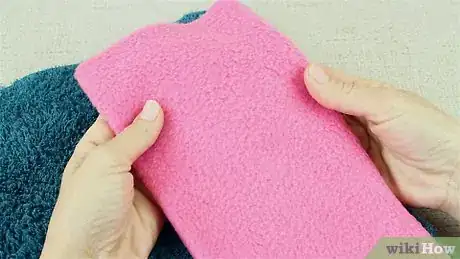
3Get 1 yard (0.91 m) of suede cloth or minky fabric for the soft side of the pads. It's important to choose a very soft fabric since you'll position it against your sensitive breasts. The fabric also has to wick away moisture to the absorbent layers.[3]
- Velour fabric is another great option because it's made from cotton or bamboo and is incredibly soft.
Cutting and Assembling the Pads
-
1Put a CD on the fabric to use as a circular template. Lay your fabric on a cutting mat and place an old CD on it. If you'd like to cut more than 1 circle at a time, fold the fabric so you'll cut through at least 2 layers.[4]
- Find a CD that you don't mind getting fingerprints or scratches on.
- If you don't have an old CD, cut out a cardboard circle that's about 5 inches (13 cm) across.
-
2Run a rotary cutter around the template to cut out circles. Hold the CD in place while you roll a rotary cutter around the outer edge of the CD. Push down enough to cut through the fabric. Repeat this for each type of fabric. To make 1 breast pad, cut out:[5]
- 1 PUL circle
- 1 to 3 absorbent fabric circles
- 1 soft fabric circle
-
3Stack the layers so the soft fabric is on the bottom and the PUL is on top. To assemble 1 breast pad, set a soft fabric circle on your work surface. This is the layer that will touch your skin. Then, stack your absorbent layers on top. You can use 1 to 3 layers, depending on how absorbant you want the pad to be. Then, place the PUL on top so the pattern is facing up.[6]
- Your assembled pad might have 1 PUL layer, 1 piece of flannel or fleece, 1 piece of terry cloth, and a top layer of suede or minky fabric, for instance.
Tip: Customize your pads by making them as absorbent as you want. For example, make a pad with just 1 absorbent layer for daytime use or assemble a pad with 3 absorbent layers. Use the more absorbent one for nighttime, when you may leak more.
-
4Clip half of the pad to hold the layers in place. Use small fabric clips or clothespins to pinch the layers of fabric on one half of the circle. Pin about 4 clips so they're 2 inches (5.1 cm) apart. Don't clip the other half of the pad because this is the side you'll sew first.[7]
- Although you can use sewing pins, poking holes in the PUL layer can make the pad leak if it absorbs a lot of liquid.
Sewing and Wearing the Pads
-
1Use a zigzag stitch to sew around the entire breast pad. Set your machine to the widest size zigzag stitch and place the assembled breast pad under the needle so the PUL side is facing up. Then, slowly rotate the pad as you zigzag stitch along the very edge.[8]
- Overlap the last few stitches with the first stitches you made in order to hold the stitches in place.
Variation: If you have a serger, use it to stitch around the entire circle. Since it also trims the fabric and secures the edges, it's a fast way to sew a lot of breast pads quickly.
-
2Trim the excess fabric from around the edge. Some of the fabric probably sticks out from the edge of the zigzag stitches, so take a sharp pair of scissors or use your rotary cutter to trim the fabric. Don't cut into the stitches or they'll start to unravel.[9]
- If you used a serger, skip this step since the machine makes cuts the edge as you sew.
-
3Tuck 1 pad into each side of your bra so it rests against your nipple. Slide a pad into the cup of your bra so the soft fabric side is against your skin and the slick waterproof side touches the bra. Since the bra is supporting the pads, it doesn't matter if you're wearing a strapless, standard, or nursing bra.[10]
- If the pad is sliding around, your bra may be too loose.
-
4Change your breast pads as soon as they get wet. Although the pads wick away moisture from your nipple, try to switch out pads as soon as they're wet. The longer moisture sits against your nipple, the more likely you'll develop an infection. If you plan on wearing the pads overnight, change them first thing in the morning or if you get up during the night to nurse.[11]
- Carry a few breast pads with you when you leave the house so you can change them during the day.
Tip: Wash the used breast pads every few days along with you regular laundry. To prevent them from getting lost in the load, toss them into a mesh laundry bag.
Things You'll Need
- CD
- Rotary cutter
- Cutting mat
- PUL fabric
- Absorbent fabric, such as fleece or terry cloth
- Soft fabric, such as suede or fleece
- Polyester thread
- Sewing machine
- Serger, optional
References
- ↑ https://media.rainpos.com/5968/using_pul_fabrics_20161221125550.pdf
- ↑ https://www.duralee.com/Fabric-Glossary.htm
- ↑ https://youtu.be/mwwyR5GRbck?t=184
- ↑ https://youtu.be/mwwyR5GRbck?t=211
- ↑ https://youtu.be/mwwyR5GRbck?t=229
- ↑ https://youtu.be/mwwyR5GRbck?t=152
- ↑ https://youtu.be/rHK9j7l5oYw?t=192
- ↑ https://youtu.be/rHK9j7l5oYw?t=399
- ↑ https://www.hampersandhiccups.com/breastfeeding-pad-tutorial/
- ↑ https://books.google.com/books?id=Pl5pCQAAQBAJ&pg=PA61&dq=Your+Breastfeeding+Guidebook&hl=en&newbks=1&newbks_redir=0&sa=X&ved=2ahUKEwidlsWp6oboAhWKuJ4KHdjYAI8Q6AEwAHoECAIQAg#v=onepage&q=Your%20Breastfeeding%20Guidebook&f=false
- ↑ https://books.google.com/books?id=Pl5pCQAAQBAJ&pg=PA61&dq=Your+Breastfeeding+Guidebook&hl=en&newbks=1&newbks_redir=0&sa=X&ved=2ahUKEwidlsWp6oboAhWKuJ4KHdjYAI8Q6AEwAHoECAIQAg#v=onepage&q=Your%20Breastfeeding%20Guidebook&f=false
- ↑ http://www.wicstrong.com/wp-content/uploads/2017/01/mastitis-and-thrush.pdf
-Step-24-Version-5.webp)
