This article was co-authored by wikiHow staff writer, Jessica Gibson. Jessica Gibson is a Writer and Editor who's been with wikiHow since 2014. After completing a year of art studies at the Emily Carr University in Vancouver, she graduated from Columbia College with a BA in History. Jessica also completed an MA in History from The University of Oregon in 2013.
There are 13 references cited in this article, which can be found at the bottom of the page.
The wikiHow Video Team also followed the article's instructions and verified that they work.
This article has been viewed 16,269 times.
Learn more...
Protect your cell phone with a cozy handmade holder. All you need is some fabric and basic sewing skills to make a fun project that comes together quickly. For a beginner project, make the simple holder lined with felt. If you'd like to be able to prop your cell phone up while you store or charge it, make a pyramid-shaped holder. Then, fill it with stuffing so your phone can lean against it.
Steps
Making a Simple Felt Holder
-
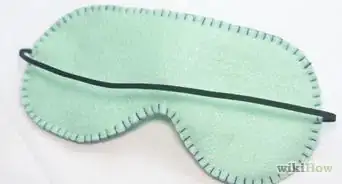
1Lay your phone on an 8 in (20 cm) square of felt. Cut a piece of felt into an 8 in (20 cm) square and lay it on your work surface. Put your phone on the felt so it's lined up with the bottom left corner.[1]
- Use any type of felt material, such as acrylic, wool, or cotton felt. Felt is great for the liner of your holder since it's soft and doesn't fray. This means you won't have to finish the edges of the holder.
-
2Mark lines on the felt and cut them to make a rectangle. Flip the phone with the felt over lengthwise. Take a piece of chalk or a pen and draw a line that's 1 inch (2.5 cm) from the long folded side. Then, make a line that's 1 1⁄4 inches (3.2 cm) from the short end of the phone. Use scissors to cut out the felt piece.[2]
- This makes a folded felt rectangle that's slightly larger than your cell phone.
Advertisement -
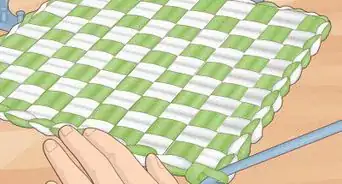
3Place the felt on a piece of decorative fabric. Put an 8 in (20 cm) square of fabric that you want to use for the outside of the holder on your work surface. Arrange the decorative fabric so the pattern faces down. Then, lay the felt on the fabric so it lines up in a corner of the decorative fabric.[3]
- You could use any type of decorative fabric, but if you're working with 100% cotton, wash it first so your holder doesn't shrink.
-
4Cut the outer fabric so it's larger than the felt. Lay your ruler on the long side of the decorative fabric and draw a line that's 1⁄2 inch (1.3 cm) from the felt edge. Move the ruler to the short edge and draw a line that's 1 1⁄4 in (3.2 cm) from it. Then, cut the 2 lines to make a slightly larger rectangle for the outer fabric of your holder.[4]
Variation: If your cell phone is rounded near the bottom instead of square, cut your felt and fabric to match the curve of your phone. This helps it sit down easily in the holder and it won't slide around as much.
-
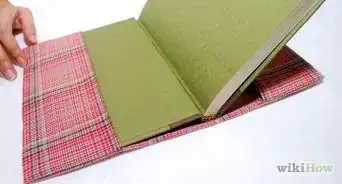
5Arrange the felt on the wrong side of the decorative fabric. Set your phone aside and unfold the decorative fabric so the pattern faces down. Then, place the felt on the fabric so the bottom short edge lines up and the sides are even.[5]
- Since the felt piece is narrower than the fabric, you'll see 1⁄4 inch (0.64 cm) of decorative fabric along the long sides of the felt.
-
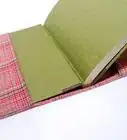
6Fold the short end of the fabric over by 1 1⁄4 in (3.2 cm) and pin it in place. Take the decorative fabric and fold it 1⁄4 inch (0.64 cm) towards the felt. Then, fold it over again by 1 inch (2.5 cm) and insert sewing pins so the fabric doesn't unfold.[6]
- Folding the top edge of the holder a few times hides the raw edge of the fabric. This creates the top edge of the holder.
-
7Fold the fabric in half lengthwise so the felt faces out and pin the long side. Fold the felt and fabric so the felt side faces out. Line up the corners so the holder is even and insert sewing pins through long side the fabric.[7]
- Although you can pin the bottom edge of the holder, it's small enough that the fabric shouldn't slide around on you.
-
8Sew a straight stitch across the bottom and side of the holder. Take the fabric to your sewing machine and straight stitch along the bottom and side edges. Leave a 1⁄4 in (0.64 cm) seam allowance as you work.[8]
- If you don't have a sewing machine, use a needle and thread to hand stitch the holder.
- Don't sew across the top folded edge of the holder or you won't be able to slide the cell phone into it.
-
9Sew around the top edge of the holder but don't stitch it closed. Place the top end of the holder under your sewing machine foot so just the inside of the fabric is under the needle. Then, straight stitch around the edge, turning the fabric in a circle as you sew. Leave a 1⁄4 inch (0.64 cm) seam allowance.[9]
- Since it can be tricky to sew around the edge, go slowly and take your time.
-
10Turn the holder right-side out and push the corners down with a pencil. Trim the excess threads from the holder and flip it inside out so the pattern faces out. Take a pencil and push it down into the corners so they are perfectly square. Then, slide your phone into your new holder![10]
- If you want to wash your cell phone case, follow the care instructions for the fabric you used. For example, if you used wool felt, you'll need to handwash the holder in lukewarm water and let it air dry.

Sewing a Pillow Stand
-
1Cut 2 pieces of fabric 6 in (15 cm) squares and stack them. You can use any type of fabric you like to make your cell phone stand. Lay the fabric flat and use scissors to cut 2 squares that are 6 inches (15 cm) in size. Then, stack the 2 squares so the patterned sides touch. Line up the edges so the holder is even.[11]
- Work with fabric that you're comfortable using. You may want to avoid fabric that stretches or pulls if you're a beginner sewer.
- Since the holder is small, there's no need to pin the fabric in place.
-
2Sew a straight stitch around 3 sides of the stacked square. Set your sewing machine to make short, straight stitches and sew across 1 side of the square. Then, turn the fabric and sew straight down the next side. Turn it again to sew along 1 more side of the square.[12]
- Leave about 1⁄4 inch (0.64 cm) seam allowance as you sew.
-
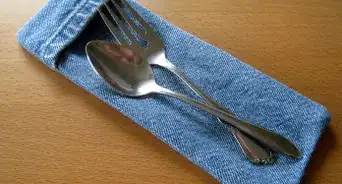
3Cut a 2 1⁄2 by 6 in (6.4 by 15.2 cm) rectangle of fabric and fold it in half lengthwise. Use the same decorative fabric you used for the rest of the holder and cut a rectangle that's 2 1⁄2 by 6 inches (6.4 cm × 15.2 cm). Fold the rectangle in half lengthwise so the right sides of the fabric touch.[13]
- Feel free to use a different fabric that works with the style of the holder. For example, if you have a polka dot holder, use striped fabric in the same color for the rectangular base.
-
4Sew across the short ends of the rectangle. Take the small, folded rectangle to the sewing machine and use straight stitches to sew across each short end. Leave a 1⁄2 inch (1.3 cm) seam allowance as you go.[14]
-
5Turn the square and the rectangle right-side out. Take both of your stand pieces and flip them right-side out so the pattern is visible. If the corners of the rectangle are curved, you can push a pencil into the corners to make them pointed.[15]
-
6Place the raw edges of the rectangle onto the raw edge of the square. Arrange the raw edge of the folded rectangle so it's centered on 1 of the sewn sides of the square. Line up the raw edges of the rectangle with the unfinished edge of the square.[16]
- You're leaving the square and rectangle open so you can stuff it before you sew it shut.
-
7Sew the bottom of the rectangle to the top of the square. Carefully sew the rectangle piece to the square fabric, but only sew 1 layer of the rectangle and 1 layer of the square. You might have to take the removable extension table so you can slide the fabric onto it.[17]
- Don't sew through all of the layers of fabric or you'll close the holder.
-
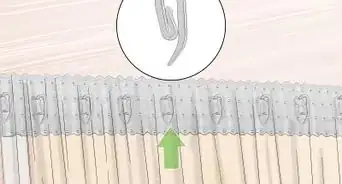
8Fill the rectangle with stuffing and hand sew the ends closed. Take a cotton ball-size clump of synthetic stuffing and push it into the rectangle. It may help to use a pencil or knitting needle to poke the stuffing in. Keep filling the rectangle until it's firm and you don't feel gaps. Then, use a needle and thread to whip stitch each end of the rectangle closed.[18]
- Use a thread color that matches the color of the fabric.
- To make the whip stitches, work the needle back and forth in loops across the edge of the fabric.
-
9Push stuffing into the square and slip stitch the edge to the rectangle. Use more of the synthetic stuffing to fill the square of the holder. Continue to stuff until the holder stand is as firm as you want. Then, tuck the raw edge under by 1⁄4 inch (0.64 cm) and use the needle and thread to sew it shut. Tie off the thread when you reach the end.[19]
- To work the slip stitch, insert the needle through the rectangle and over onto the folded side. Then, push it back into the rectangle before bringing it to the folded side again.
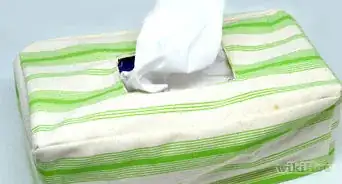
Variation: If you'd like to weigh the holder down, put a small beanbag into the square once you've stuffed it half full. If you don't have a beanbag, fill a small bag with rice or beans and seal it shut.


Warnings
- Remove sewing pins as you sew or you may damage your sewing machine.⧼thumbs_response⧽
Things You'll Need
Making a Simple Holder
- Fabric
- Felt
- Scissors
- Ruler
- Sewing machine
- Sewing pins
- Pencil
- Cell phone
Sewing a Pillow Stand
- Fabric
- Ruler
- Sewing machine
- Scissors
- Cell phone
- Stuffing


References
- ↑ https://sewguide.com/felt-fabric-material/
- ↑ https://www.thesewingdirectory.co.uk/easy-phone-case-tutorial/
- ↑ https://www.thesewingdirectory.co.uk/easy-phone-case-tutorial/
- ↑ https://www.thesewingdirectory.co.uk/coute-pouch-for-your-phone-tutorial/
- ↑ https://www.thesewingdirectory.co.uk/easy-phone-case-tutorial/
- ↑ https://www.thesewingdirectory.co.uk/easy-phone-case-tutorial/
- ↑ https://www.thesewingdirectory.co.uk/easy-phone-case-tutorial/
- ↑ https://www.thesewingdirectory.co.uk/easy-phone-case-tutorial/
- ↑ https://youtu.be/UmDy0wWZ4YI?t=379
- ↑ https://www.thesewingdirectory.co.uk/easy-phone-case-tutorial/
- ↑ https://youtu.be/DPD7d-U77cI?t=527
- ↑ https://youtu.be/DPD7d-U77cI?t=549
- ↑ https://youtu.be/DPD7d-U77cI?t=640
- ↑ https://youtu.be/DPD7d-U77cI?t=650
- ↑ https://youtu.be/DPD7d-U77cI?t=702
- ↑ https://youtu.be/DPD7d-U77cI?t=699
- ↑ https://youtu.be/DPD7d-U77cI?t=741
- ↑ https://youtu.be/DPD7d-U77cI?t=834
- ↑ https://fabricartdiy.com/ipad-stand-diy/
About This Article