wikiHow is a “wiki,” similar to Wikipedia, which means that many of our articles are co-written by multiple authors. To create this article, 18 people, some anonymous, worked to edit and improve it over time.
This article has been viewed 29,908 times.
Learn more...
Making a slipcover for a chair is a fairly cheap, easy way to spruce up an old, outdated, or worn chair, and it also gives you a chance to match the chair's appearance to the rest of the room's décor. Slipcovers can be bought reasonably cheaply (depending on the material and the size of the chair, usually between $20 and $150),[1] but they're not terribly difficult to make on your own, either. Read on to find the method that best matches your skill level and schedule.
Steps
Making a Fitted Slipcover
-
1Measure your chair. To make a fabric slipcover that's tailored to the shape of your chair, you’ll need to begin by taking and writing down precise readings of the dimensions of the chair. Here's a checklist of the measurements you'll want to take:
- Height of the back of the chair
- Width of the back of the chair at its widest point
- Thickness of the back of the chair
- Distance from the top of the back to the seat
- Length of the arms
- Distance from the arms to the floor
- Distance from the arms to the seat
- Length of the seat
- Width of the seat
- Depth of the seat cushion
- Distance from the floor to the lowest fabric edge (if you plan to include a skirt on your slipcover)
- Distance around the bottom circumference of the chair (if you plan to include a skirt)
-
2Pick out the fabric for your slipcover. Be sure to purchase enough fabric to fit your chair's measurements (plus a little extra for hemming and mistakes).
- For maximum durability, choose a fairly sturdy fabric, like denim, thicker cotton/hemp blends, canvas, or twill. [2]
- Fabric is sold in a wide variety of widths: 36 inches, 42 inches, 60 inches, and all the way up to widths over 100 inches. For slipcovers, it's best to buy one of the wider widths (60 inches or more) because the wider the fabric is, the less need you'll have to sew separate pieces of fabric together.
- Some chairs are bigger than others, but as a very general rule, about four to six yards of a 60-inch-wide fabric should be enough for a standard armchair.
Advertisement -
3Buy tracing paper. You’ll need tracing paper in order to make the initial pattern for your slipcover. The most common types of paper used for pattern tracing are freezer paper, Swedish tracing paper, and medical exam table paper.
- Freezer paper is relatively inexpensive and thick enough not to accidentally tear, though it’s also harder to see through.
- Swedish tracing paper is easy to see through and doesn’t tend to tear accidentally, but it’s also relatively expensive.
- Medical exam table paper is easy to see through and very inexpensive, but it’s also thinner and tends to wrinkle easily.
-
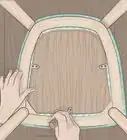
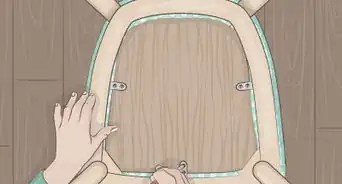
4Outline of each section of the chair. It’s important to trace the pattern for each section of the chair onto tracing paper before attempting to assemble the slipcover. Without a clearly traced pattern, you’ll end up with an imprecise and ill-fitting cover.
- Start by carefully drawing the back, front, seat, and arms of your chair on your tracing paper. Compare your tracings with the measurements initially you took for guidance.
- If you plan to put a skirt on the chair, you can also draw a pattern for the skirt onto the tracing paper. You'll need a strip of fabric as long as the distance around the base of the chair and wide enough to hang from the bottom of the chair to the floor.
-
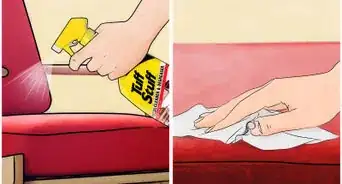
5Vacuum the chair. Though the slipcover will eventually cover the chair completely, it's still important to clean the chair beforehand to remove any excess dirt and dust.
- If you don't clean the chair before covering it, the chair can get musty after you’ve added the slipcover.
-
6Cut out the patterns. After you’ve traced each section of the chair onto your tracing paper, begin cutting out each pattern. Leave a 1-inch margin around seams and a 2-inch margin around hems. This provides a seam allowance when sewing the pieces together.
- Use a pair of scissors and/or an X-acto knife to cut out the paper patterns for your chair.
- Be careful and take your time with this step--mistakes here can lead to imperfections in your slipcover.
-
7Trace the patterns onto your fabric. Begin by laying out your fabric with the wrong side facing upwards. Lay your paper shapes down so that they all fit on the fabric.
- Carefully trace the edge of each piece, then cut the shapes with a pair of fabric scissors. There are many, many ways to mark your fabric without leaving a permanent mark; the most common include:
- Disappearing ink fabric pens/markers
- Tailor's wax (essentially a crayon)
- Washable colored pencils
- Tailor's chalk
- Tracing wheel
- Sharpies, markers, etc. (use only lightly on the back side of reasonably thick fabrics)
-
8Join the front and arm pieces. Once you have cut out each piece of fabric match them up and pin along the shared seams and sew the seams in place.
- Pin and sew the cut-out for the front of the chair onto each of the arm cut-outs where they would naturally meet.
-
9Join the back and front pieces. Match up the back piece to the piece from the previous step (comprised of the front panel and arms) and pin in place. Then sew the pieces together along the seams you’ve marked.
- When you're done, you should have a piece of baggy fabric that fits over the back and arms of your chair.
-
10Join the seat and bottom pieces. Match the seat piece to what you’ve already assembled and pin along the seams. Sew the seams in place.
- The rear edge of the seat should meet the "back" of the cutout, while the sides should meet the "arm" sleeves.
-
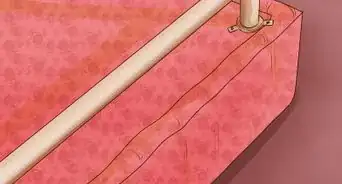
11Sew the skirt (if any) to the seat. Pin the strip of skirt material to the seat of the chair and sew it in place.
- It should hang so that it is near the floor, but not pooled on it.
- If possible, try to position the spot where the skirt material crosses over itself in the back of the slipcover where it won't be easily seen.
-
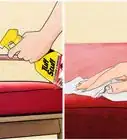
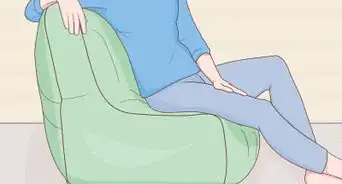
12Pull the new slipcover over the chair. Tuck the corners of the slipcover into the cushions and arms of the chair.
- Gently sit down; your slipcover should feel comfortable and should conform easily to the weight of your body. If it doesn’t you may need to rip out and re-sew any seams that fit irregularly.


Making a Draped Slipcover
-
1Select a sheet of material. Find a material in a pattern of your choice that’s large enough to completely cover your chair that reaches all the way to the floor.[3] In general, a piece of fabric that's at least 6 x 9 feet should fit most chairs.[4]
- A few fabric ideas that should work well for this project:
- A canvas drop cloth (preferably not stained with paint, etc.)
- An old bed sheet
- An old quilt
- Fabric purchased from a store (thicker cotton blends work well)
-
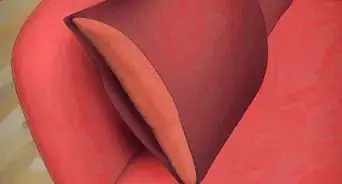
2Drape your fabric over the chair. When draping the fabric, arrange it such that the pattern of the material (if there is one) lays across the chair as you would like it to appear.
- Lay your fabric over the top of the chair (with the center of the fabric lined up with the highest point on the chair) so that it covers the entire chair completely on all sides and drapes to the floor.
-
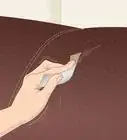
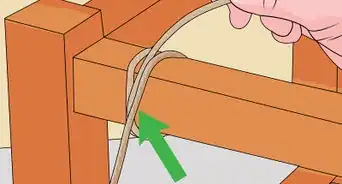
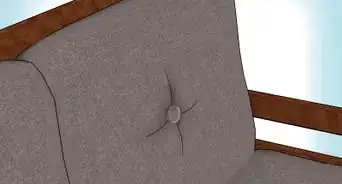
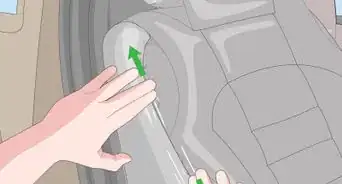
3Tuck the fabric into the folds of the chair. Using your fingers, push the fabric into the various folds around the seat until it appears to hug the chair fairly snugly. Smooth out any unsightly folds or creases in the fabric itself as you go and create darts (folds made in the fabric that allow the fabric to lay flat) where needed to allow the fabric to lay smooth.
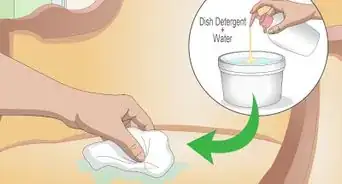
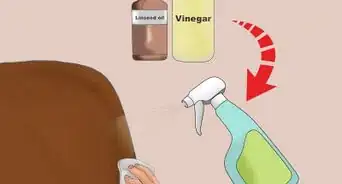
- If desired, use fabric adhesive (available at most craft and fabric stores) to stick your slipcover in place. Doing so will hold your slipcover over the chair snugly and prevent it from falling, bunching, or slipping off.
- Use the adhesive to adhere the rear of the new slipcover material to the top of the original chair fabric. You'll need to lift up the slipcover fabric and work underneath it to do this, so it can help to have a friend help you here by pointing out where to put adhesive.
- Luckily, fabric adhesive is usually very forgiving before it sets. If you make a mistake, just pull the fabric up and reposition it as needed.
- Different adhesive products will have different drying times, but, in general, most fabric glues take about two to four hours to set.[5] Fabric adhesives can usually be washed safely after a few days. Check the product's label for more specific instructions.
-
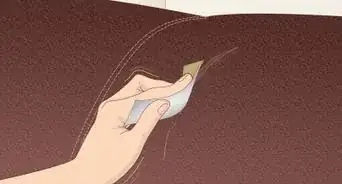
4Trim off any excess material. Once the adhesive has dried in place, you may carefully use pair of scissors or a fabric knife to trim the loose bottom portion of your slipcover.
- Ideally, you want this "skirt" to hang an inch or two above the floor. Take care to cut in a straight line as you go.
- If you make a noticeable mistake, just trim the slipcover back a few inches and glue a long, skinny strip of material around the bottom to make a new skirt.


Buying a Slipcover
-
1Measure your chair. Using a measuring tape, measure the height, length and width of the chair as a whole.
- Take these measurements carefully. If you're spending your hard-earned money on a slipcover, you will want it to fit well.
-
2Go shopping for slipcovers. Slipcovers are available at most stores and websites carrying home furniture and decorating items.
- Most slipcovers range in price from about $20 to as much as $150, depending on the material of the slipcover and the size of the chair.
- Have your measurements handy as you shop because most slipcovers will be advertised as fitting certain sizes of chair. If you're shopping at a brick and mortar store and need help choosing the right size slipcover, talk to an employee.
- When in doubt, buy a slipcover slightly bigger than you think you'll need. You can always pull, sew, and trim a slipcover to make it smaller, but it's difficult to make a slipcover bigger.
- For maximum durability, pick a slipcover made from a fairly sturdy fabric, like denim, thicker cotton/hemp blends, canvas, or twill.[6]
-
3Vacuum the chair. Before putting on the new slipcover, you'll want to remove any excess dirt and dust from your chair.
- It’s also beneficial to periodically remove the slipcover and vacuum the chair again before replacing it to prevent the chair from getting musty underneath its cover.
-
4Pull the slipcover over the chair. After pulling the slipcover on, go around the chair and tuck the fitted edges of the cover into folds around the seat.
- Pull and tie any strings or ribbons on the front or back of the cover. These ties are added to keep the slipcover tight and secured in place.
- Use a tight knot, but not one that's too tight to undo, as your slipcover may change size and shape slightly with repeated use and washing.


Warnings
- Follow all care instructions for your fabric when cleaning it--you do not want it to shrink in the laundry!⧼thumbs_response⧽
- Consider how much use your chair gets before investing in a slipcover. If your chair is used often, you'll probably want to invest in the most durable slipcover possible.⧼thumbs_response⧽
Things You'll Need
- Slipcover
- Scissors
- Pencil
- Tracing paper
- Sewing machine
- Thread
- Needle
- Fabric
- Fabric measuring tape
- Vacuum
- Pins


References
- ↑ http://www.target.com/c/slipcovers-futon-covers-home-decor/-/N-5xttf
- ↑ http://www.huffingtonpost.com/2012/09/06/buying-guide-best-slipcovers_n_1862932.html
- ↑ http://www.diynetwork.com/decorating/how-to-make-arm-chair-slipcovers-for-less-than-30/index.html
- ↑ http://www.diynetwork.com/decorating/how-to-make-arm-chair-slipcovers-for-less-than-30/index.html
- ↑ http://www.ilovetocreate.com/Howtousedetail.aspx?useid=b49d1616-add4-432b-b53f-05b53557096a
- ↑ http://www.huffingtonpost.com/2012/09/06/buying-guide-best-slipcovers_n_1862932.html
- ↑ http://www.goodhousekeeping.com/home/decorating-ideas/sofa-slipcovers